How to Add a New Event
Last updated: September 8, 2026
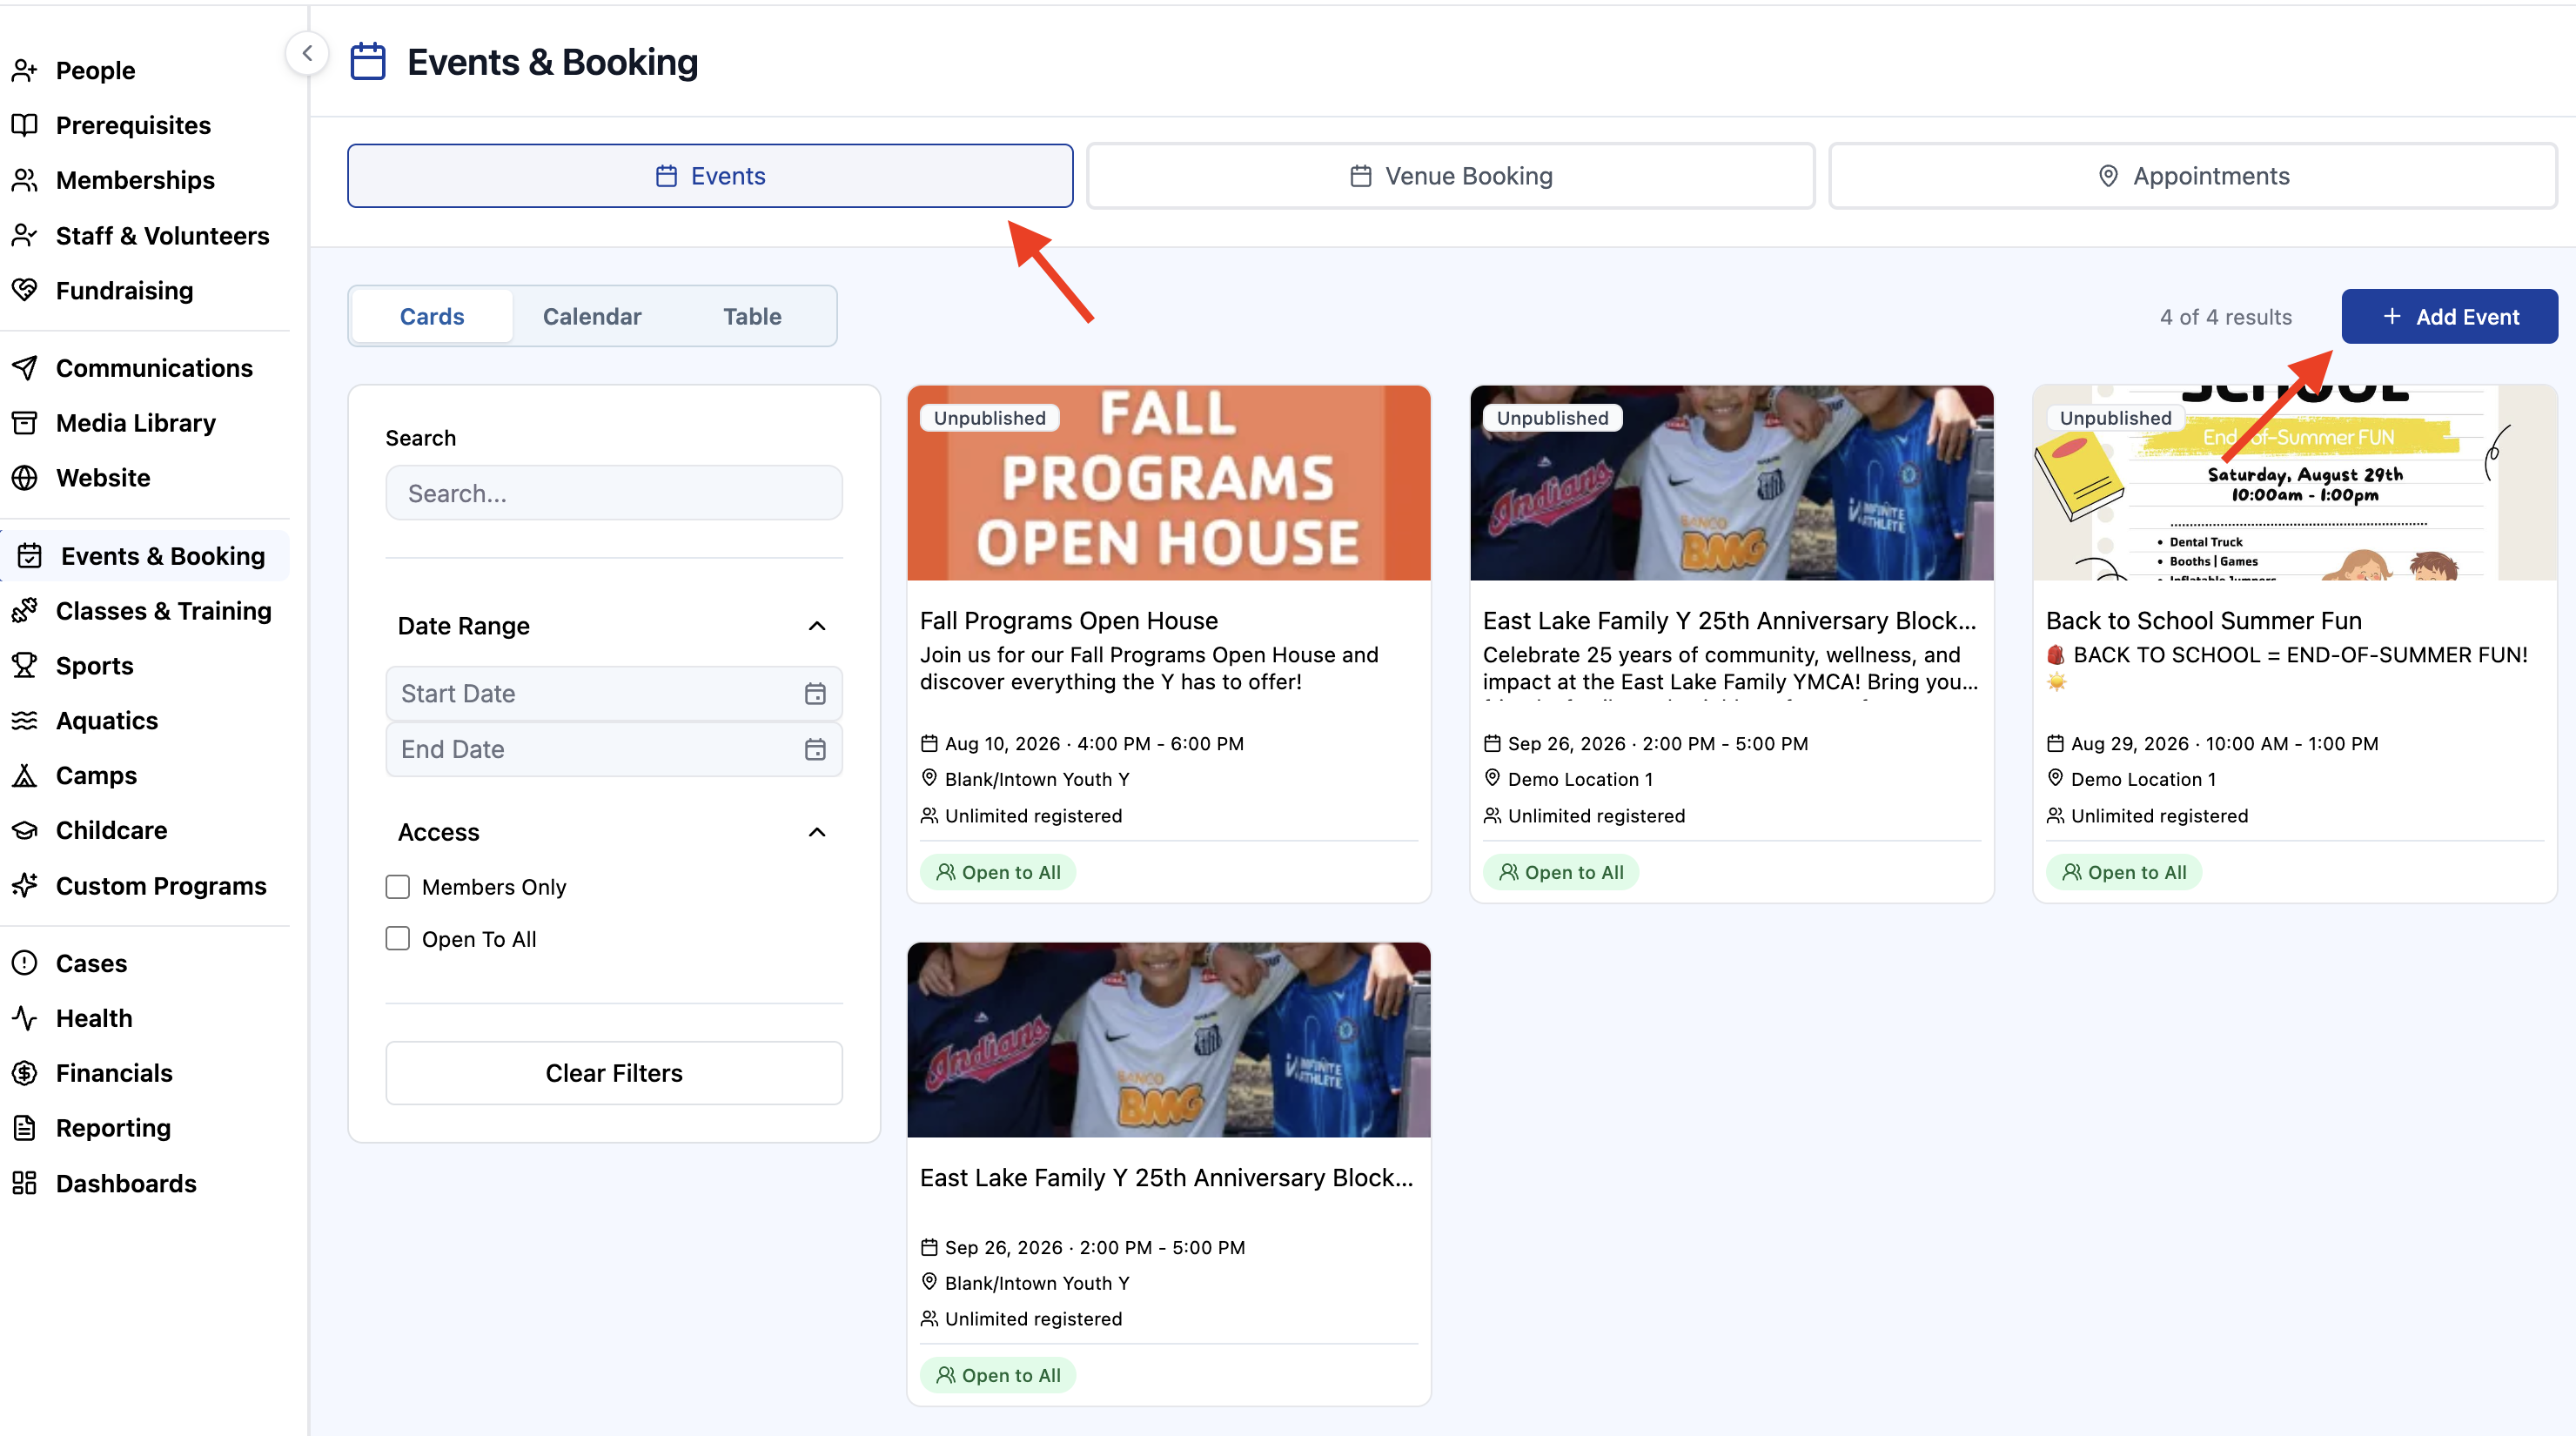
Click the Events & Booking tab on the left rail menu item
Click Events > Add Event
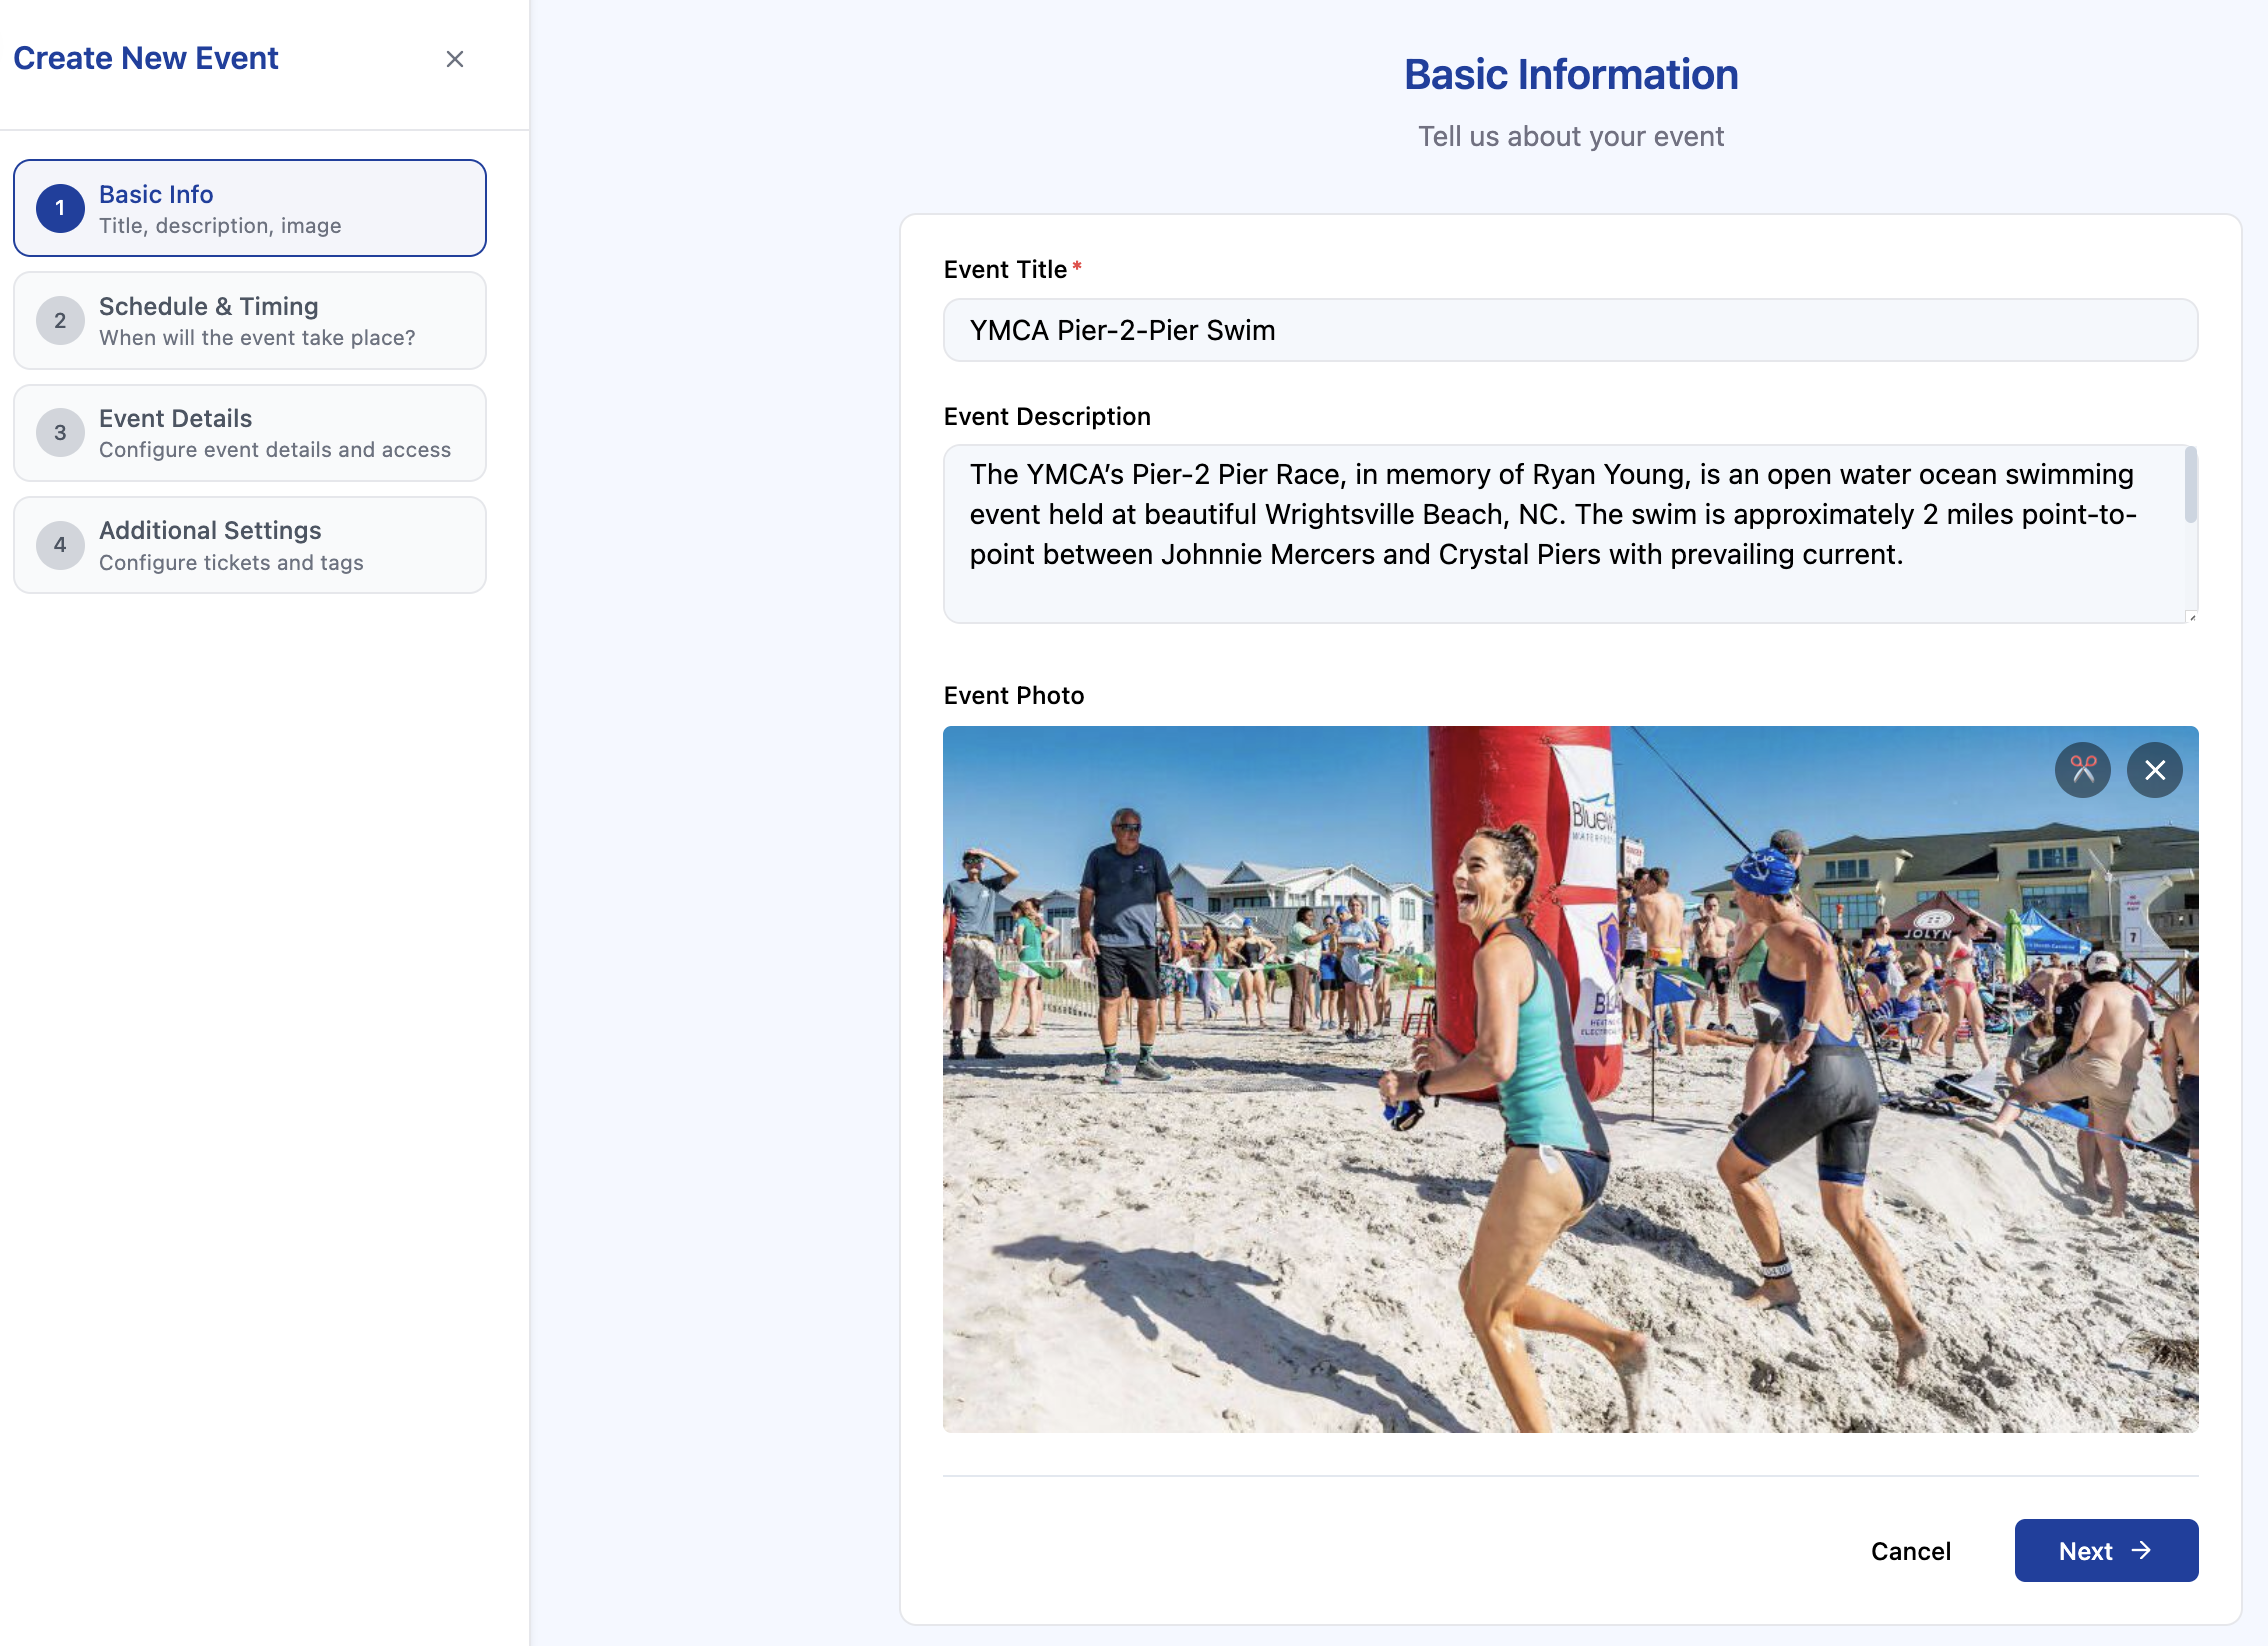
Enter an Event Title, Event Description, and select an Event Image.
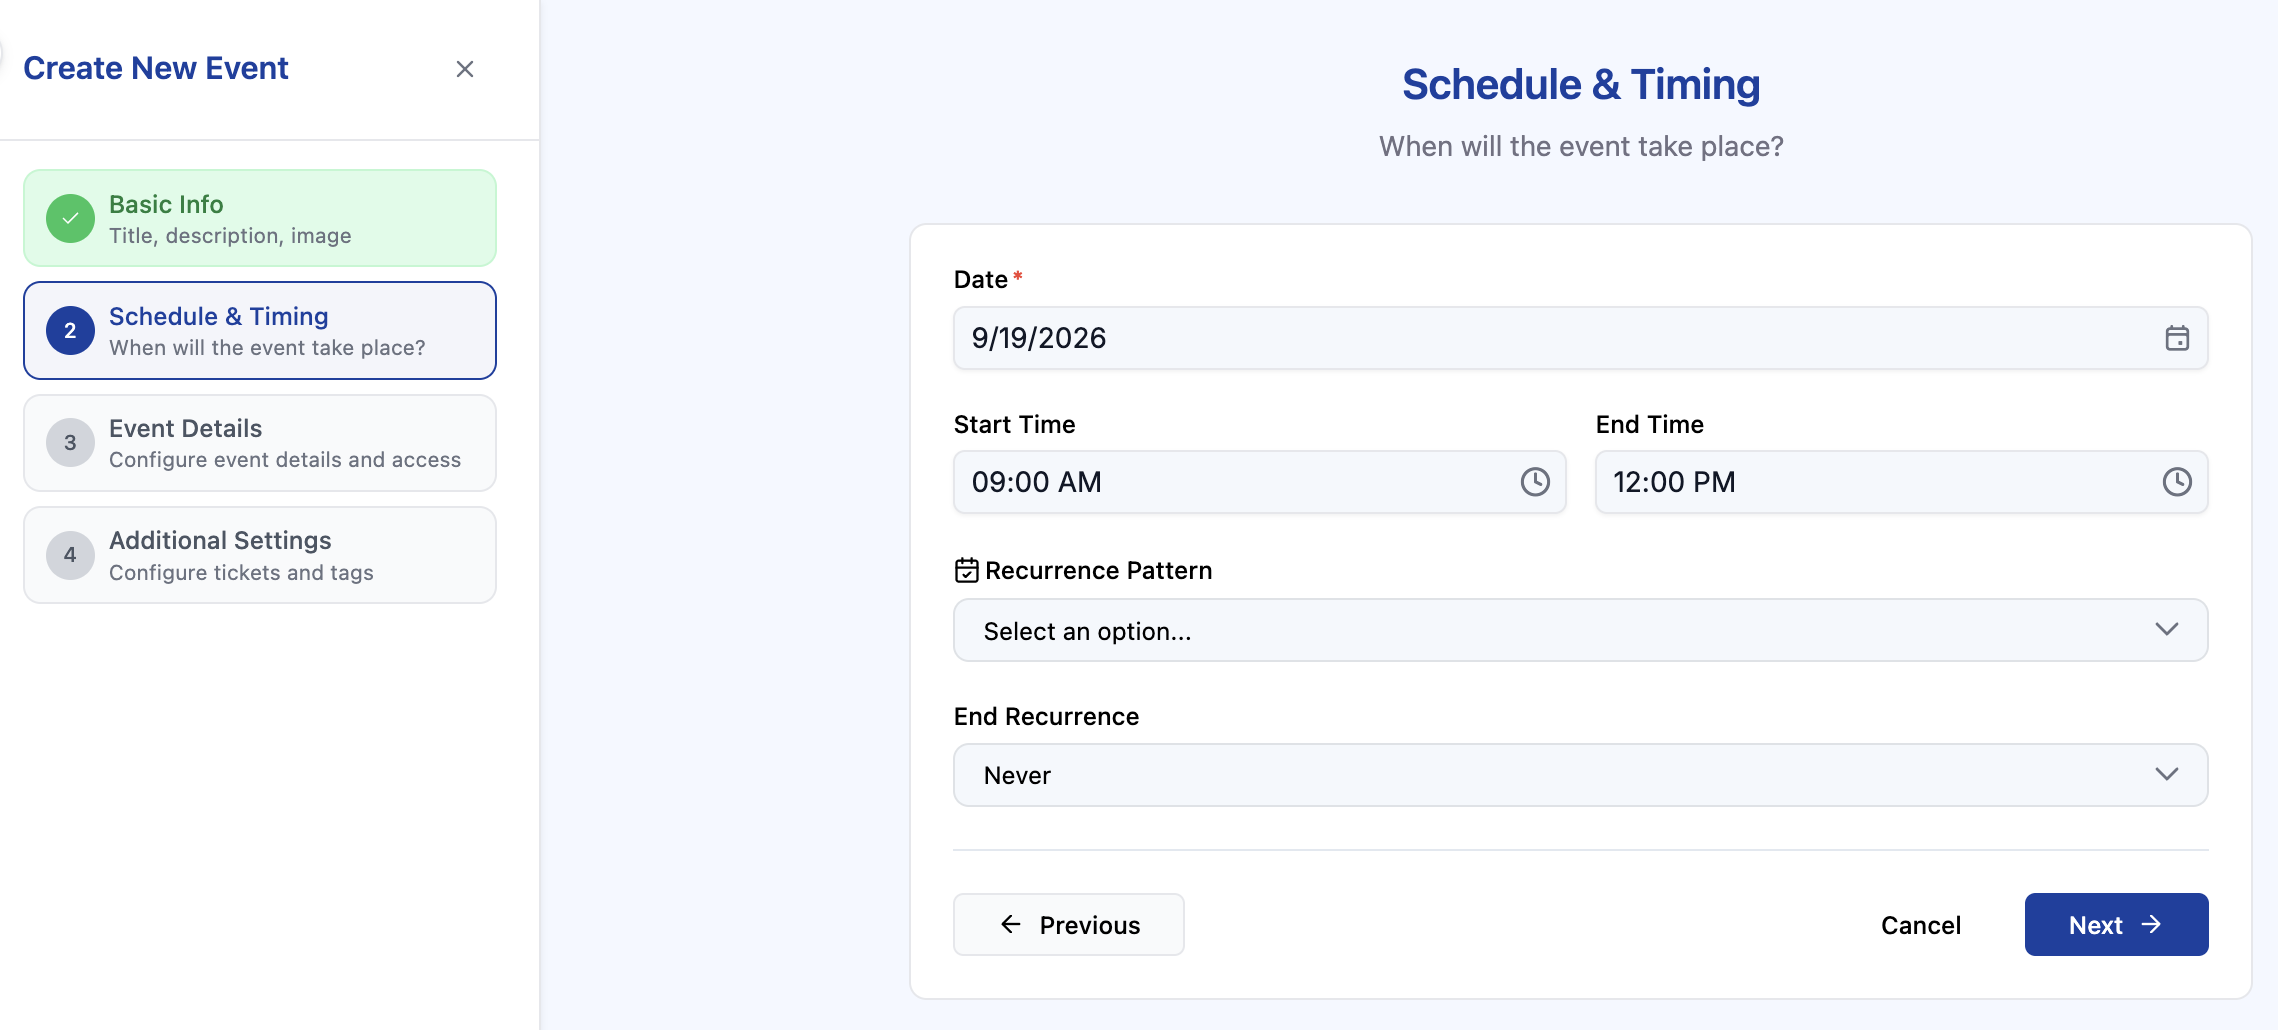
Enter the Event Date, Start & End Time, and select the Recurrence Pattern
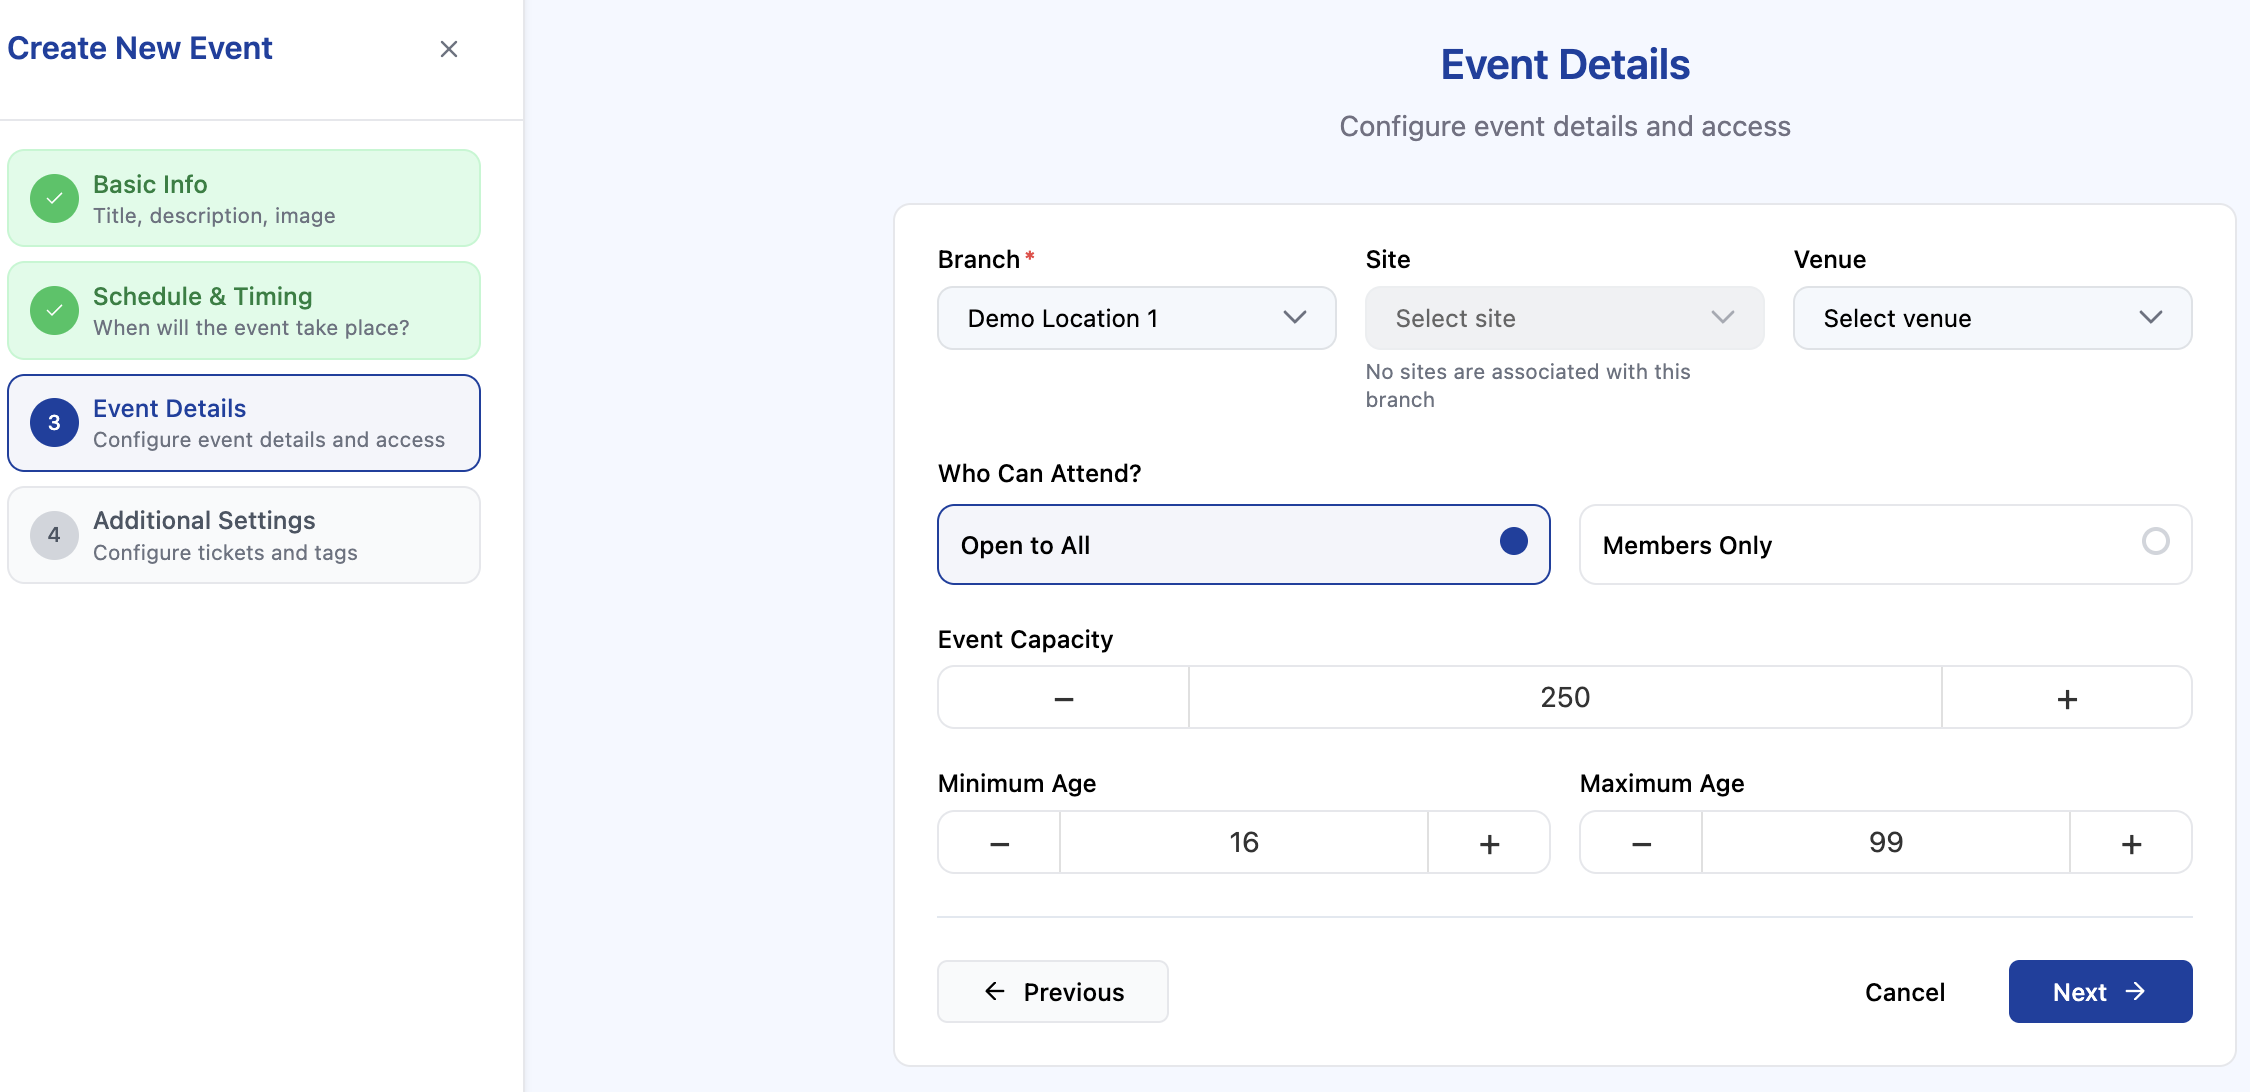
5. Select the Branch and, optionally, select the Site and Venue for the event. You can also select Who Can Attend, your Event Capacity, and the Minimum & Maximum Ages for the event.
To allow online registration for your event on your website, click the Enable Registration toggle switch. If you will not be selling tickets for this event, click Create Event.
Adding ticket options
Ticket options let you sell more than one kind of admission for the same event. A gala might have an individual seat, a couple's ticket, and a table of eight. Each one gets its own price and its own quantity.
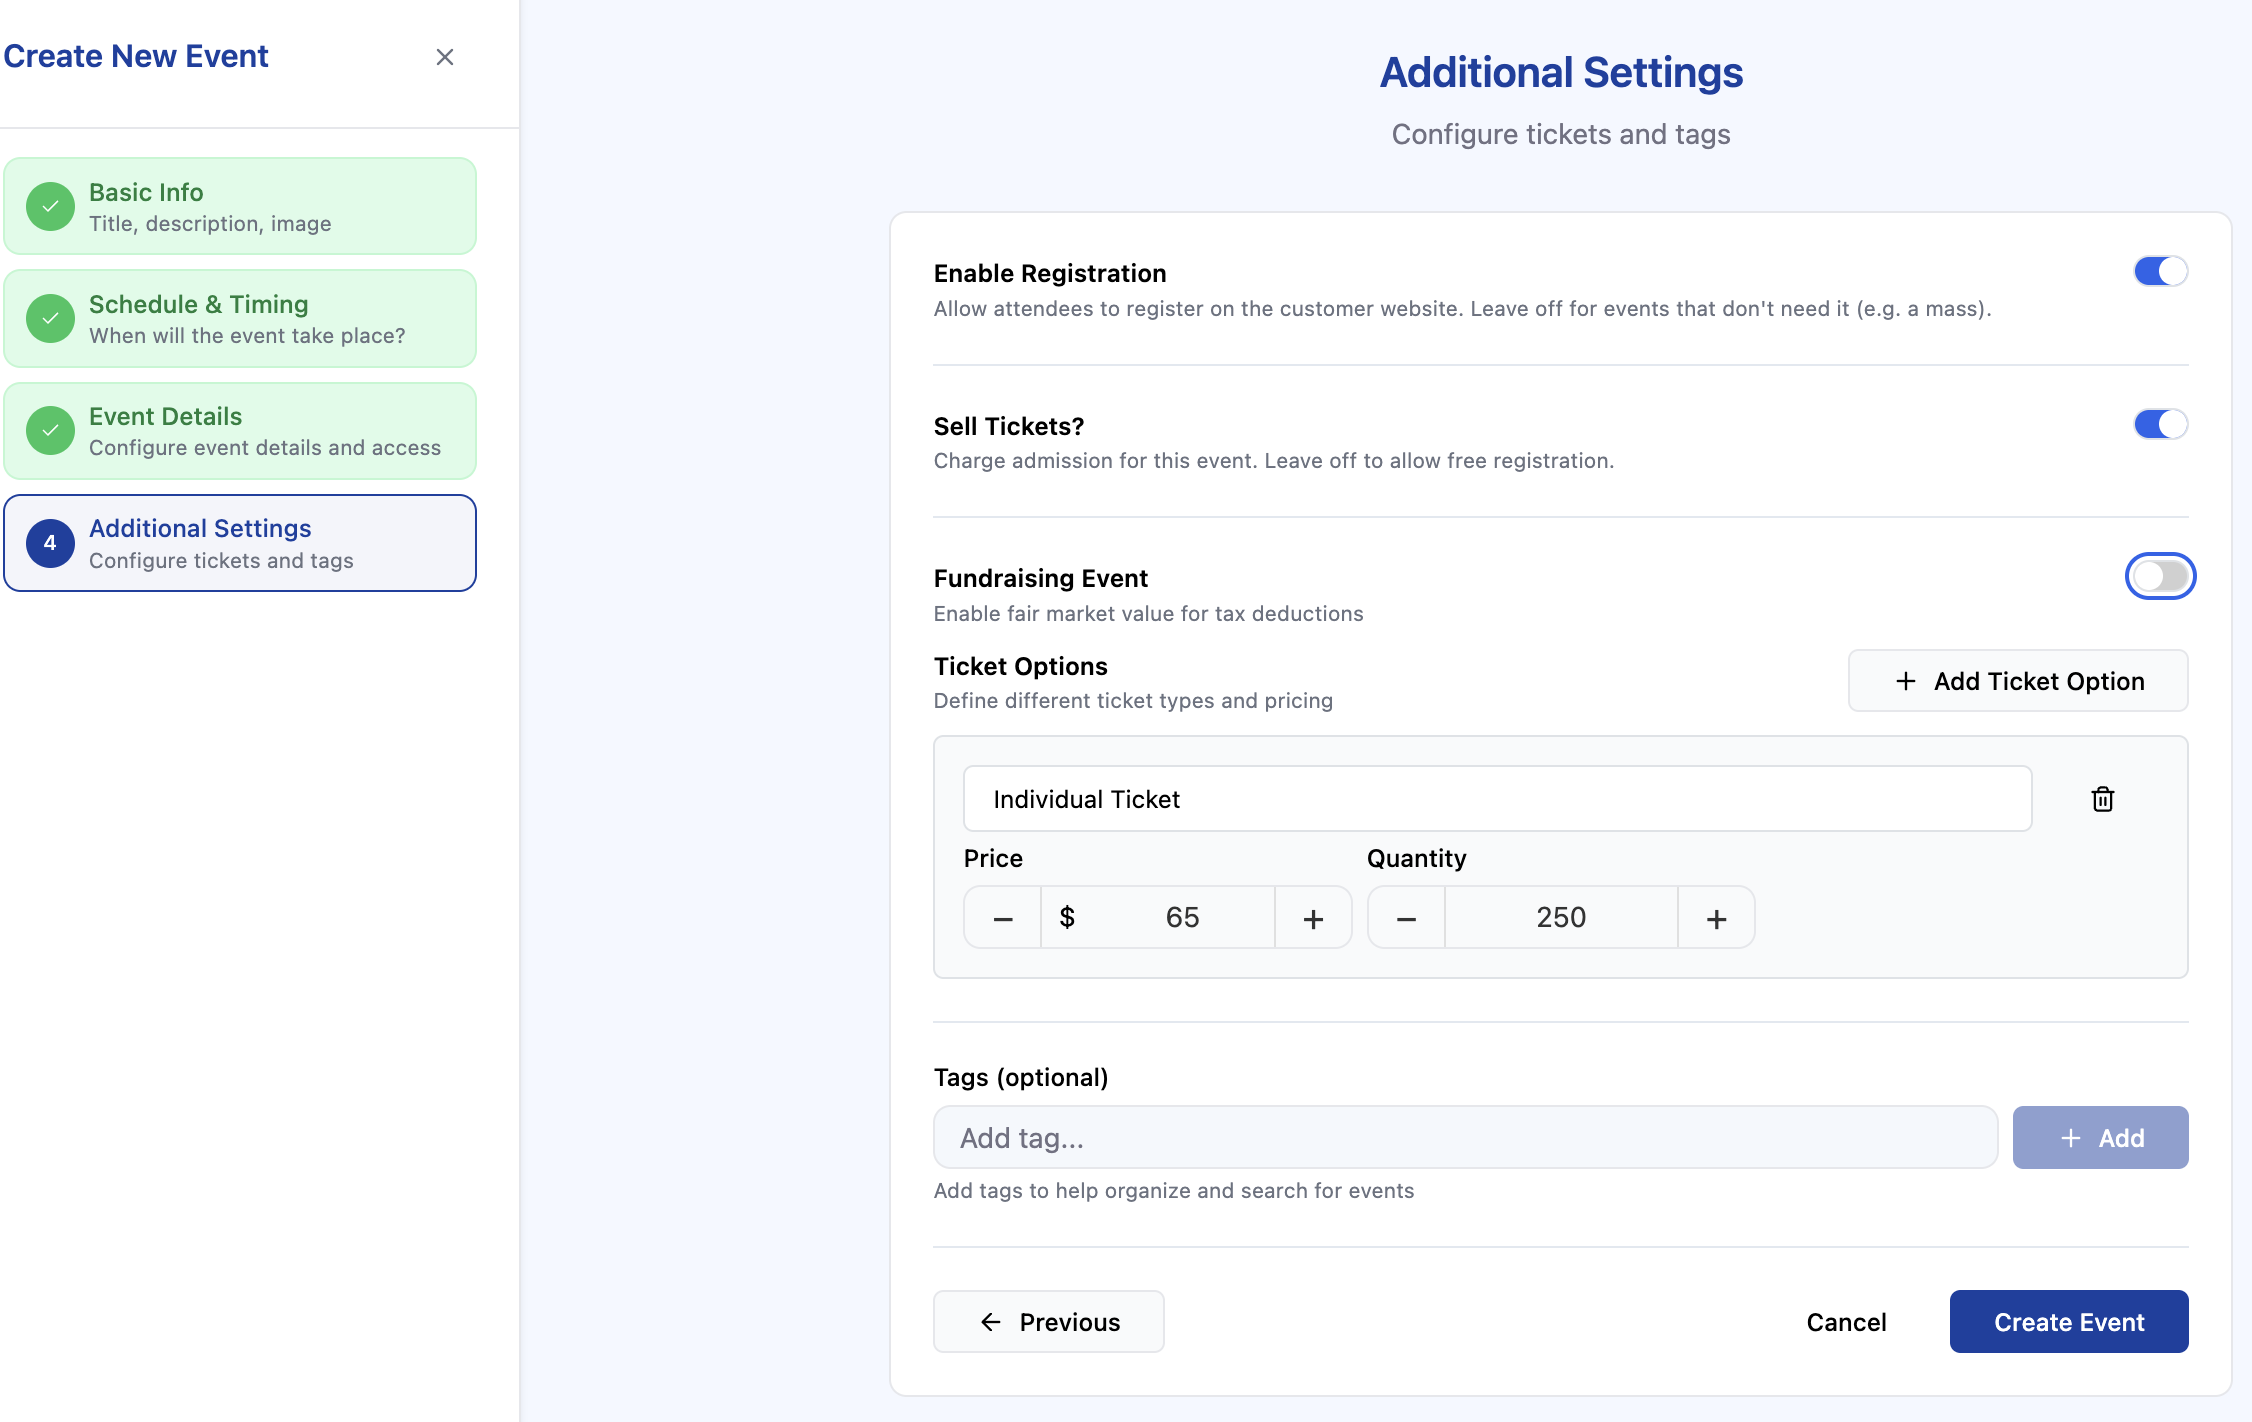
Turn on the Enable Registration toggle switch. This lets attendees sign up on your customer website.
Turn on the Sell Tickets? toggle switch. If you leave this off, registration is free, and no ticket options appear.
Click Add Ticket Option. A new ticket block appears below.
Name the ticket. Use whatever the attendee will recognize, like Individual Ticket, Couple, or Table of 8.
Set the Price. Type the amount or use the plus and minus buttons to adjust it.
Set the Quantity. This is how many of that specific ticket type you have available. Once they sell out, that option is no longer selectable on your website, even if other ticket types still have inventory.
Click Add Ticket Option again for each additional ticket type you plan to sell. There is no limit, so add one for every price point you want to offer.
Click Create Event when you're finished.
To remove a ticket option, click the trash icon to the right of its name.
A few things worth knowing
Quantity is tracked per ticket option, not for the event as a whole. If you want a hard cap on total attendance, keep that in mind when setting quantities.
If your event is a fundraiser and you want attendees to receive the tax-deductible portion of their purchase, turn on Fundraising Event before you set your prices. That adds a fair market value field to each ticket option.
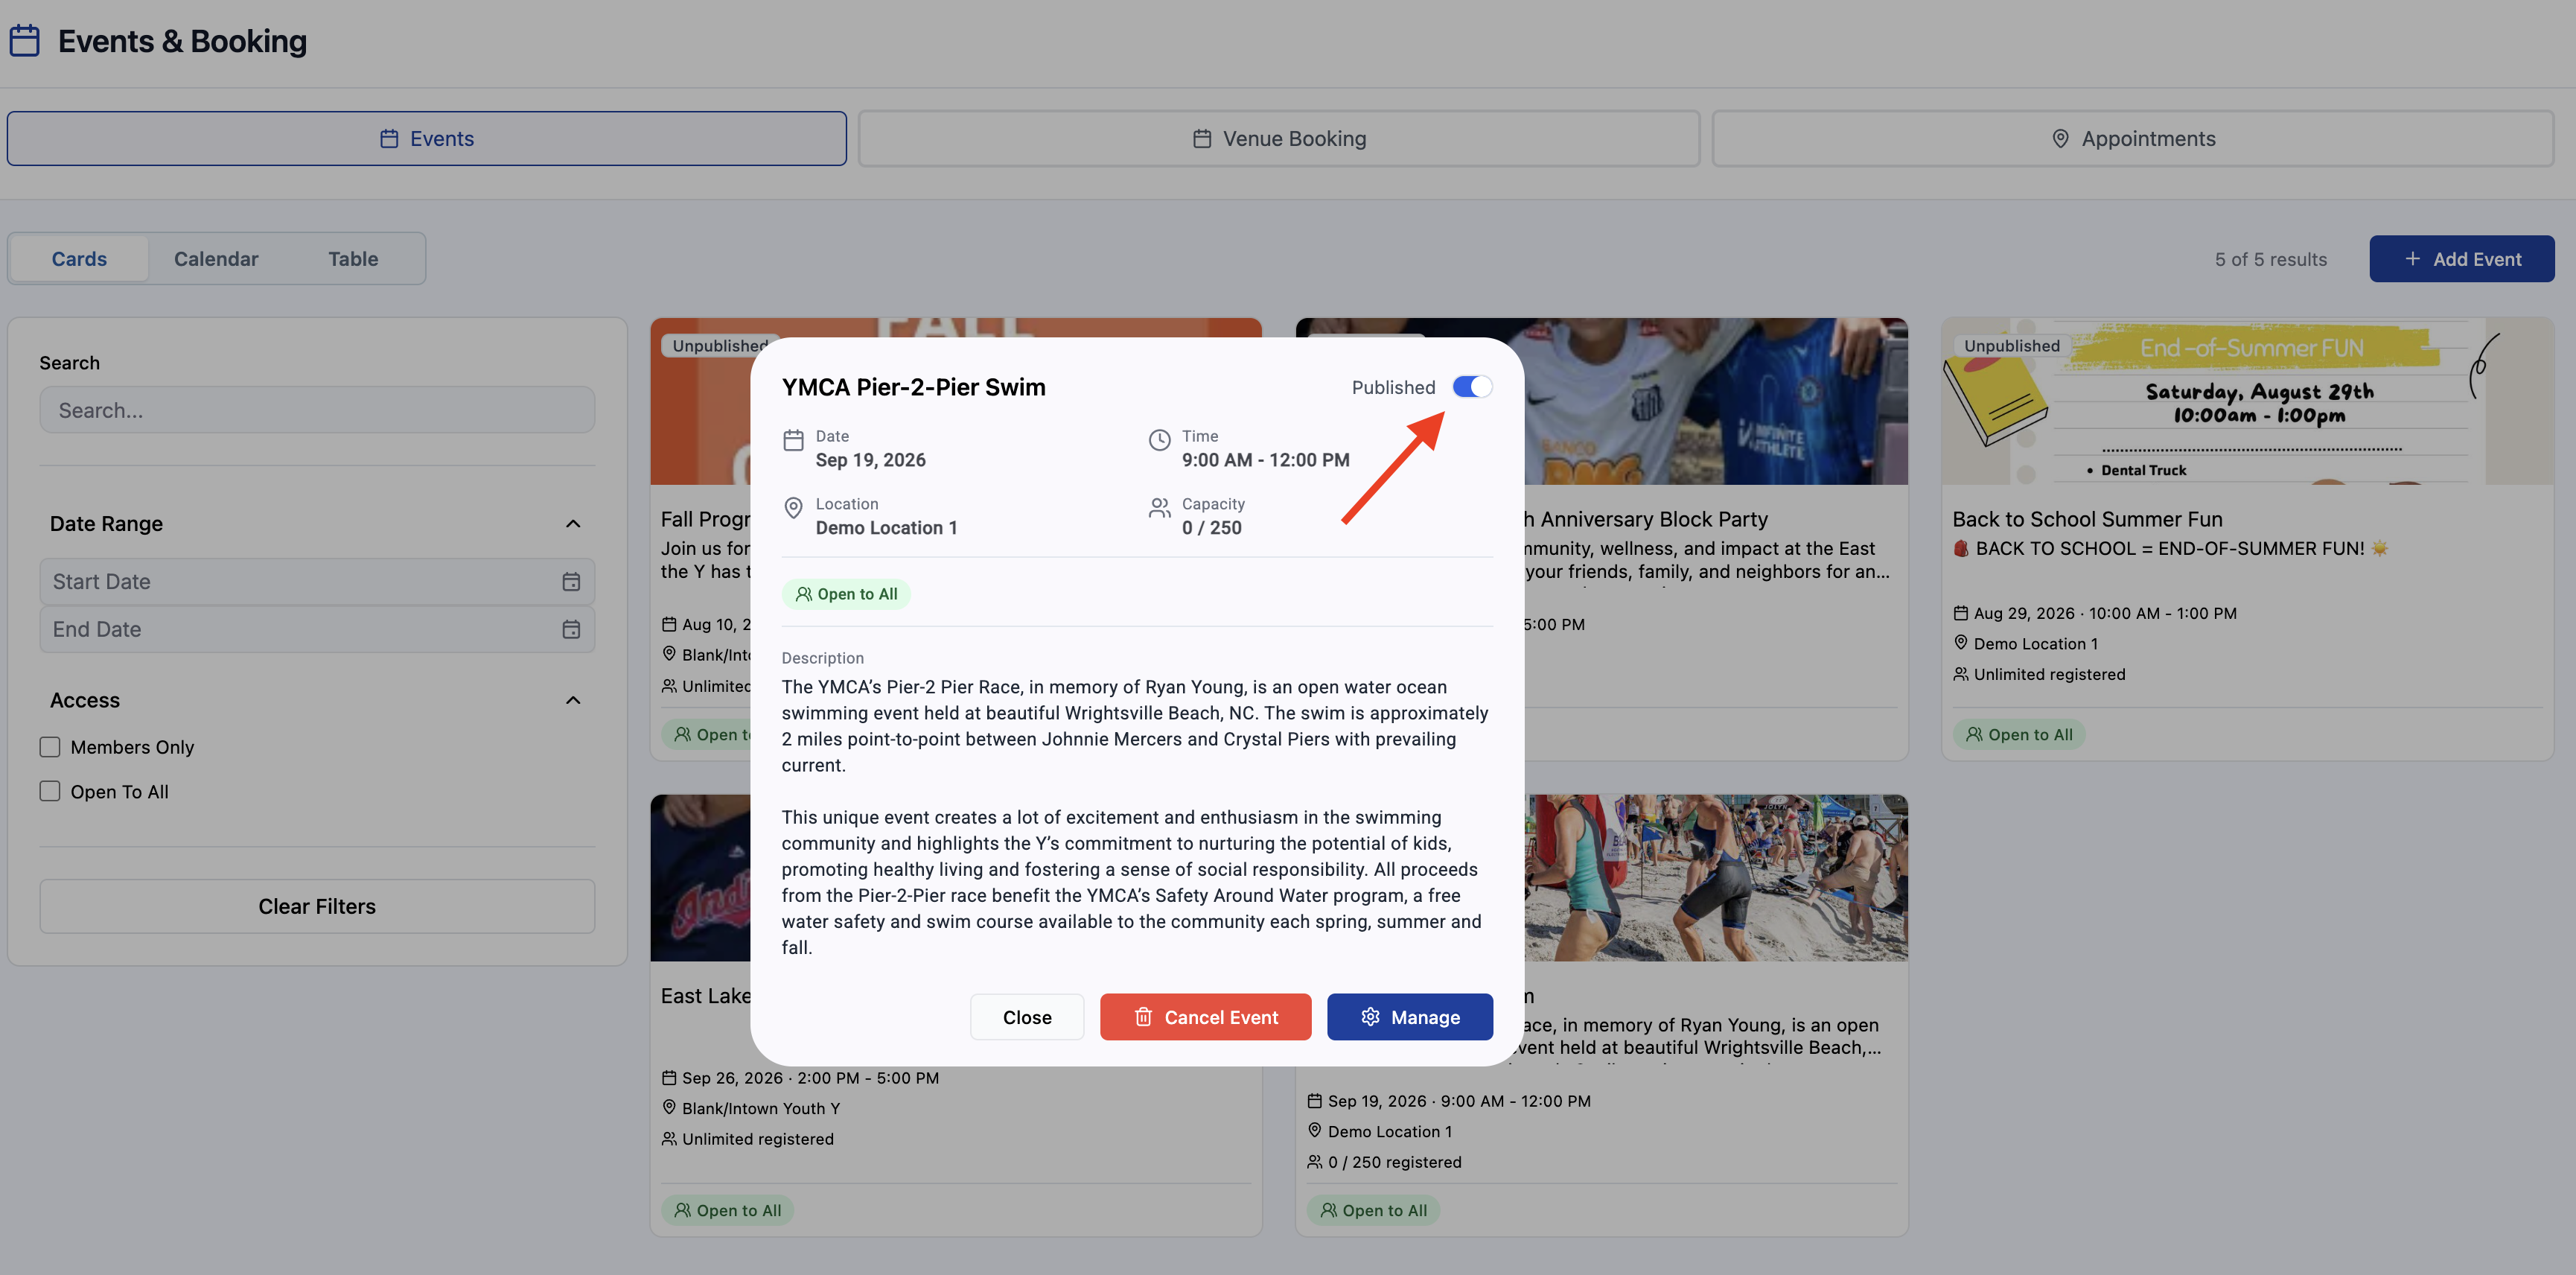
Publishing Your Event to the Website
Once you create an event, you need to publish it if you want it to show up on your website for registration. To do this, click the Events & Booking tab on the left rail menu item, and then click Events. Click the event card for your event, and click the Publish toggle switch.