Checking Participants In and Out of Programs
Last updated: October 5, 2026
Program check-in works three different ways, and the right one depends on how your site runs and what your licensing requires.
Bulk check-in and check-out moves a group of kids at once. No pickup person, no signature.
Individual check-in and check-out handles one child at a time and captures the authorized adult plus their signature.
Kiosk Mode puts a self-serve screen in front of parents so they check their own kids in and out.
All three live in the same place.
Where to start
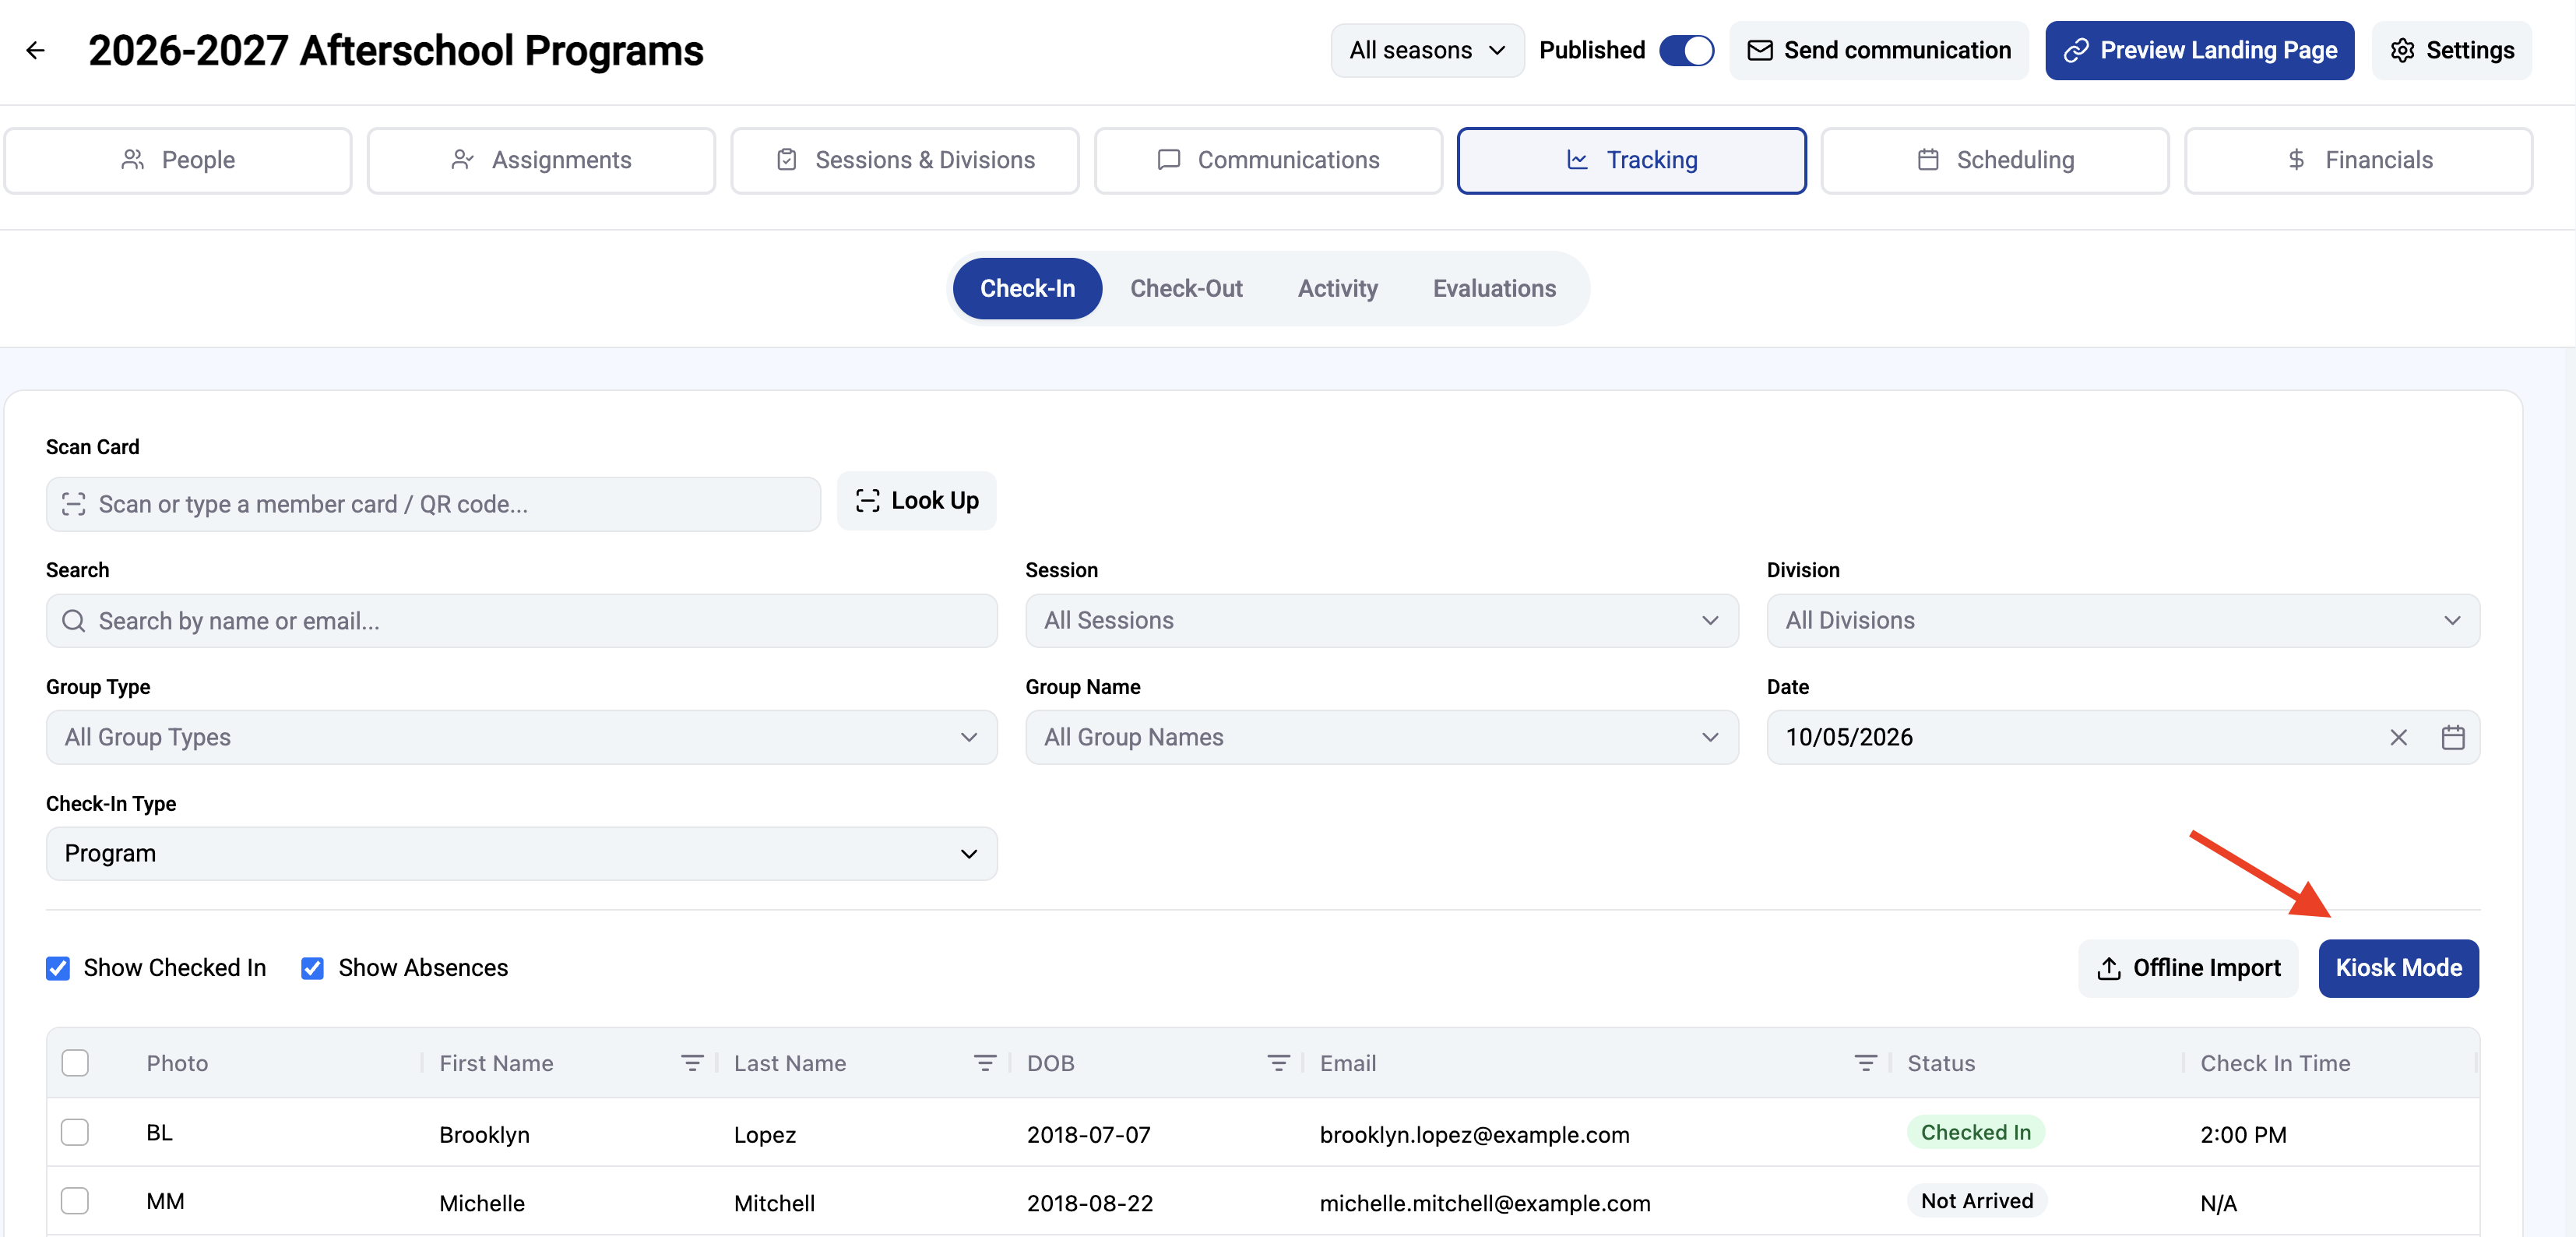
Open the program and click the Tracking tab. You land on the Check-In sub-tab by default, with Check-Out, Activity, and Evaluations alongside it.
The filters at the top narrow the list by session, division, group type, group name, and date, so a site running several groups can get down to just the kids in front of them. There's also a Scan Card field at the top for scanning a member card or QR code, and checkboxes to show or hide participants who are already checked in or marked absent.
The list shows each participant's photo, name, date of birth, email, status, and check-in time.
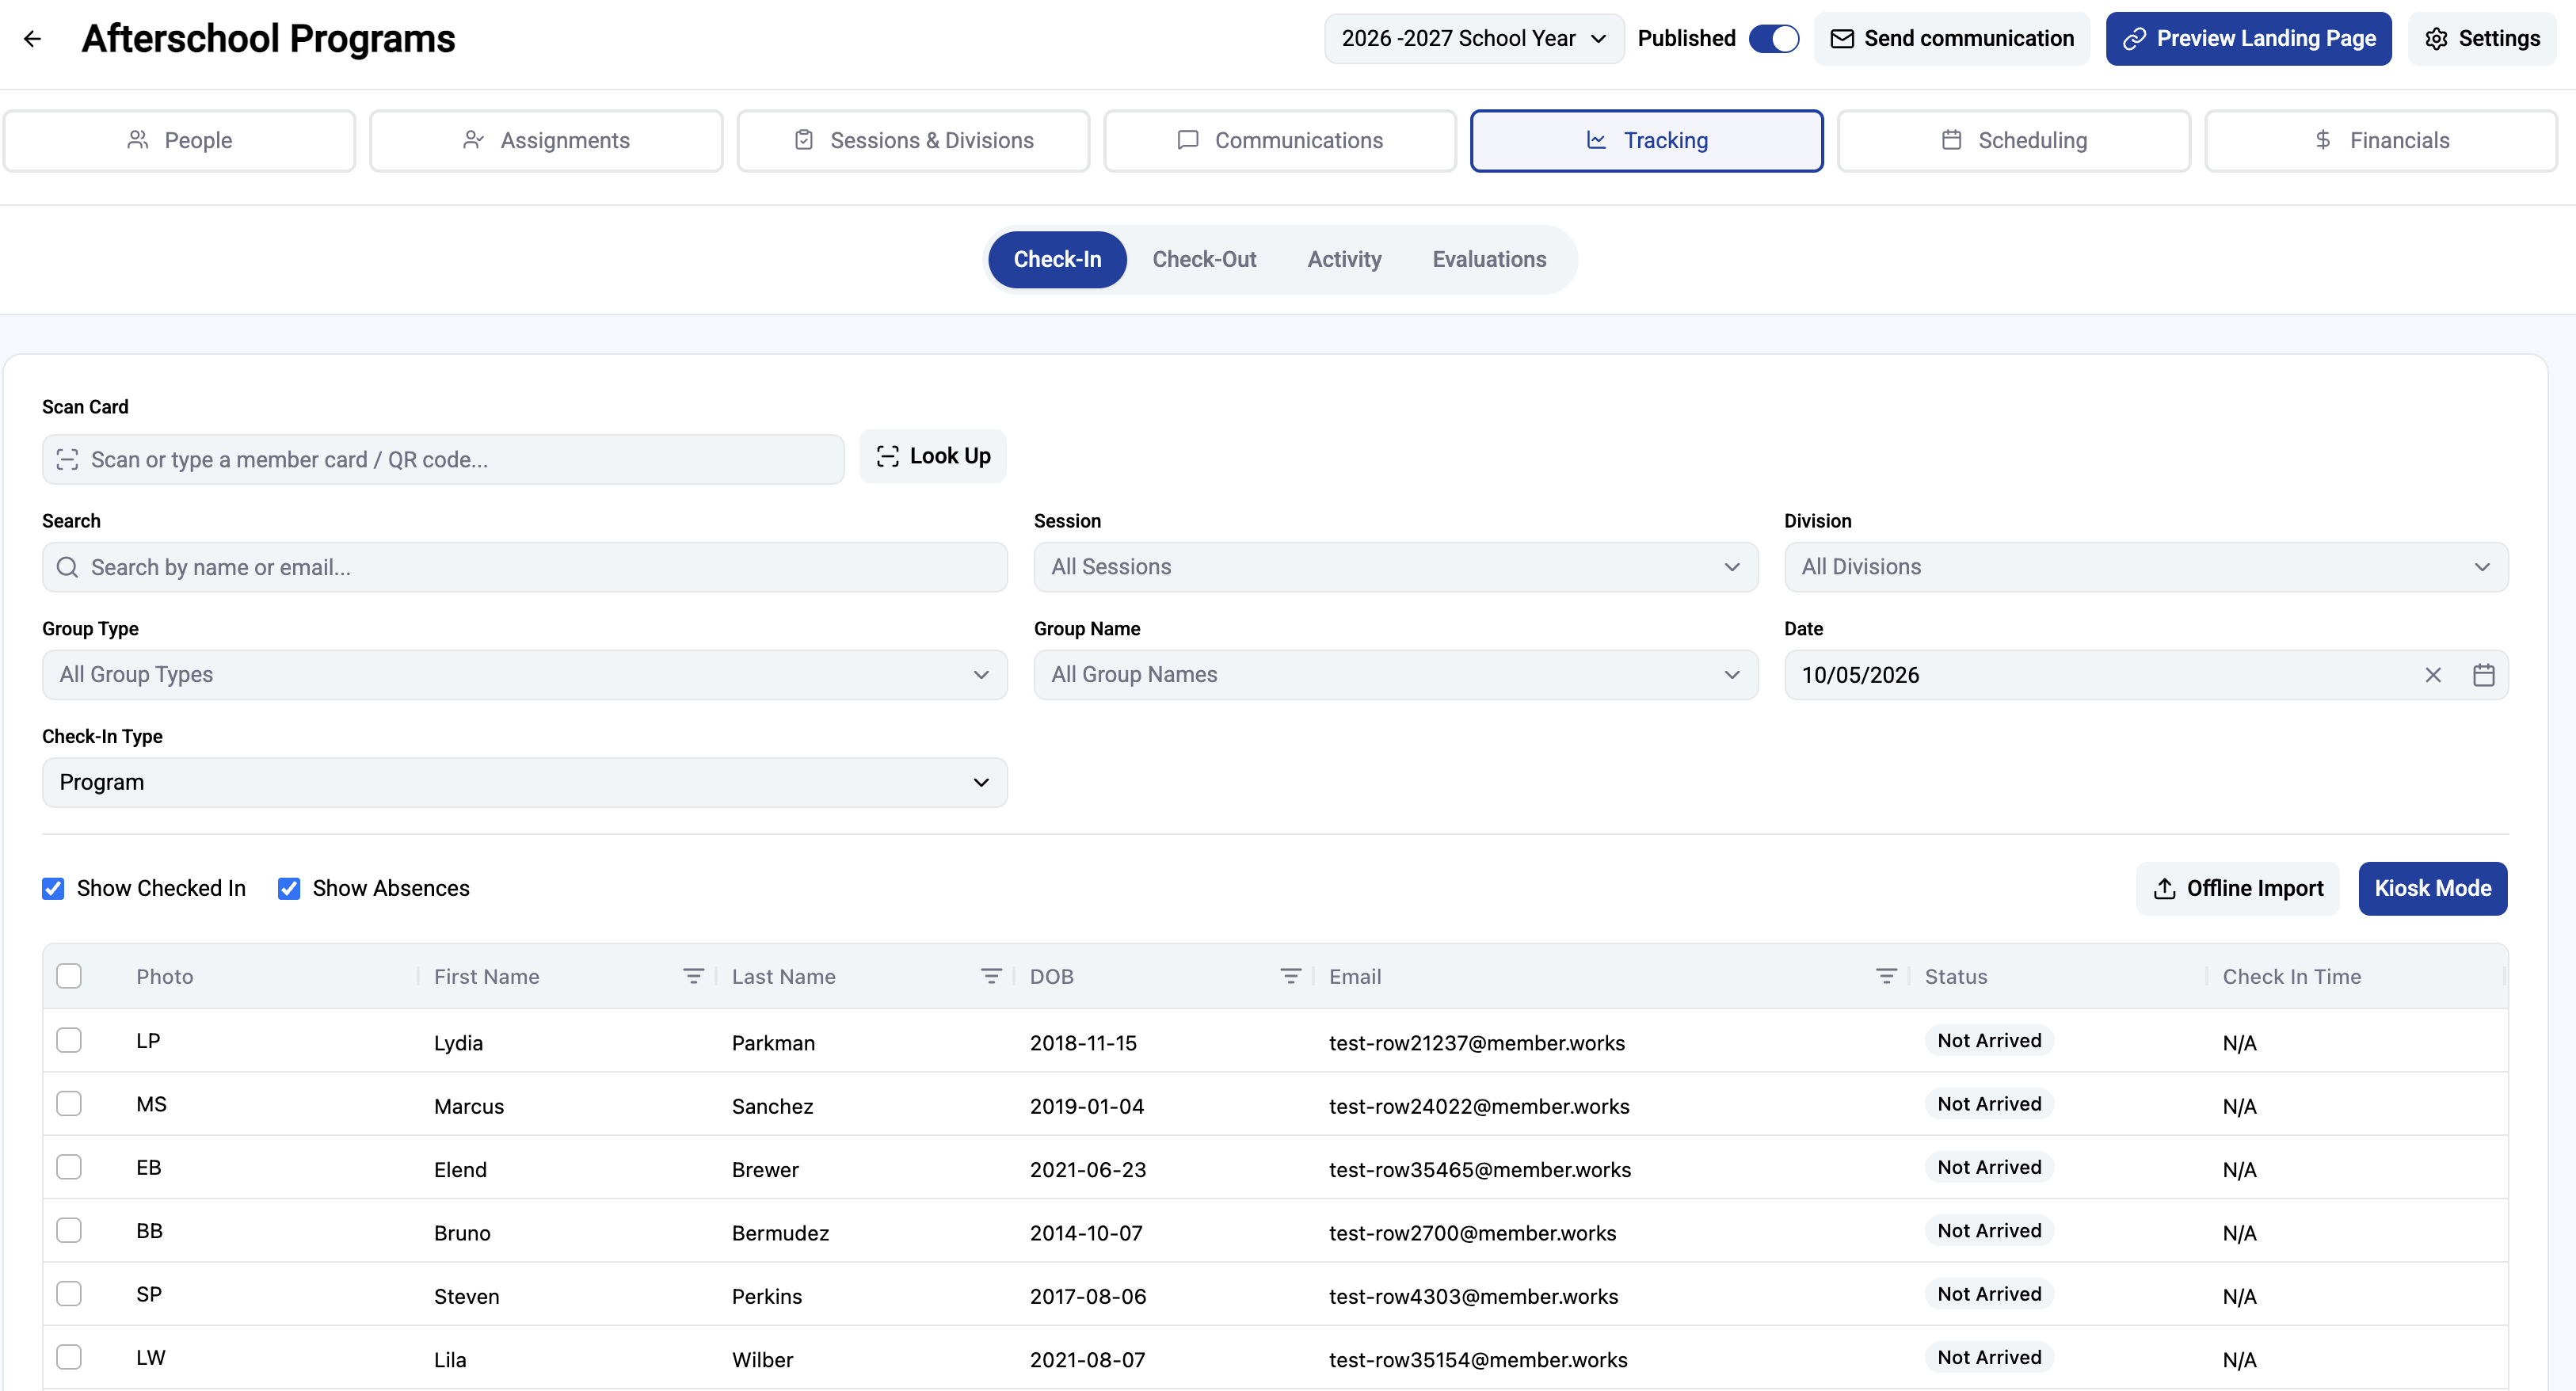
Scenario 1: Bulk check-in and check-out
Use this when a group arrives together, like a bus from the elementary school, and your site doesn't collect a signature at drop-off.
To check in a group:
On the Check-In sub-tab, tick the checkbox next to each participant's name.
Click the green Check In button that appears, which shows how many you've selected.
Set the check-in time, add a note if you want one applied to all of them, and click Confirm Check-In.
Everyone in the selection gets the same timestamp, which is the point of doing it this way.
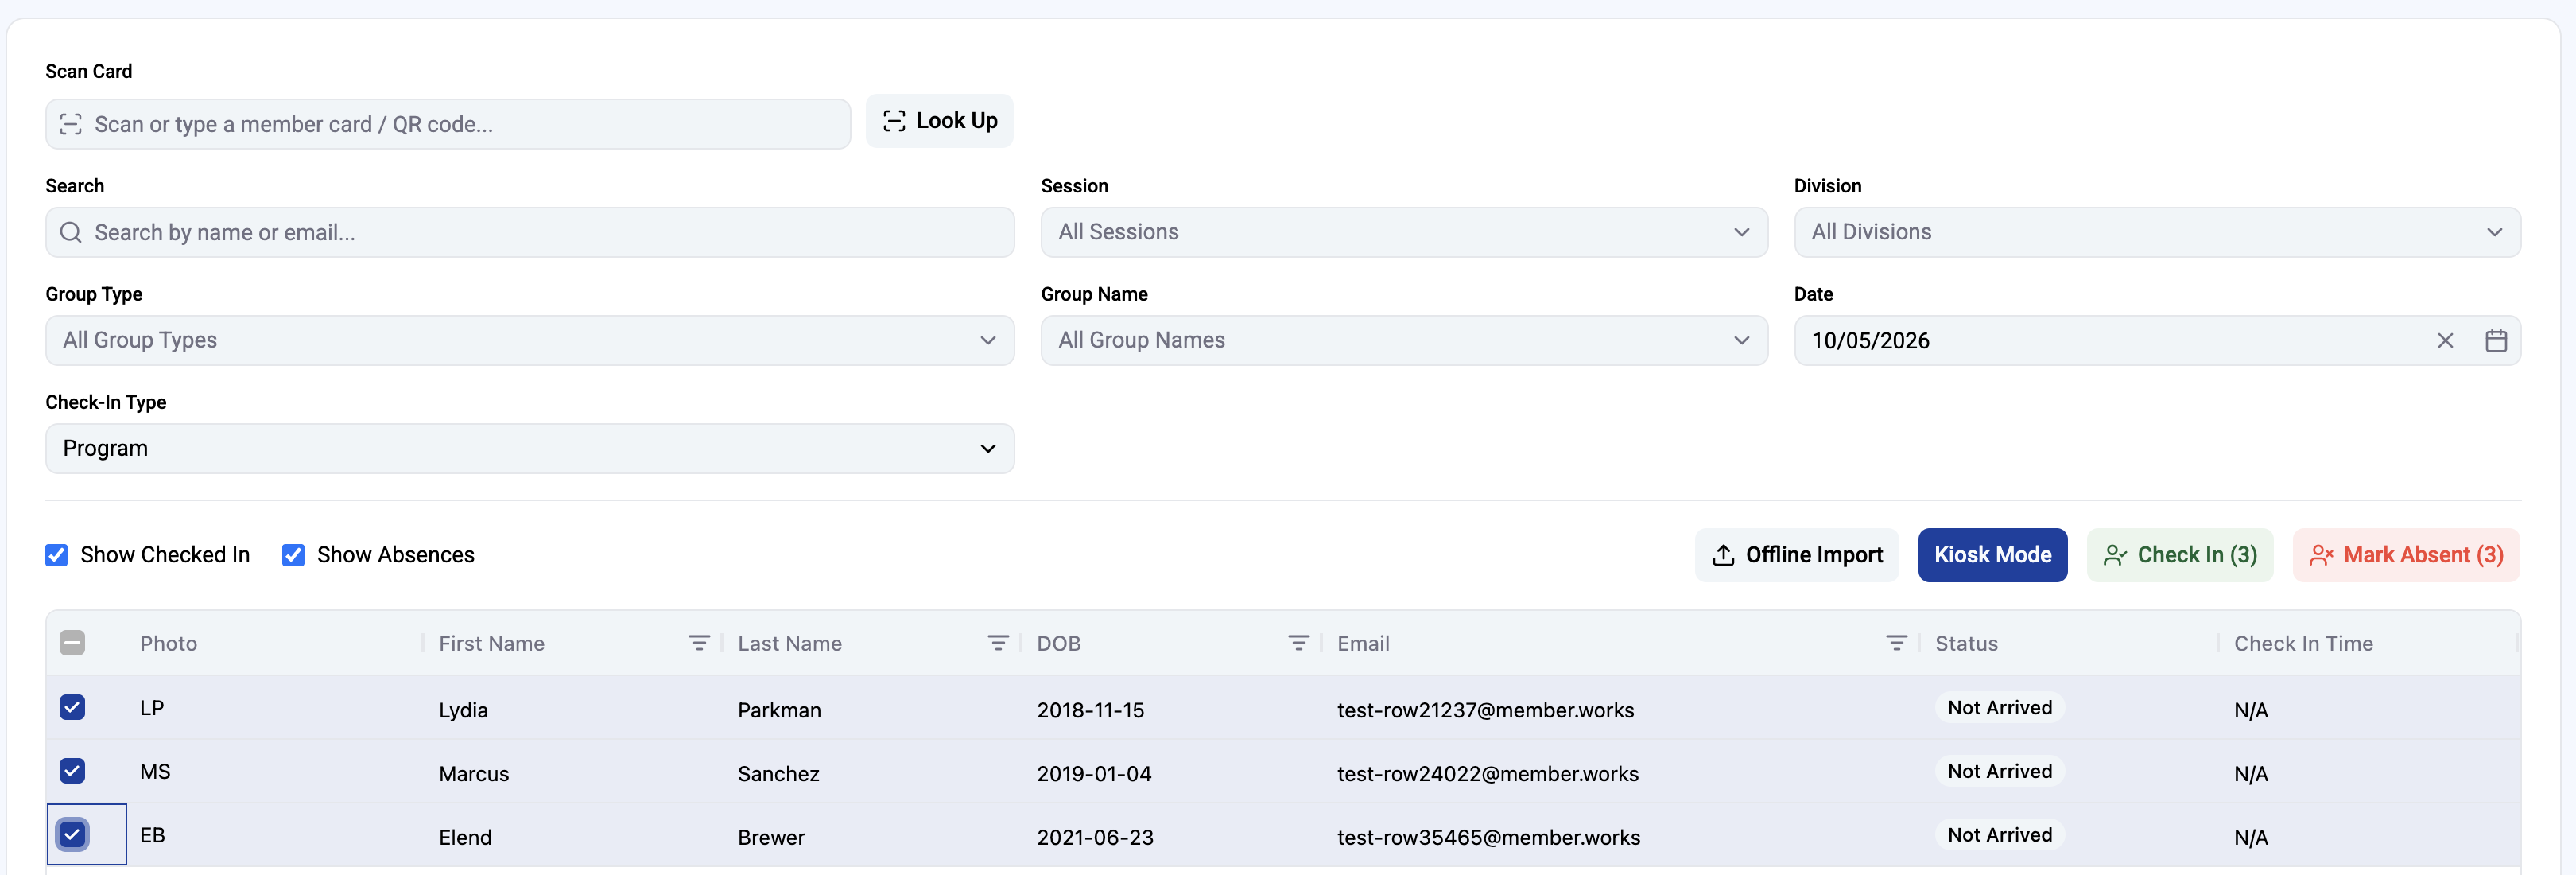
The red Mark Absent button next to it does the same thing for kids who didn't show.
To check out a group:
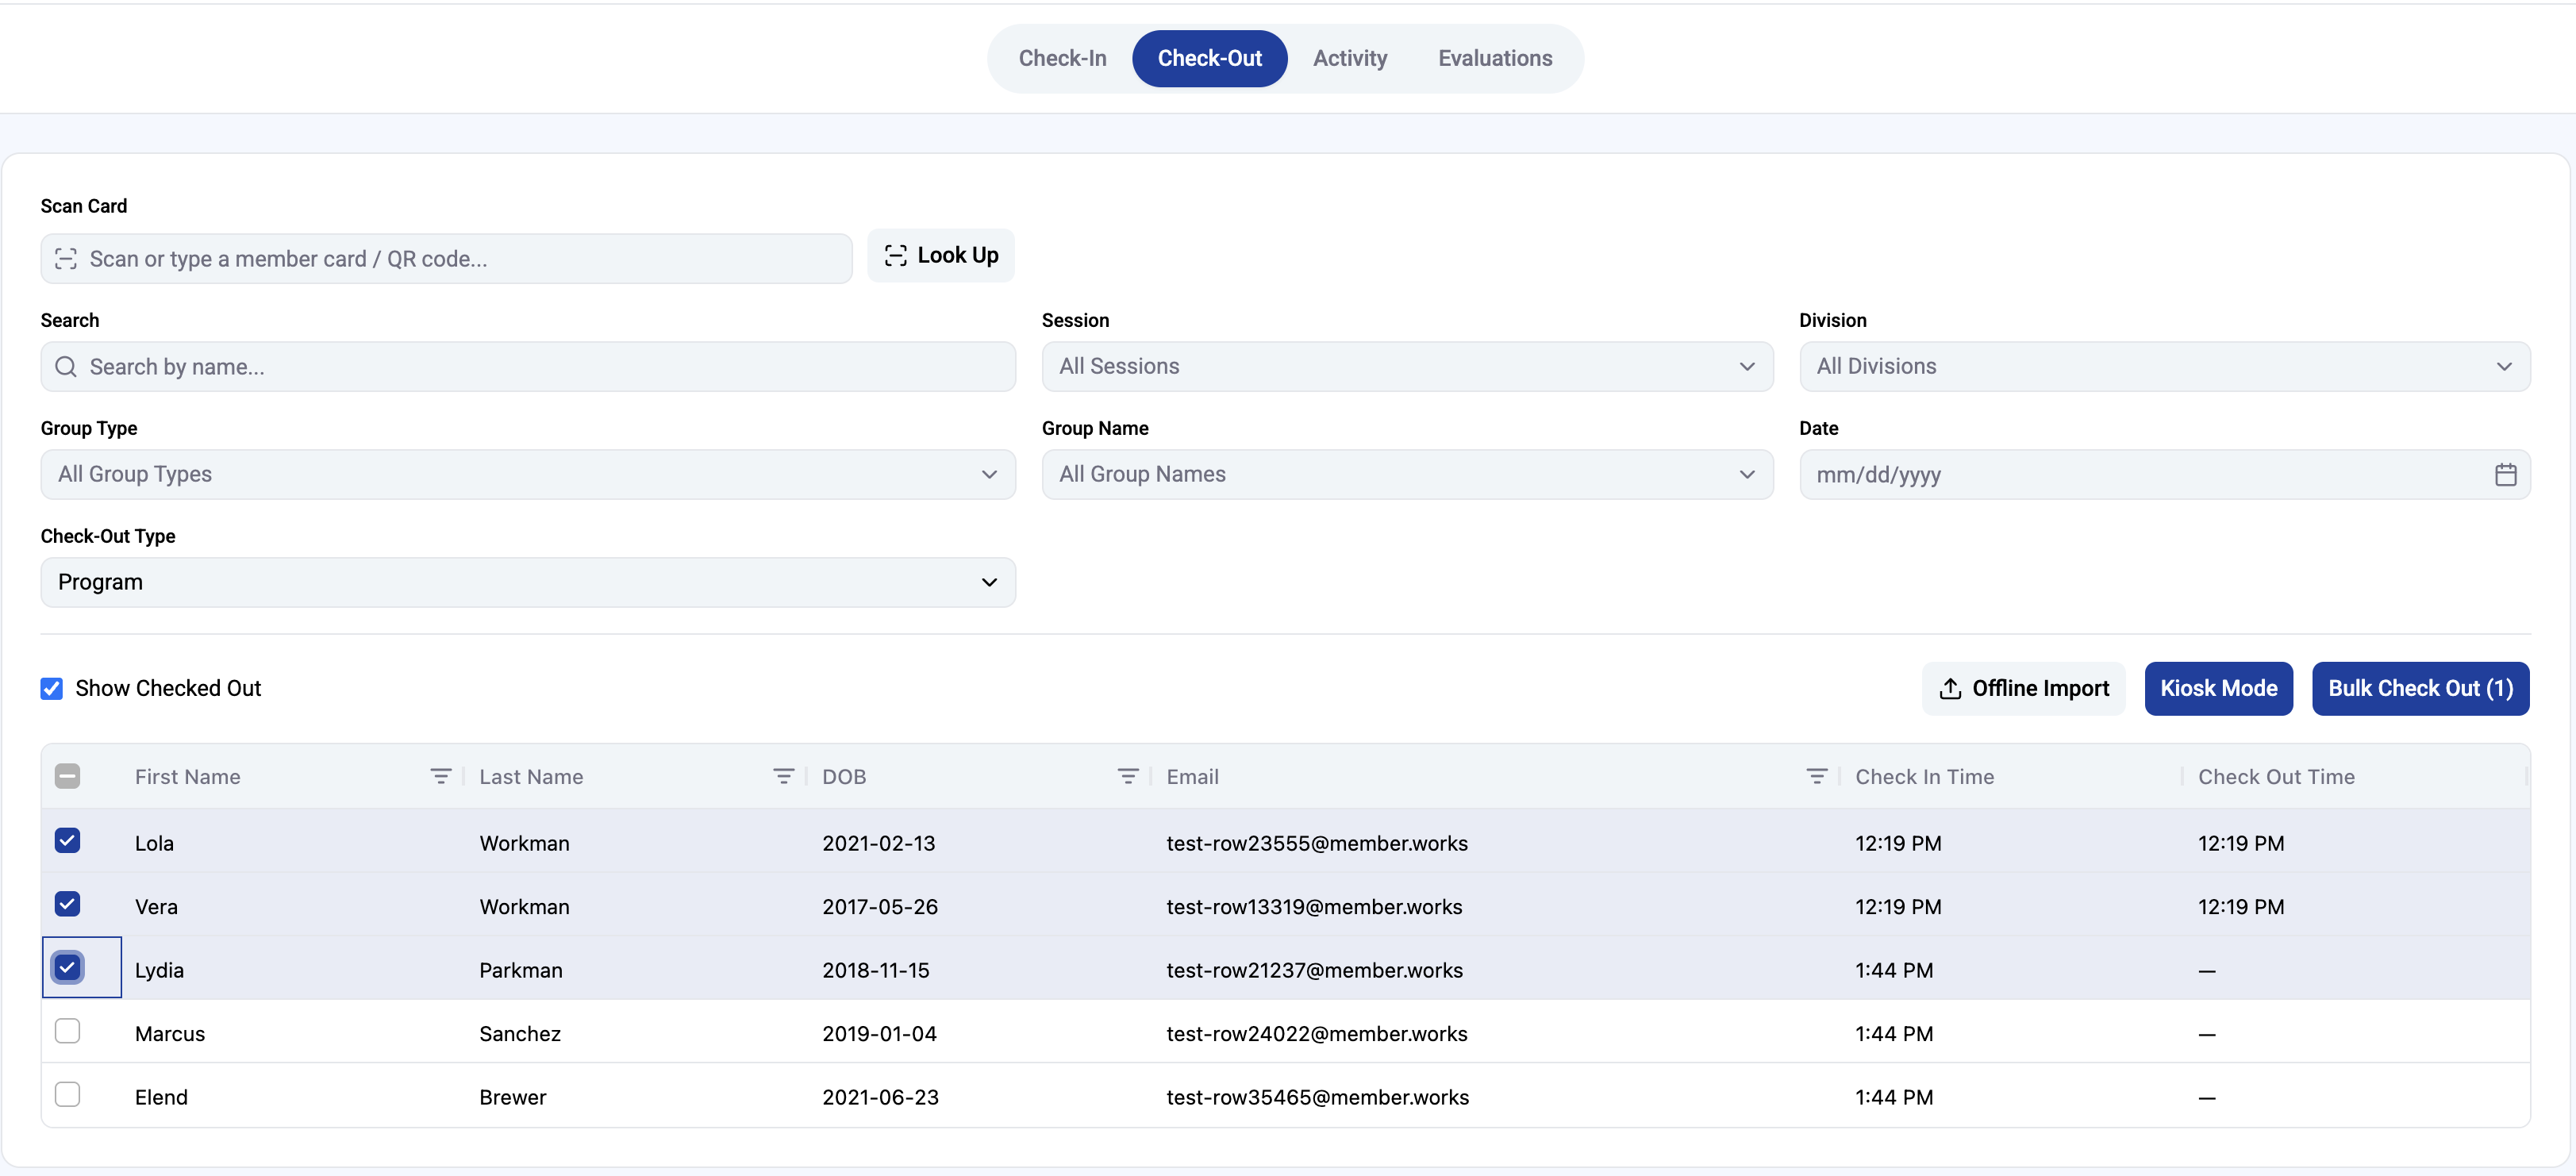
Click the Check-Out sub-tab.
Tick the checkbox next to each participant.
Click Bulk Check Out and confirm.
Note: This path never asks for a pickup person or a signature. If your site needs either of those, use the next scenario.
Scenario 2: Individual check-in and check-out with signature
Use this when you need a record of which adult dropped off or picked up each child, which is what most licensed childcare requires.
The important difference: click the participant's actual name, not the checkbox beside it. The checkbox is for bulk actions. Clicking the name opens their individual view.
What you see before you act
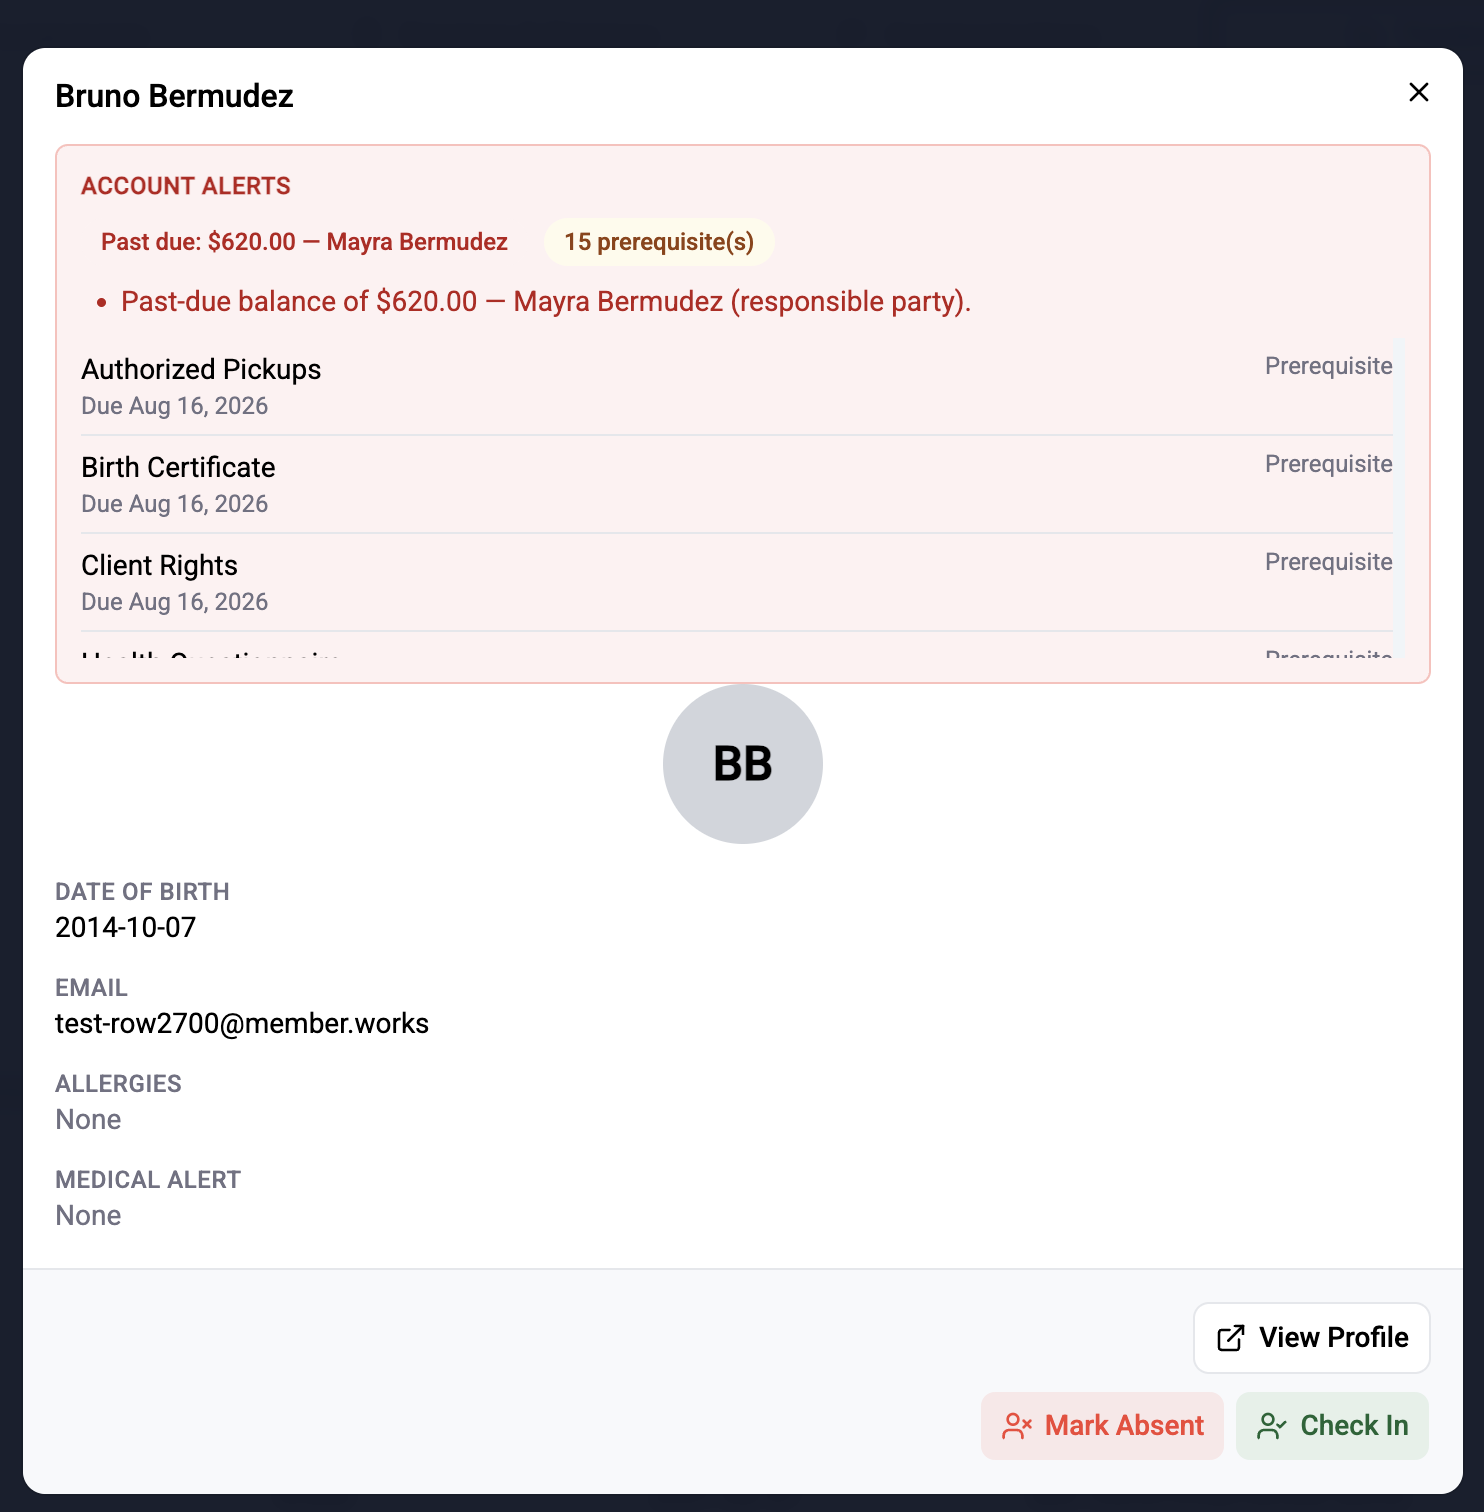
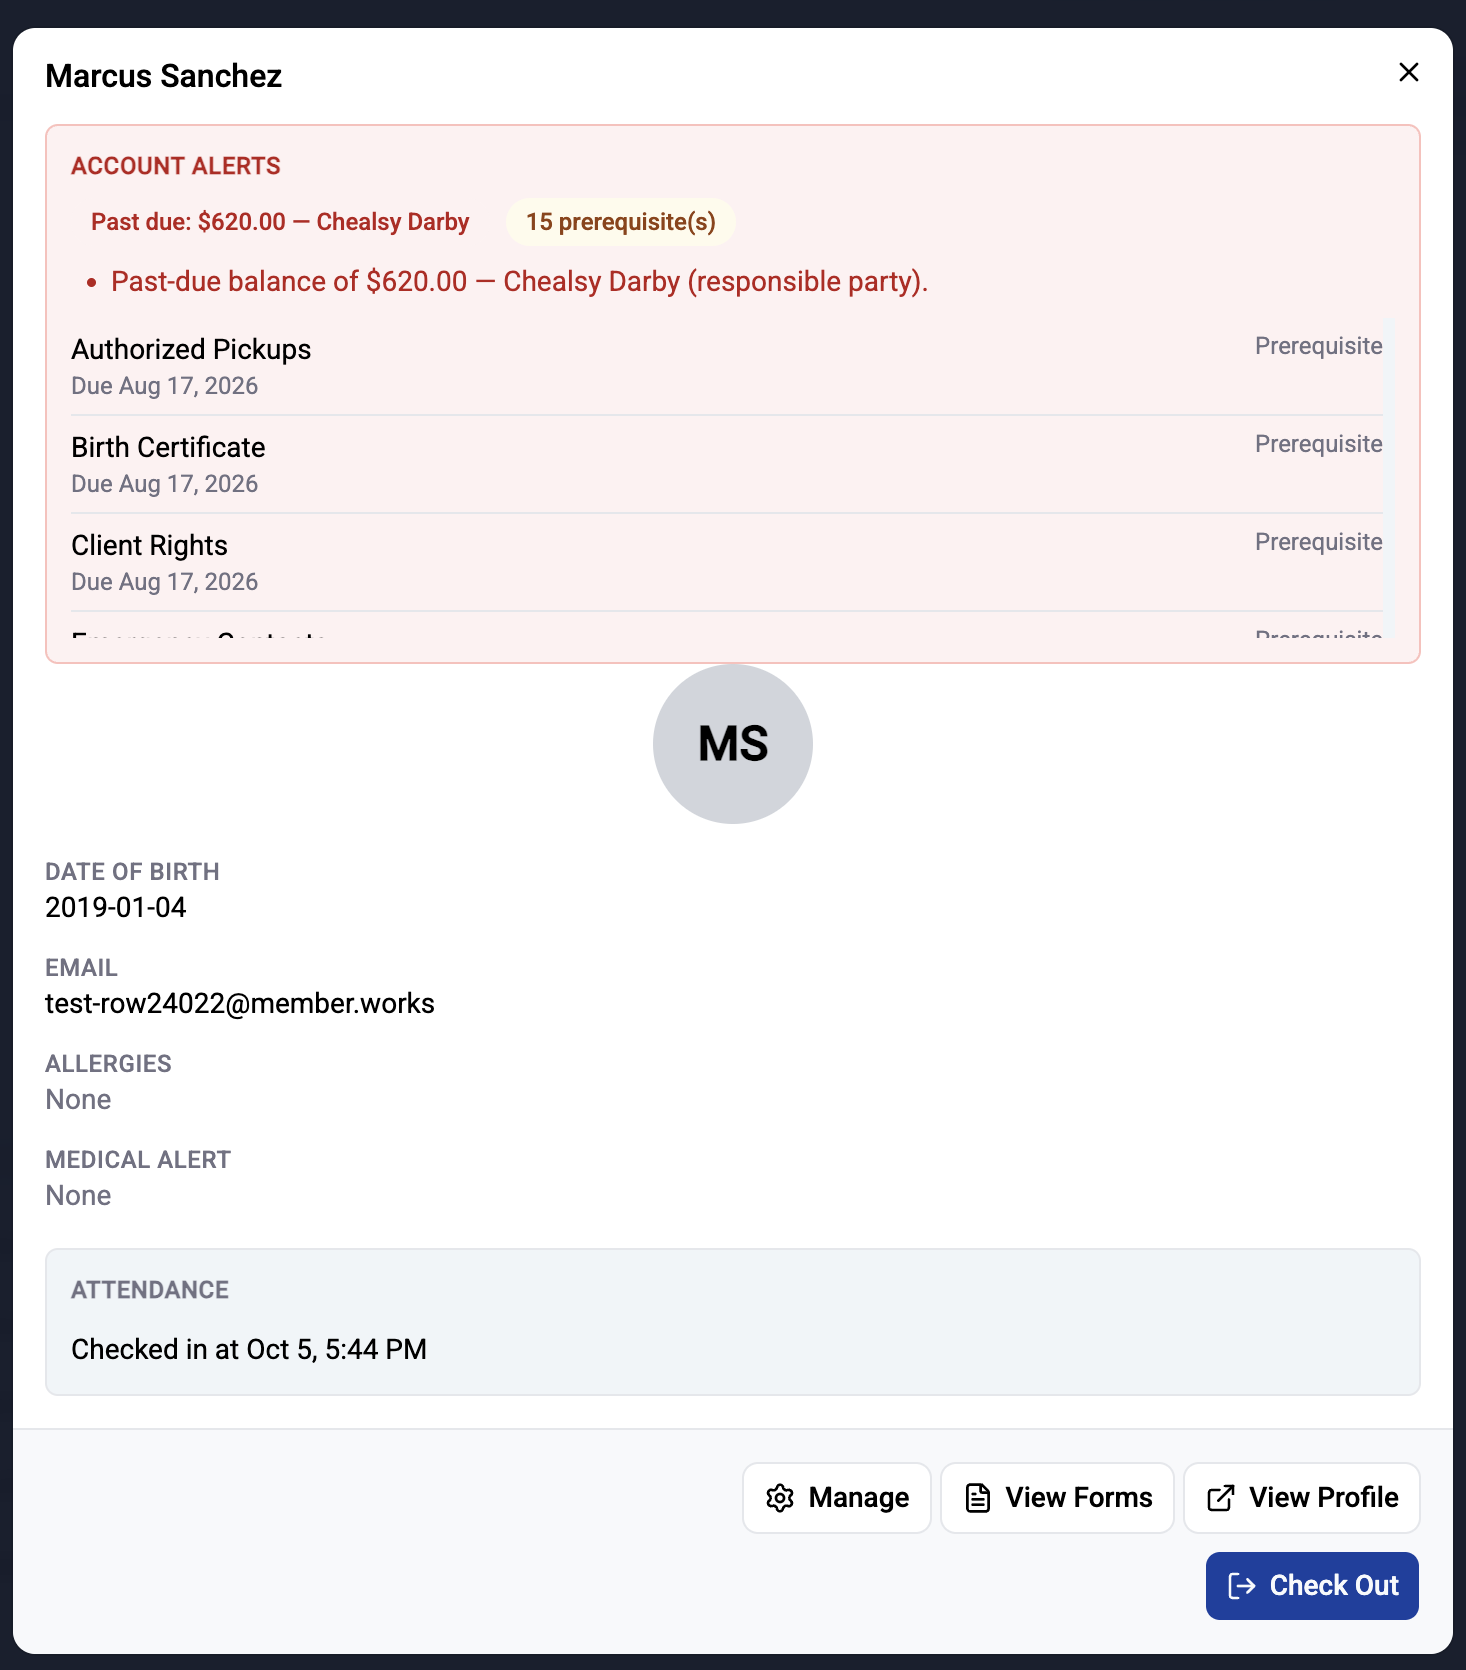
The pop-up shows account alerts at the top, including any past-due balance with the responsible party named and a list of outstanding prerequisites with due dates. Below that you get date of birth, email, allergies, and medical alert, so anything staff need to know surfaces before the child joins the group.
To check a child in:
Click their name in the list.
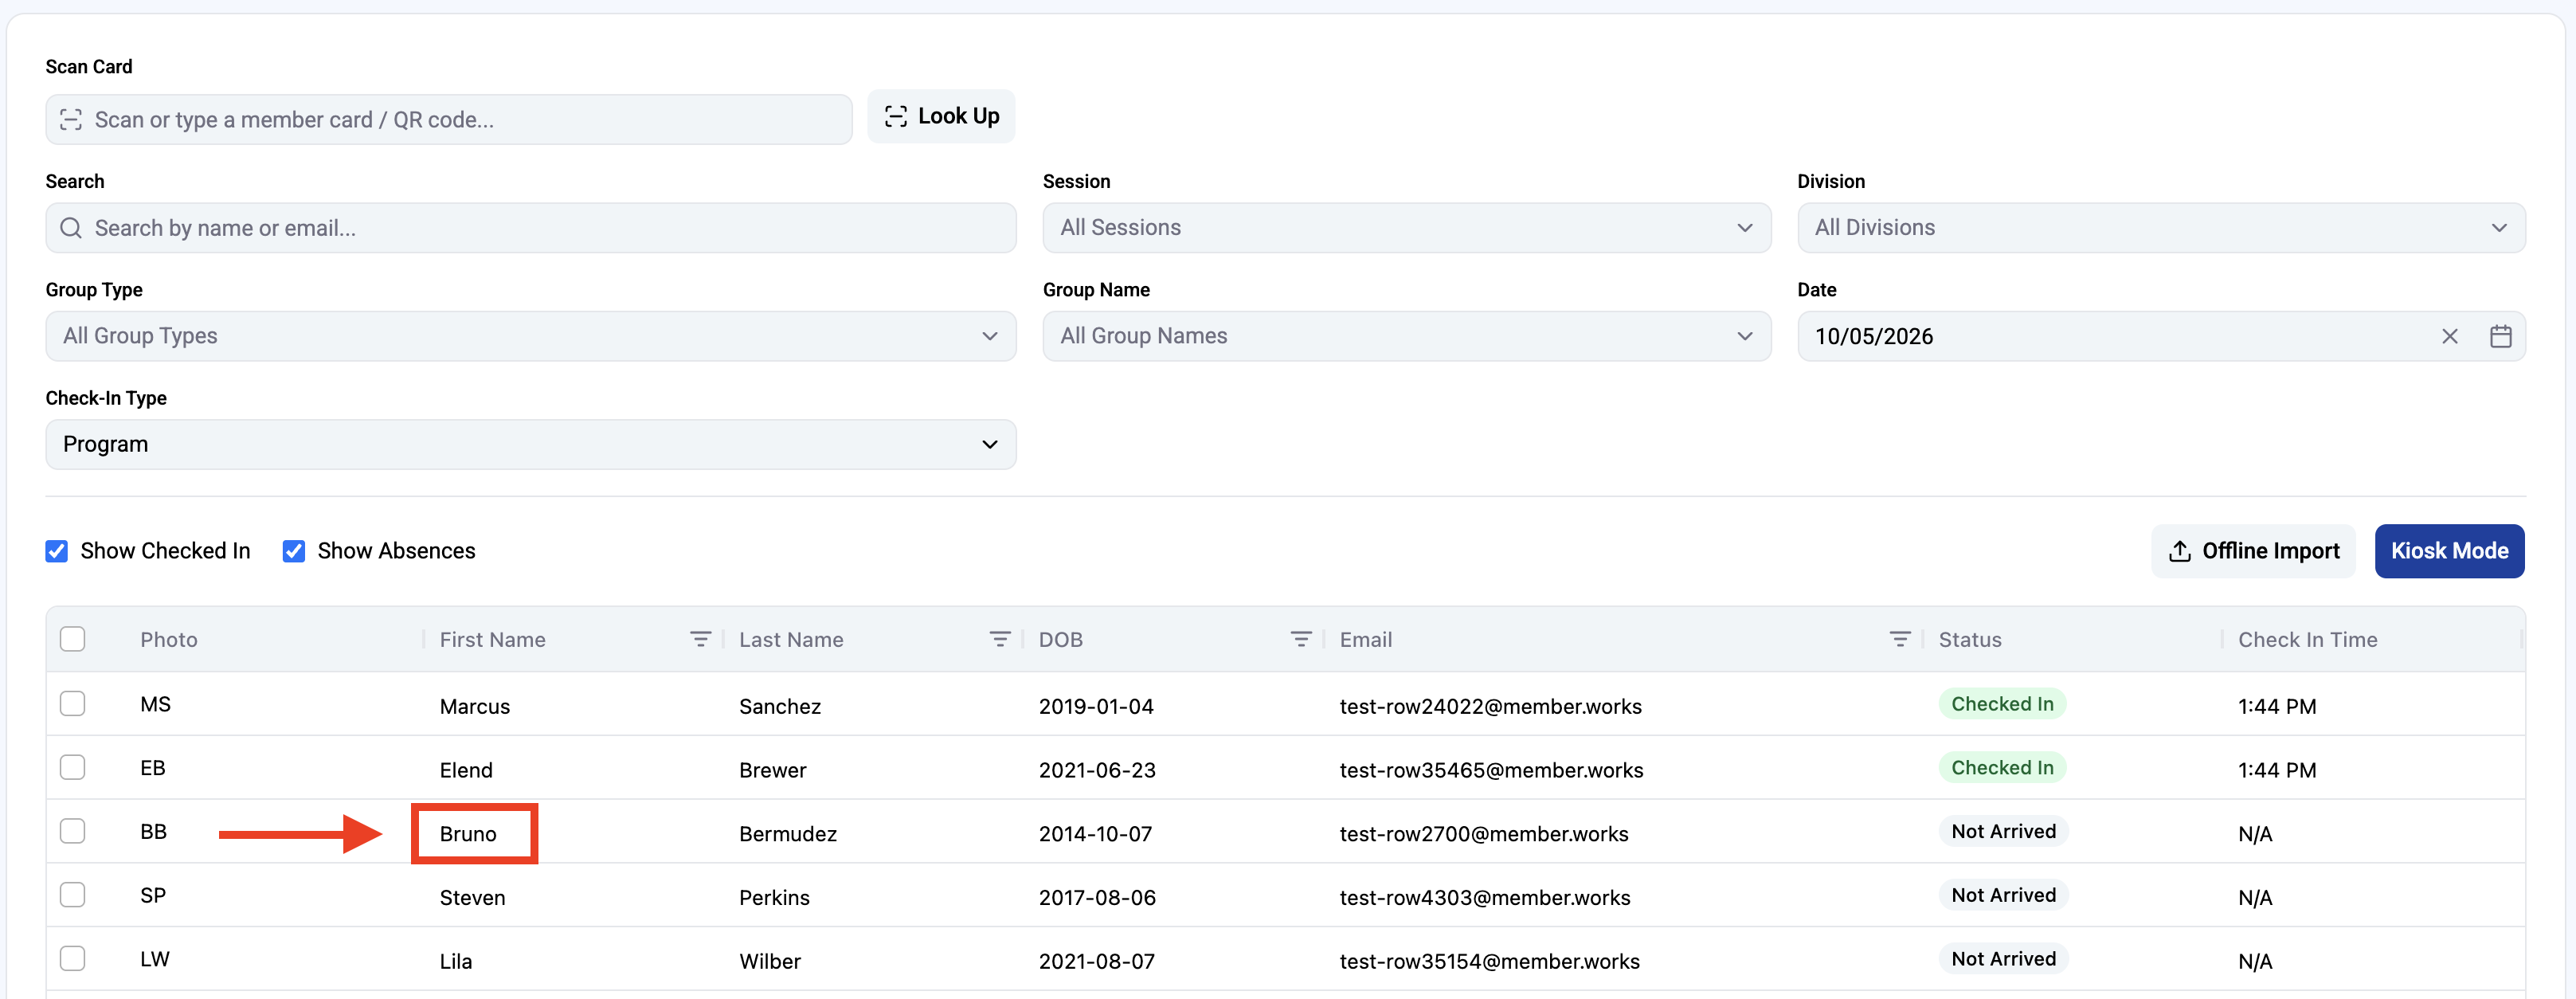
Click the green Check In button.
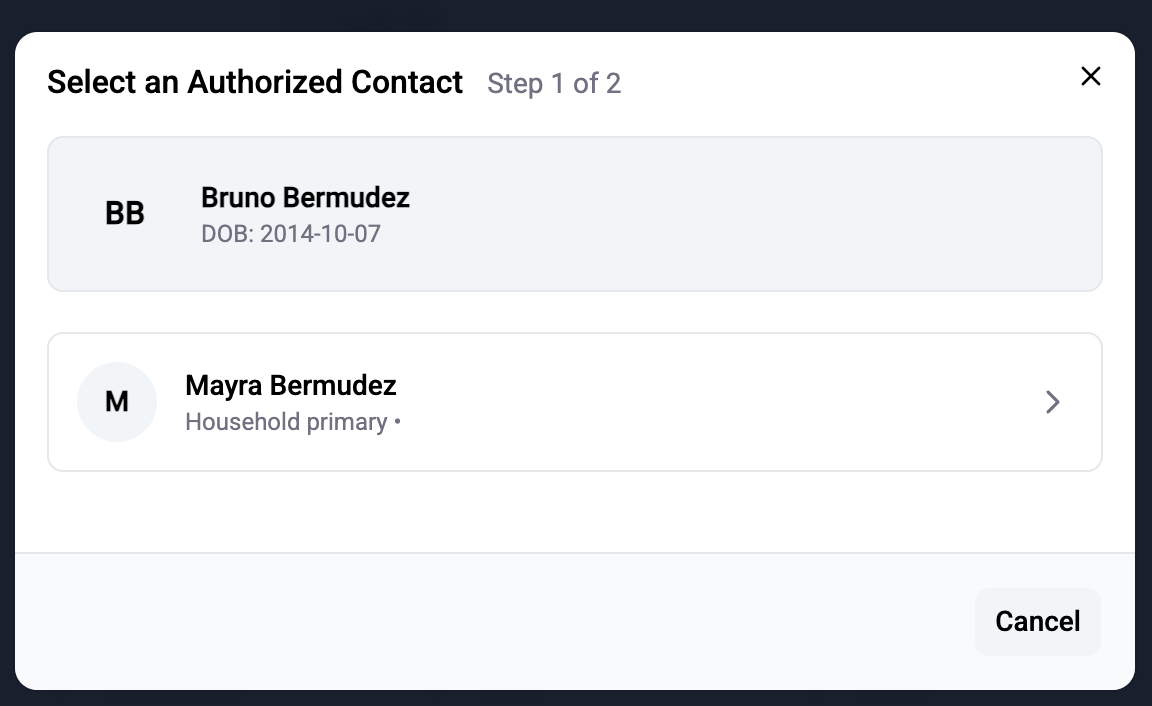
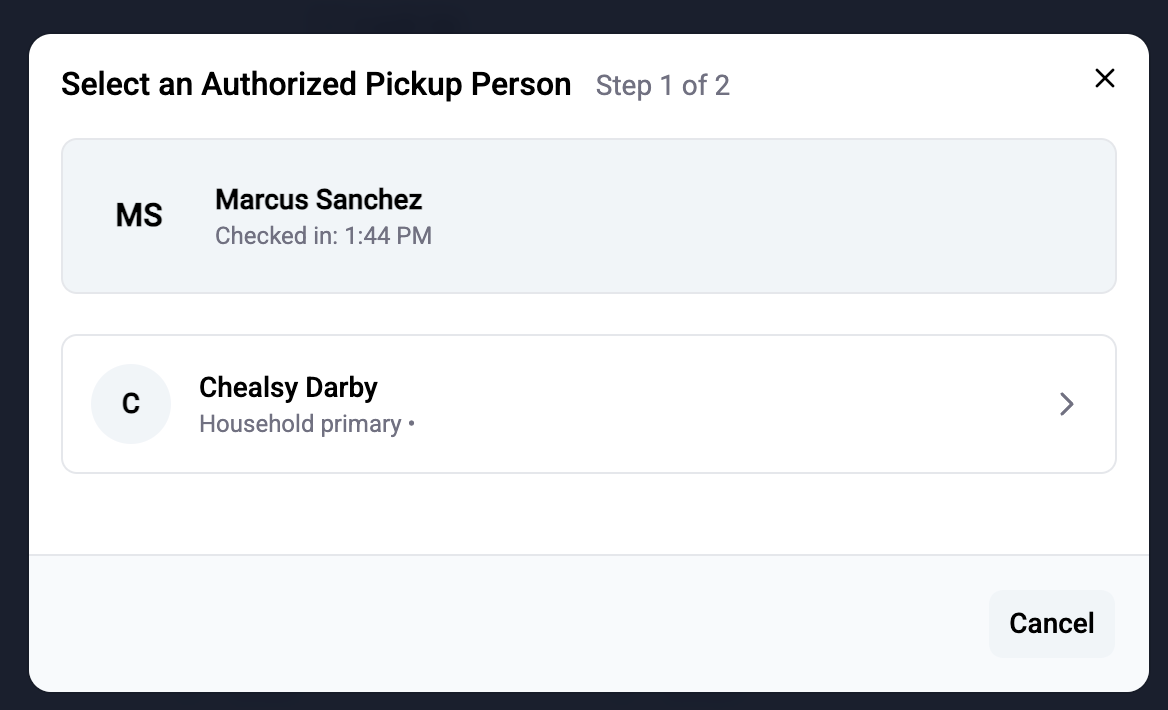
Select the authorized contact who is dropping the child off. The child and the household's authorized adults are listed.
Confirm the check-in time, have the adult sign on the signature pad, add a note if needed, and click Confirm Check-In.
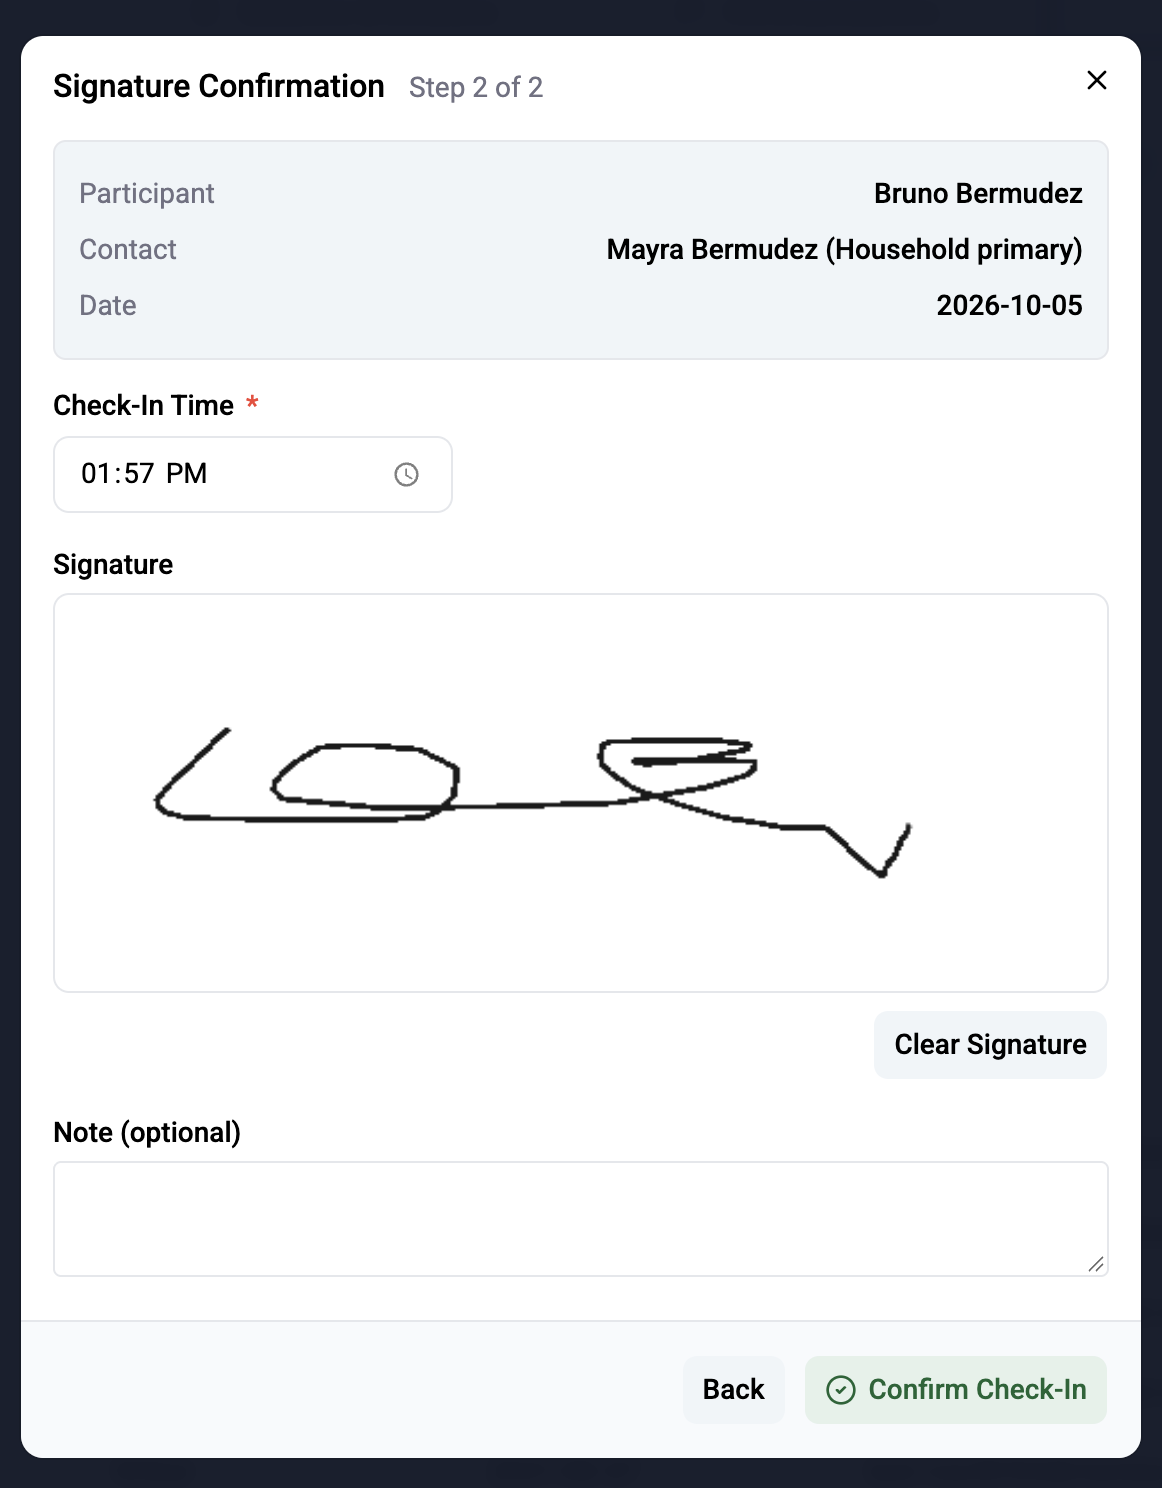
Note: Clear Signature wipes the pad if the signature smudges or the wrong person signs.
To check a child out:
Click their name on the Check-Out sub-tab.
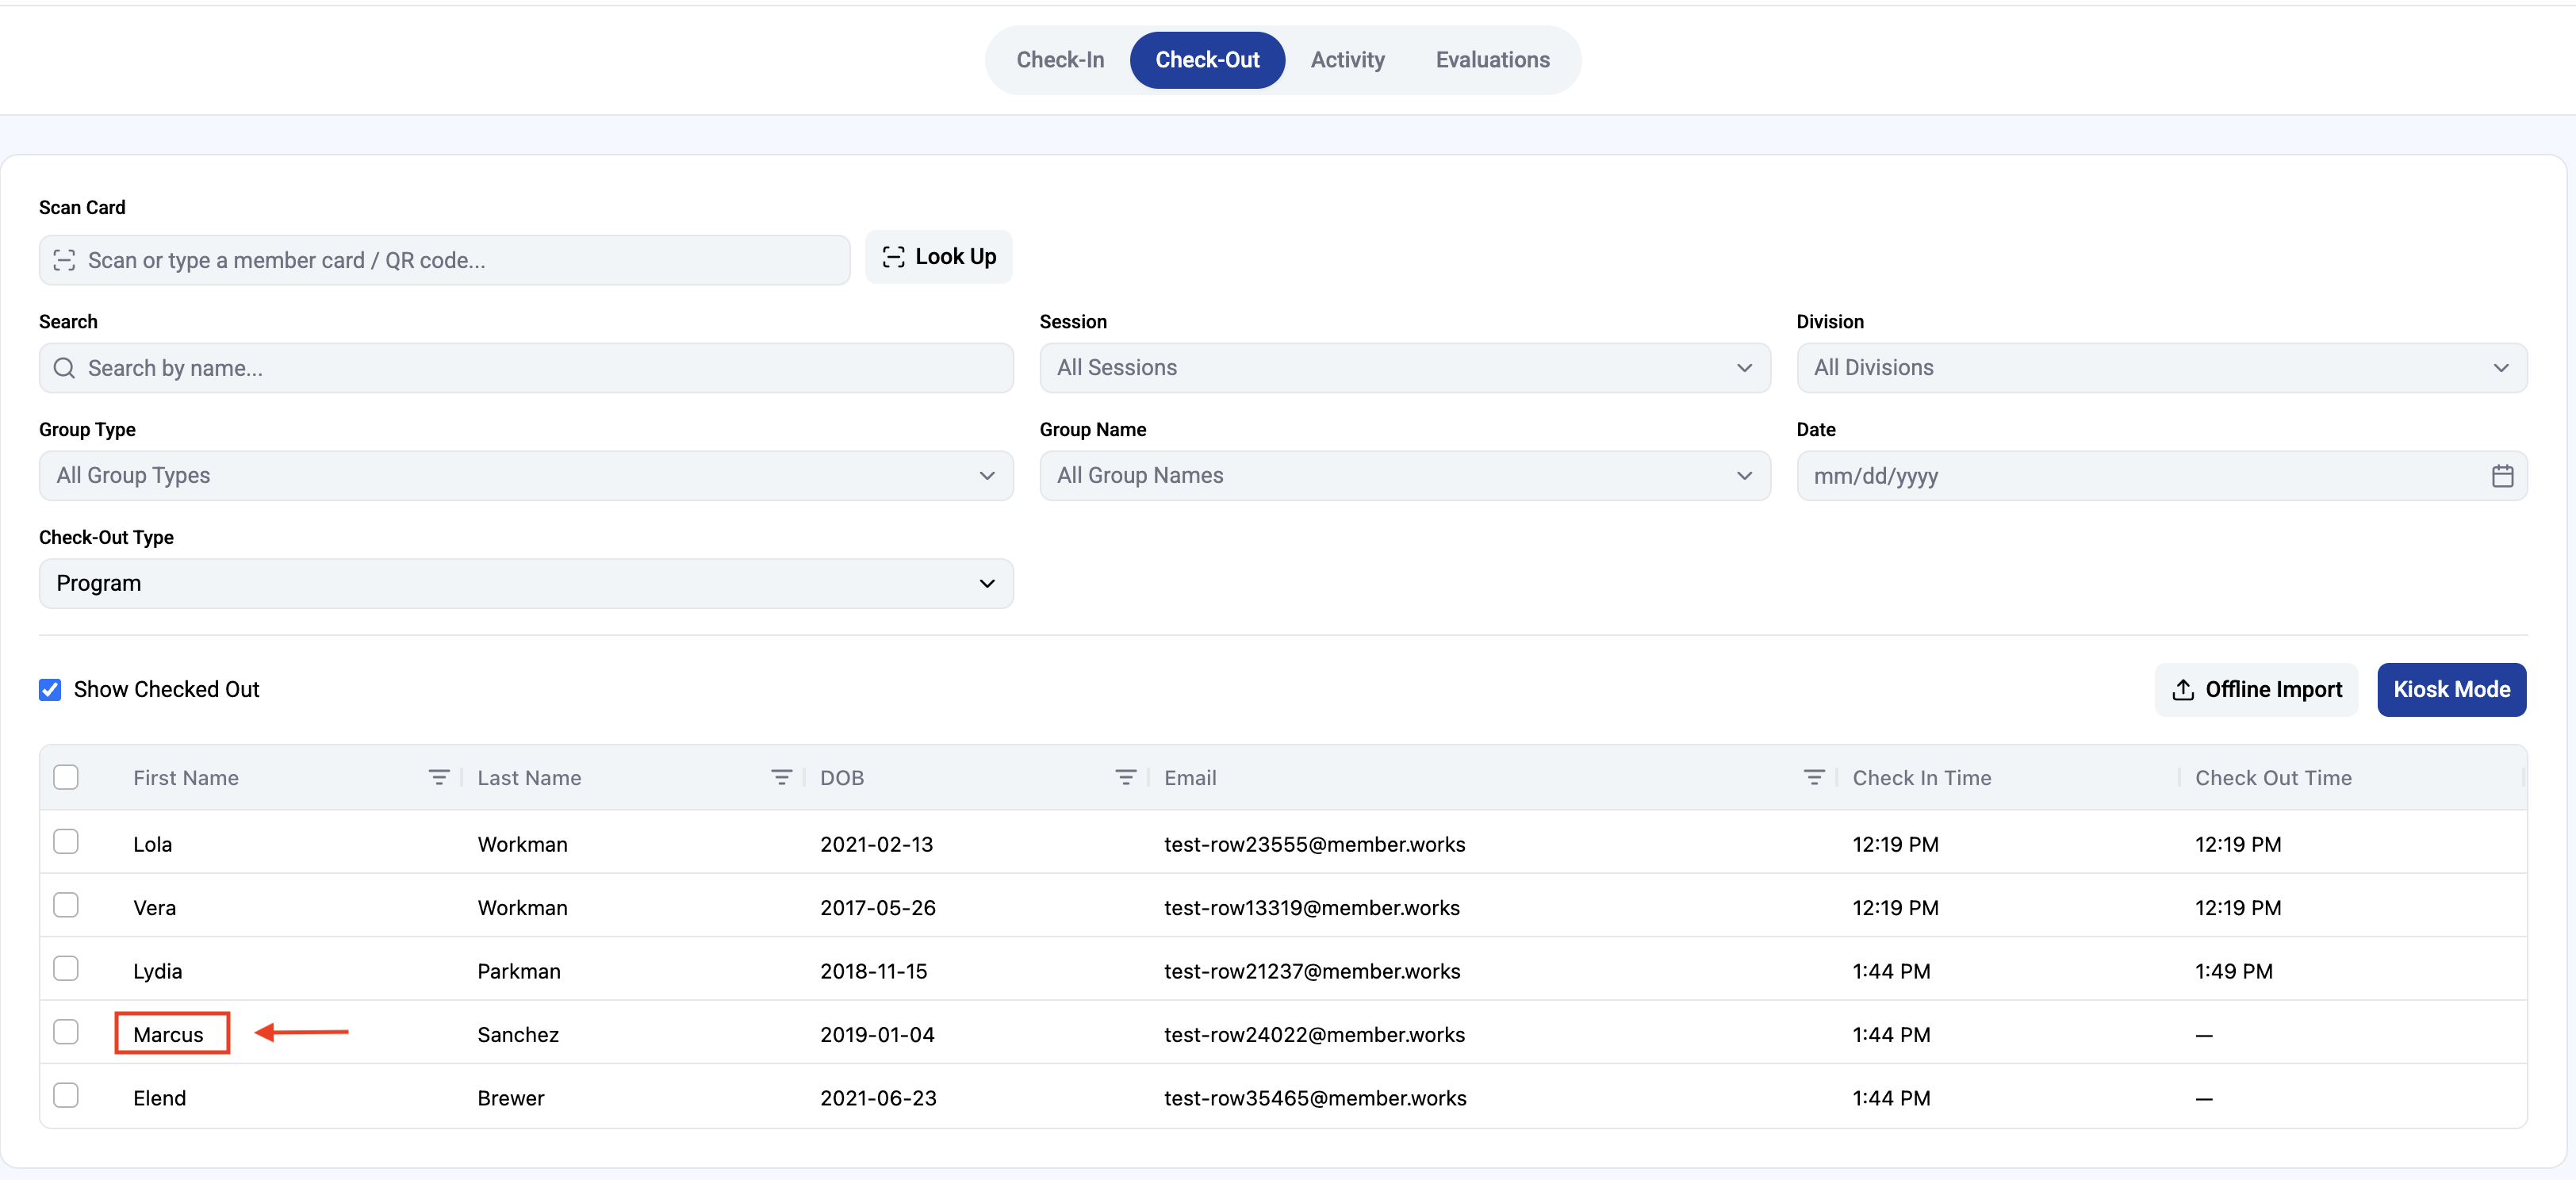
Click the blue Check Out button. The pop-up also shows when they checked in, along with Manage, View Forms, and View Profile.
Select the authorized pickup person from the list.
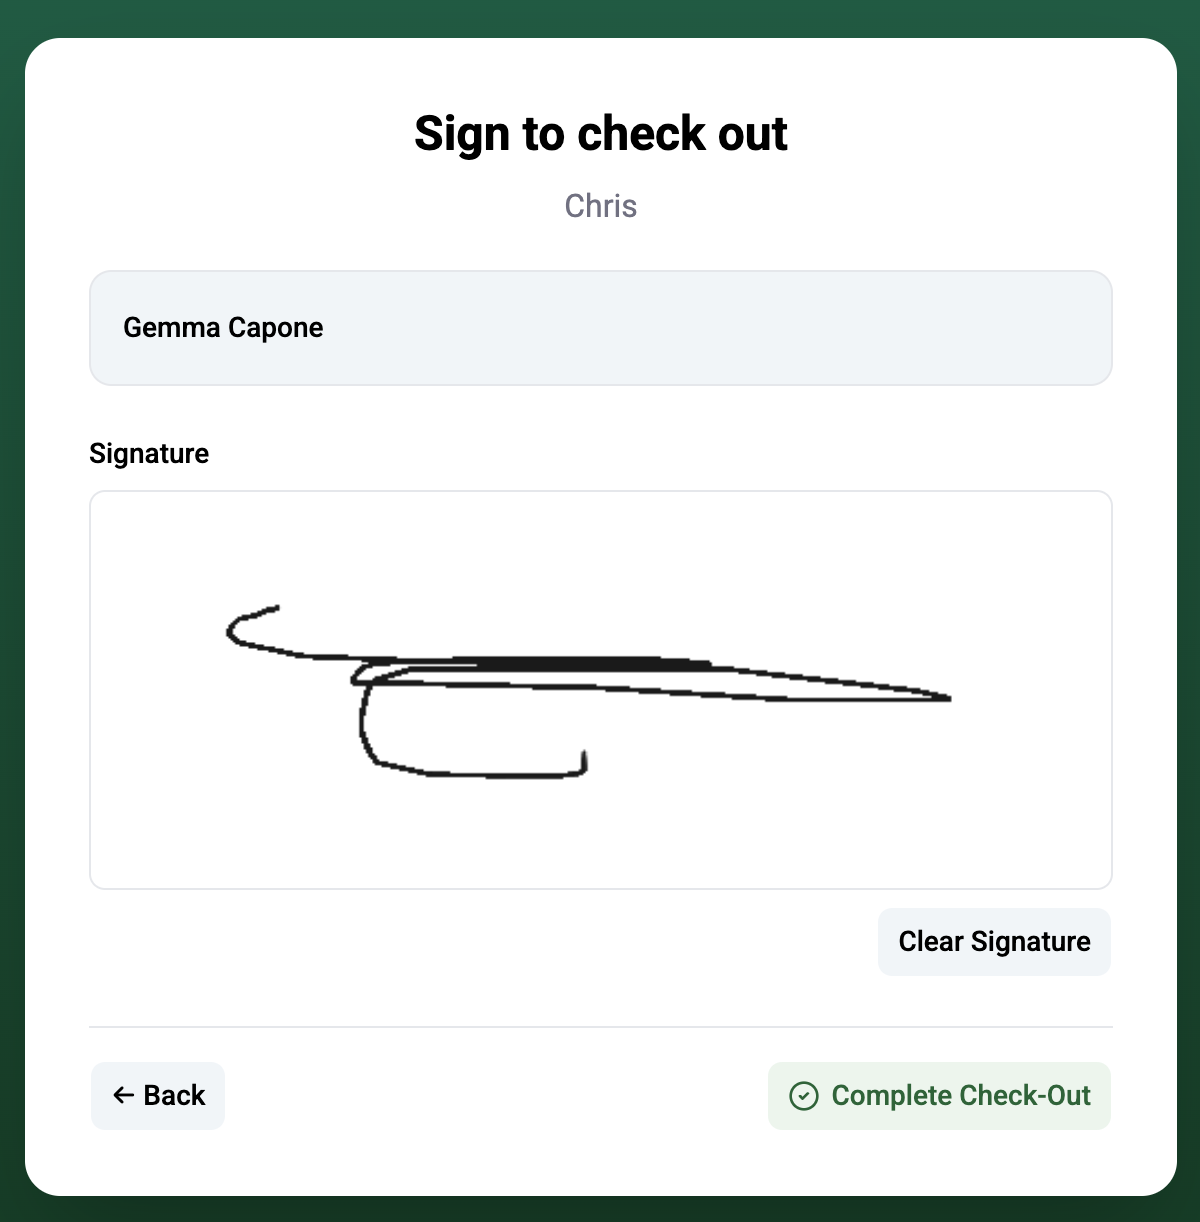
Confirm the check-out time, have them sign, and click Complete Check-Out.
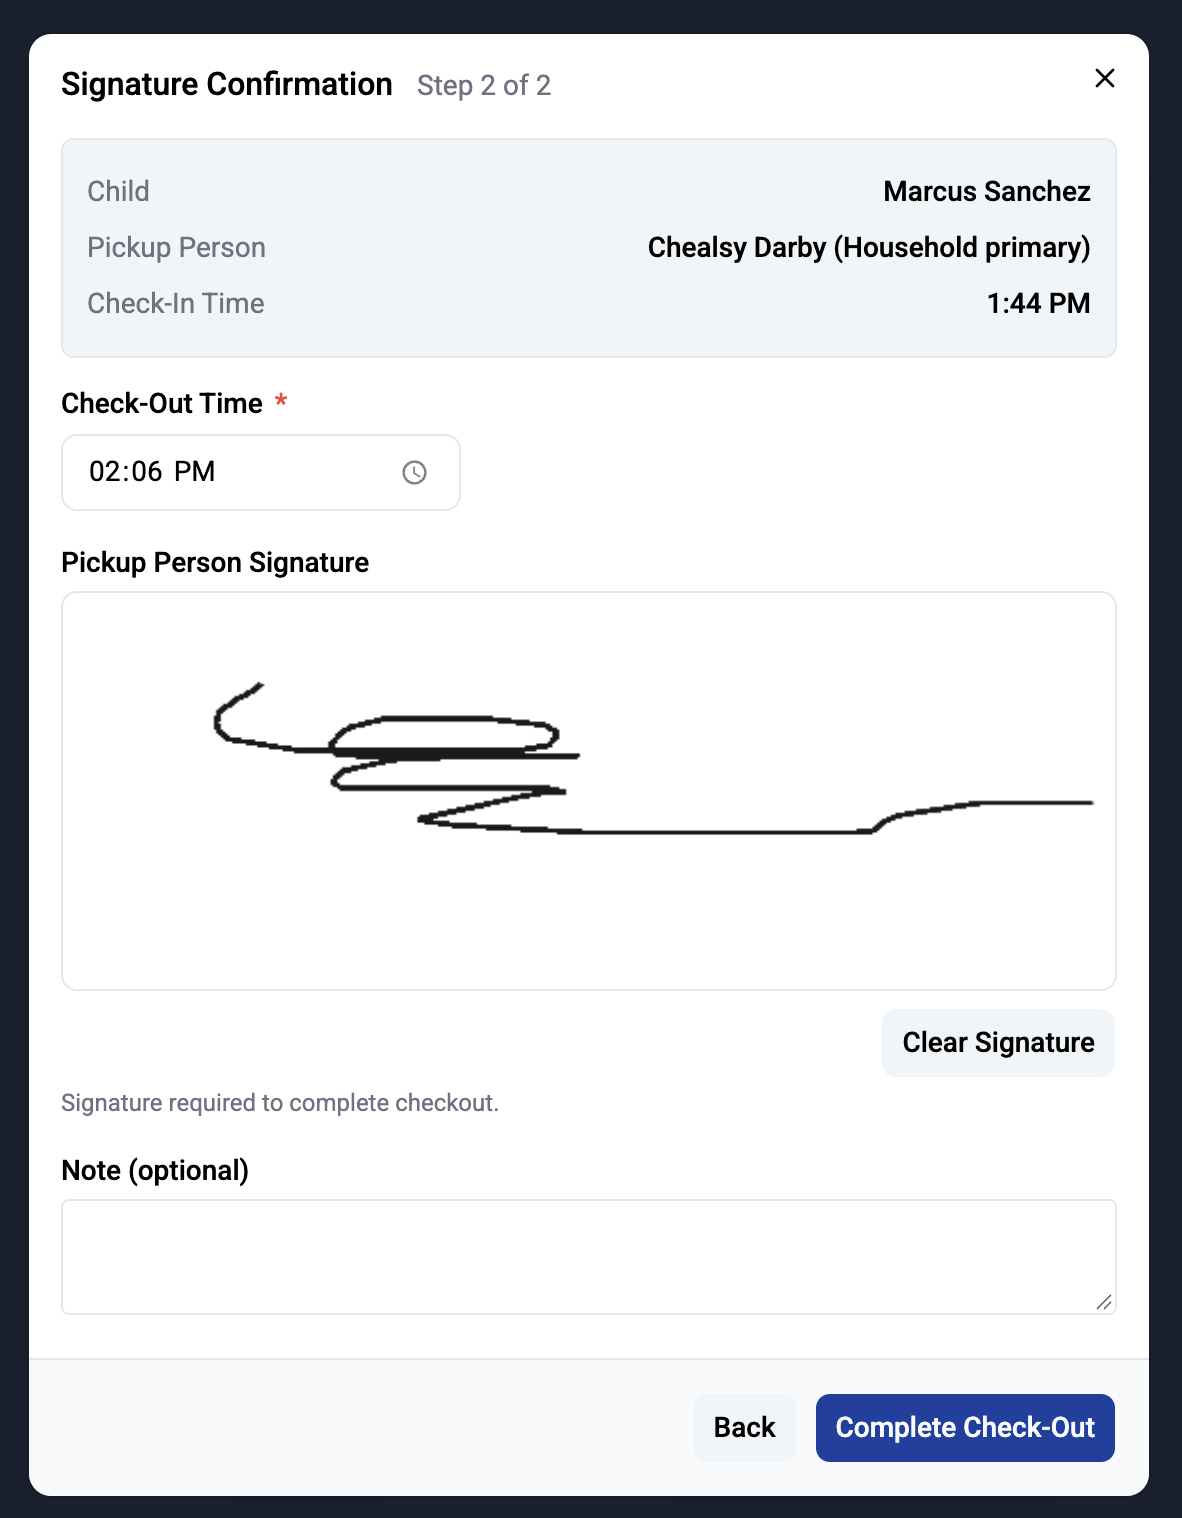
The signature is required here. Check-out won't complete without one.
If the adult at the door isn't on the list, that's a conversation with the parent, not a workaround. Only the people on the authorized list appear as options.
Scenario 3: Kiosk Mode
Use this when you want parents handling their own check-in and check-out on a tablet or computer screen at the door.
Click the blue Kiosk Mode button on the Tracking tab to launch the kiosk screen.
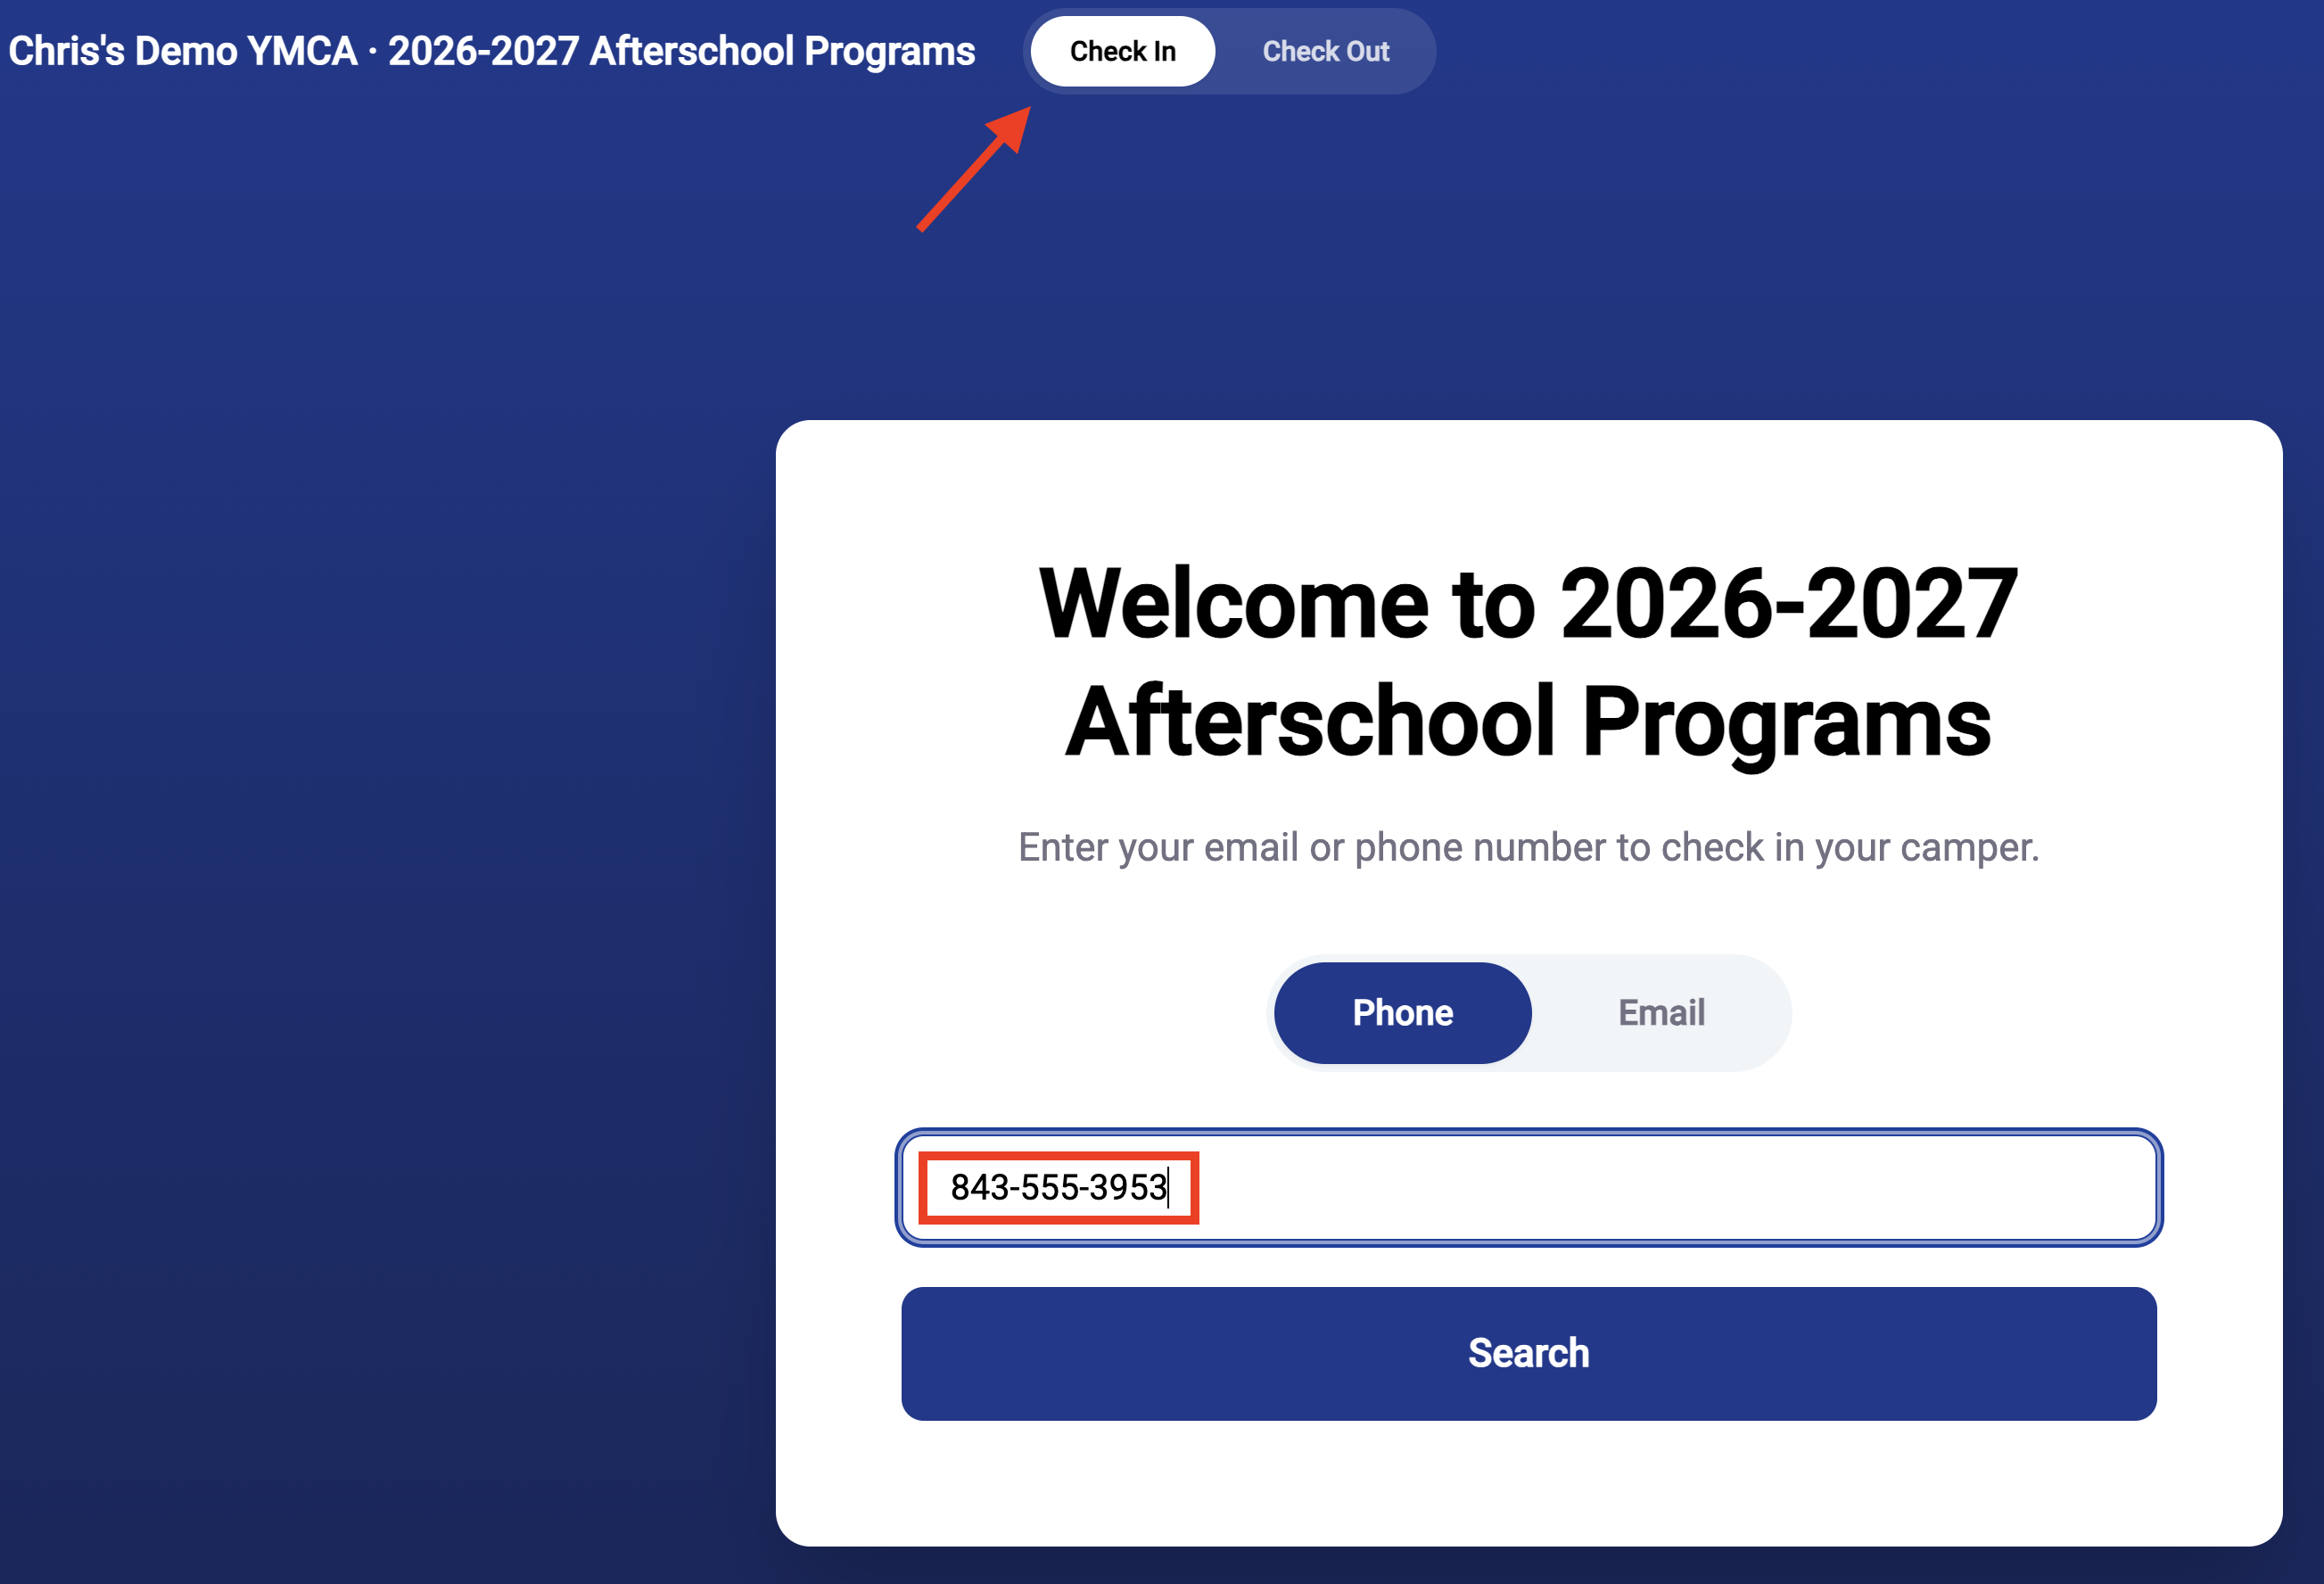
At the top of the kiosk, a pill selector switches between Check In and Check Out. The screen color tells you which mode you're in at a glance: blue for check-in, green for check-out. Confirm the mode is right before you walk away from the tablet.
Check-in at the kiosk
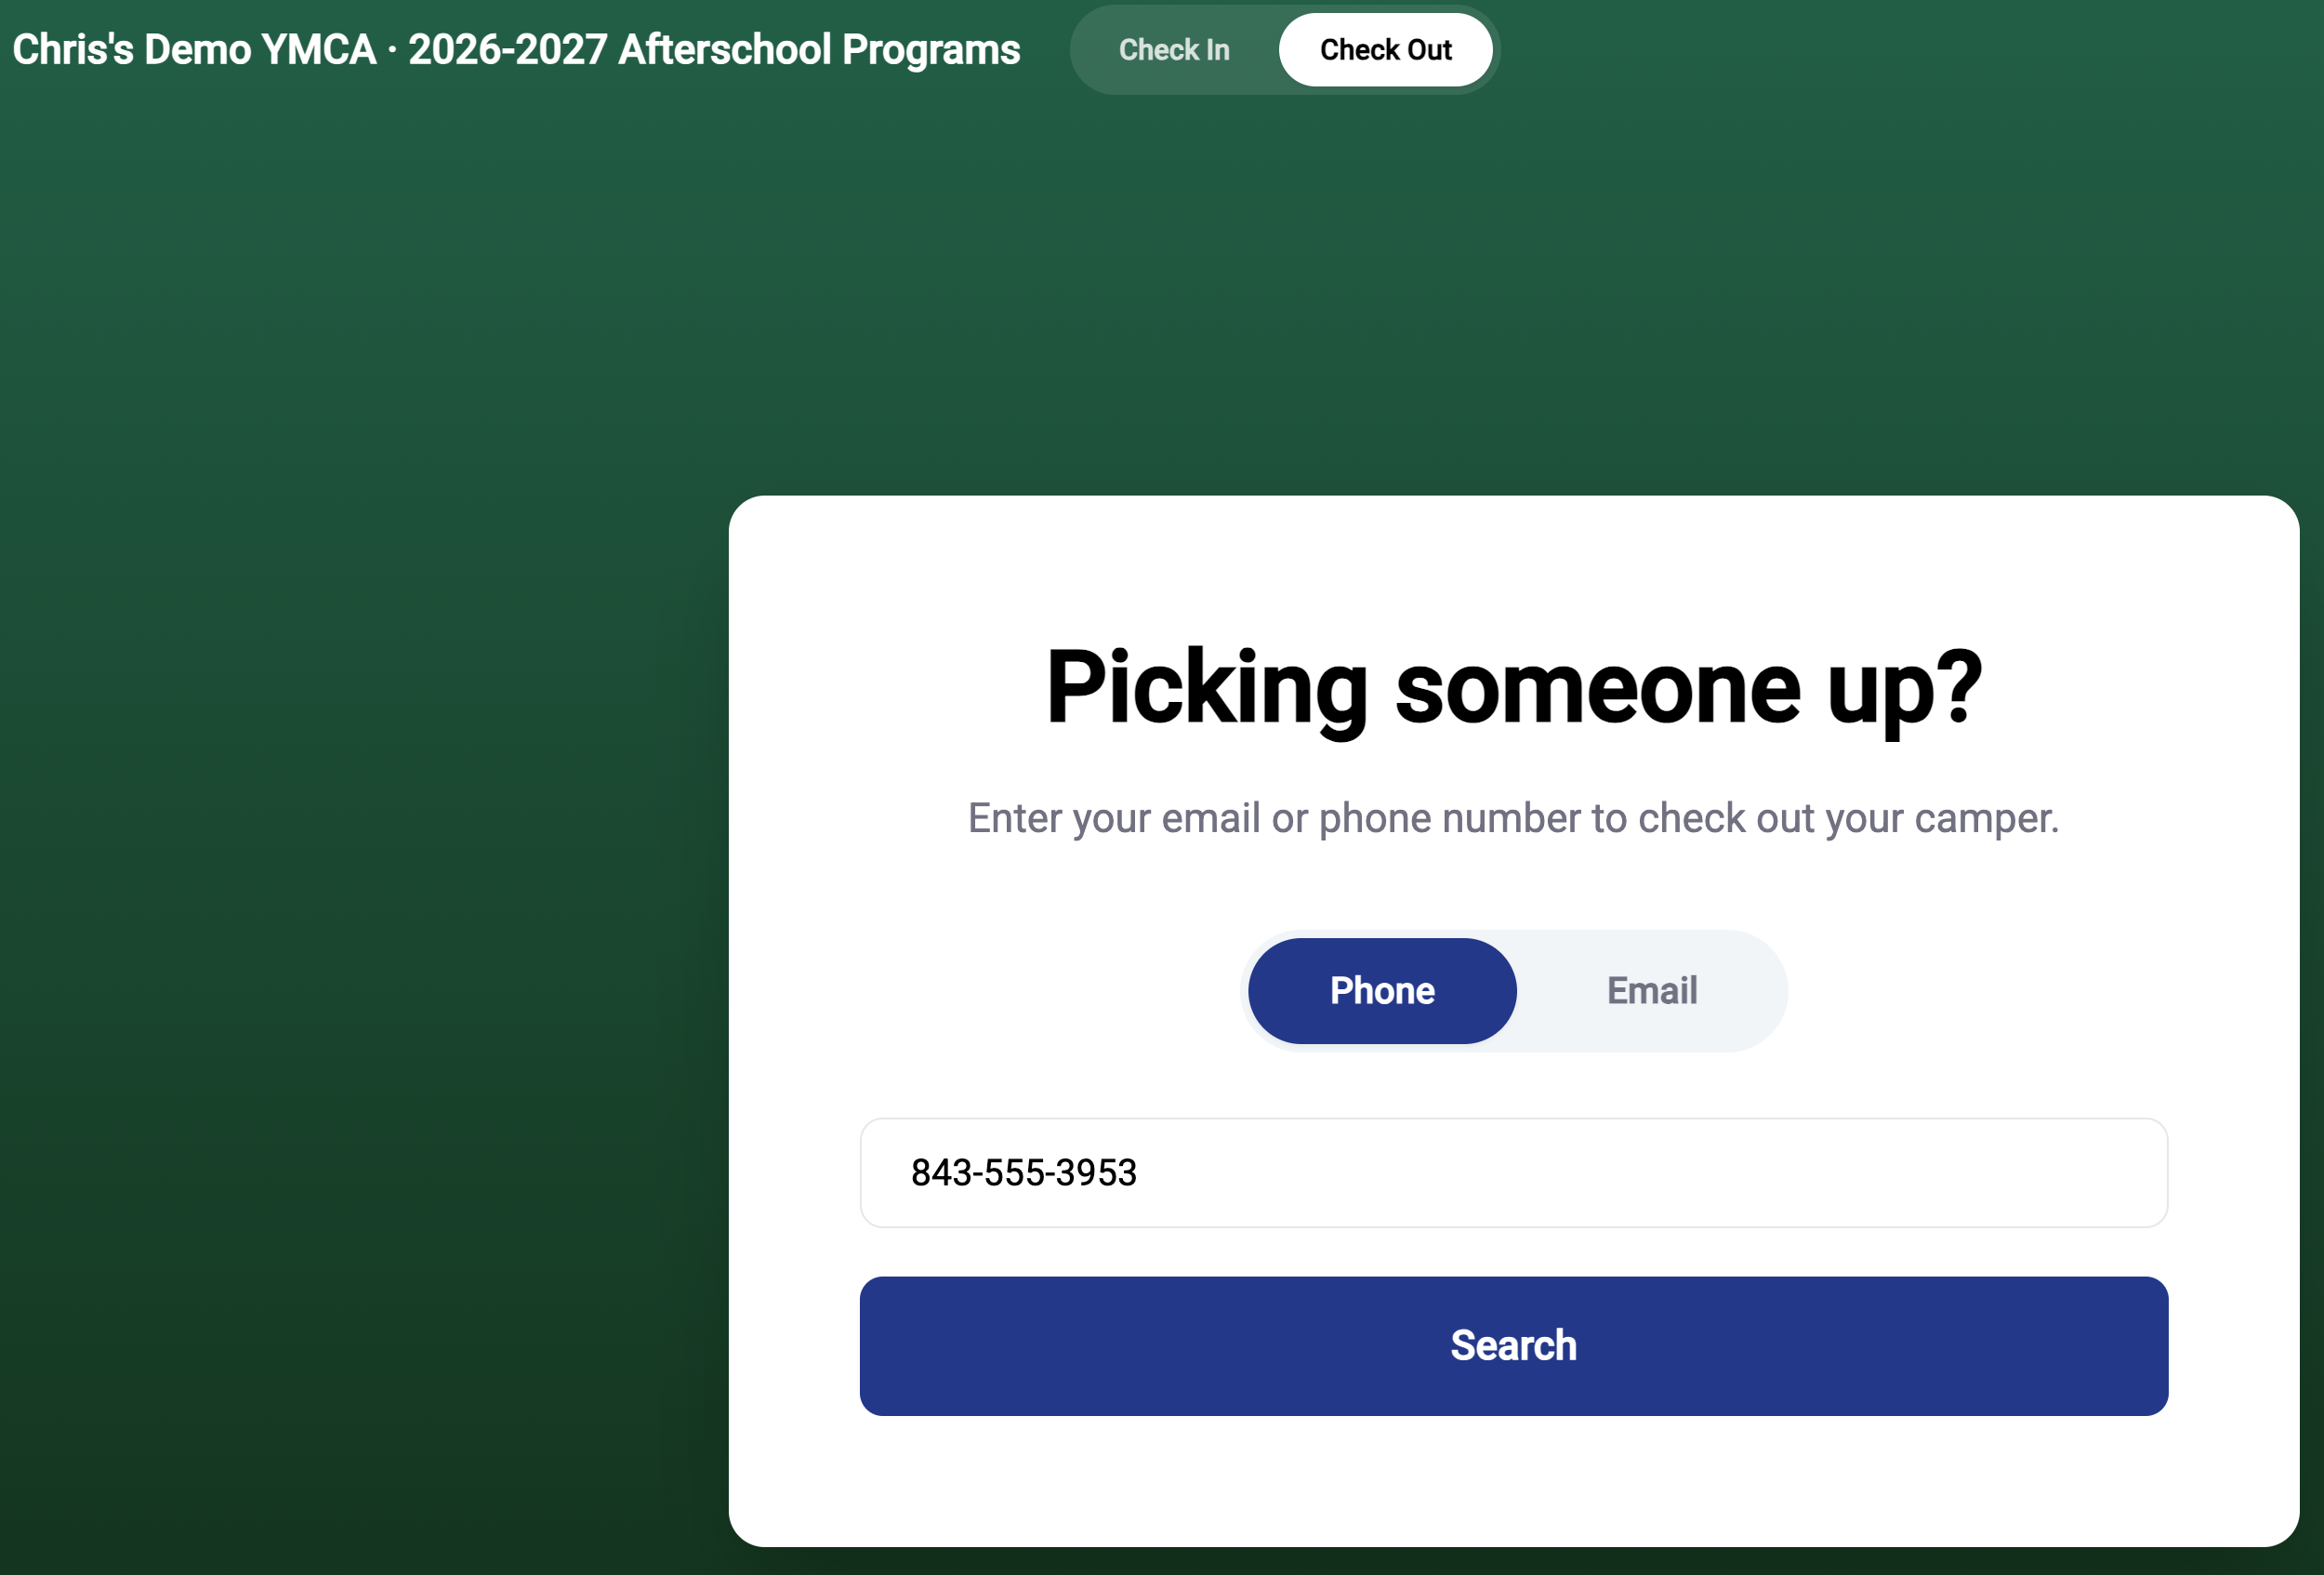
The parent chooses Phone or Email and enters it, then taps Search.
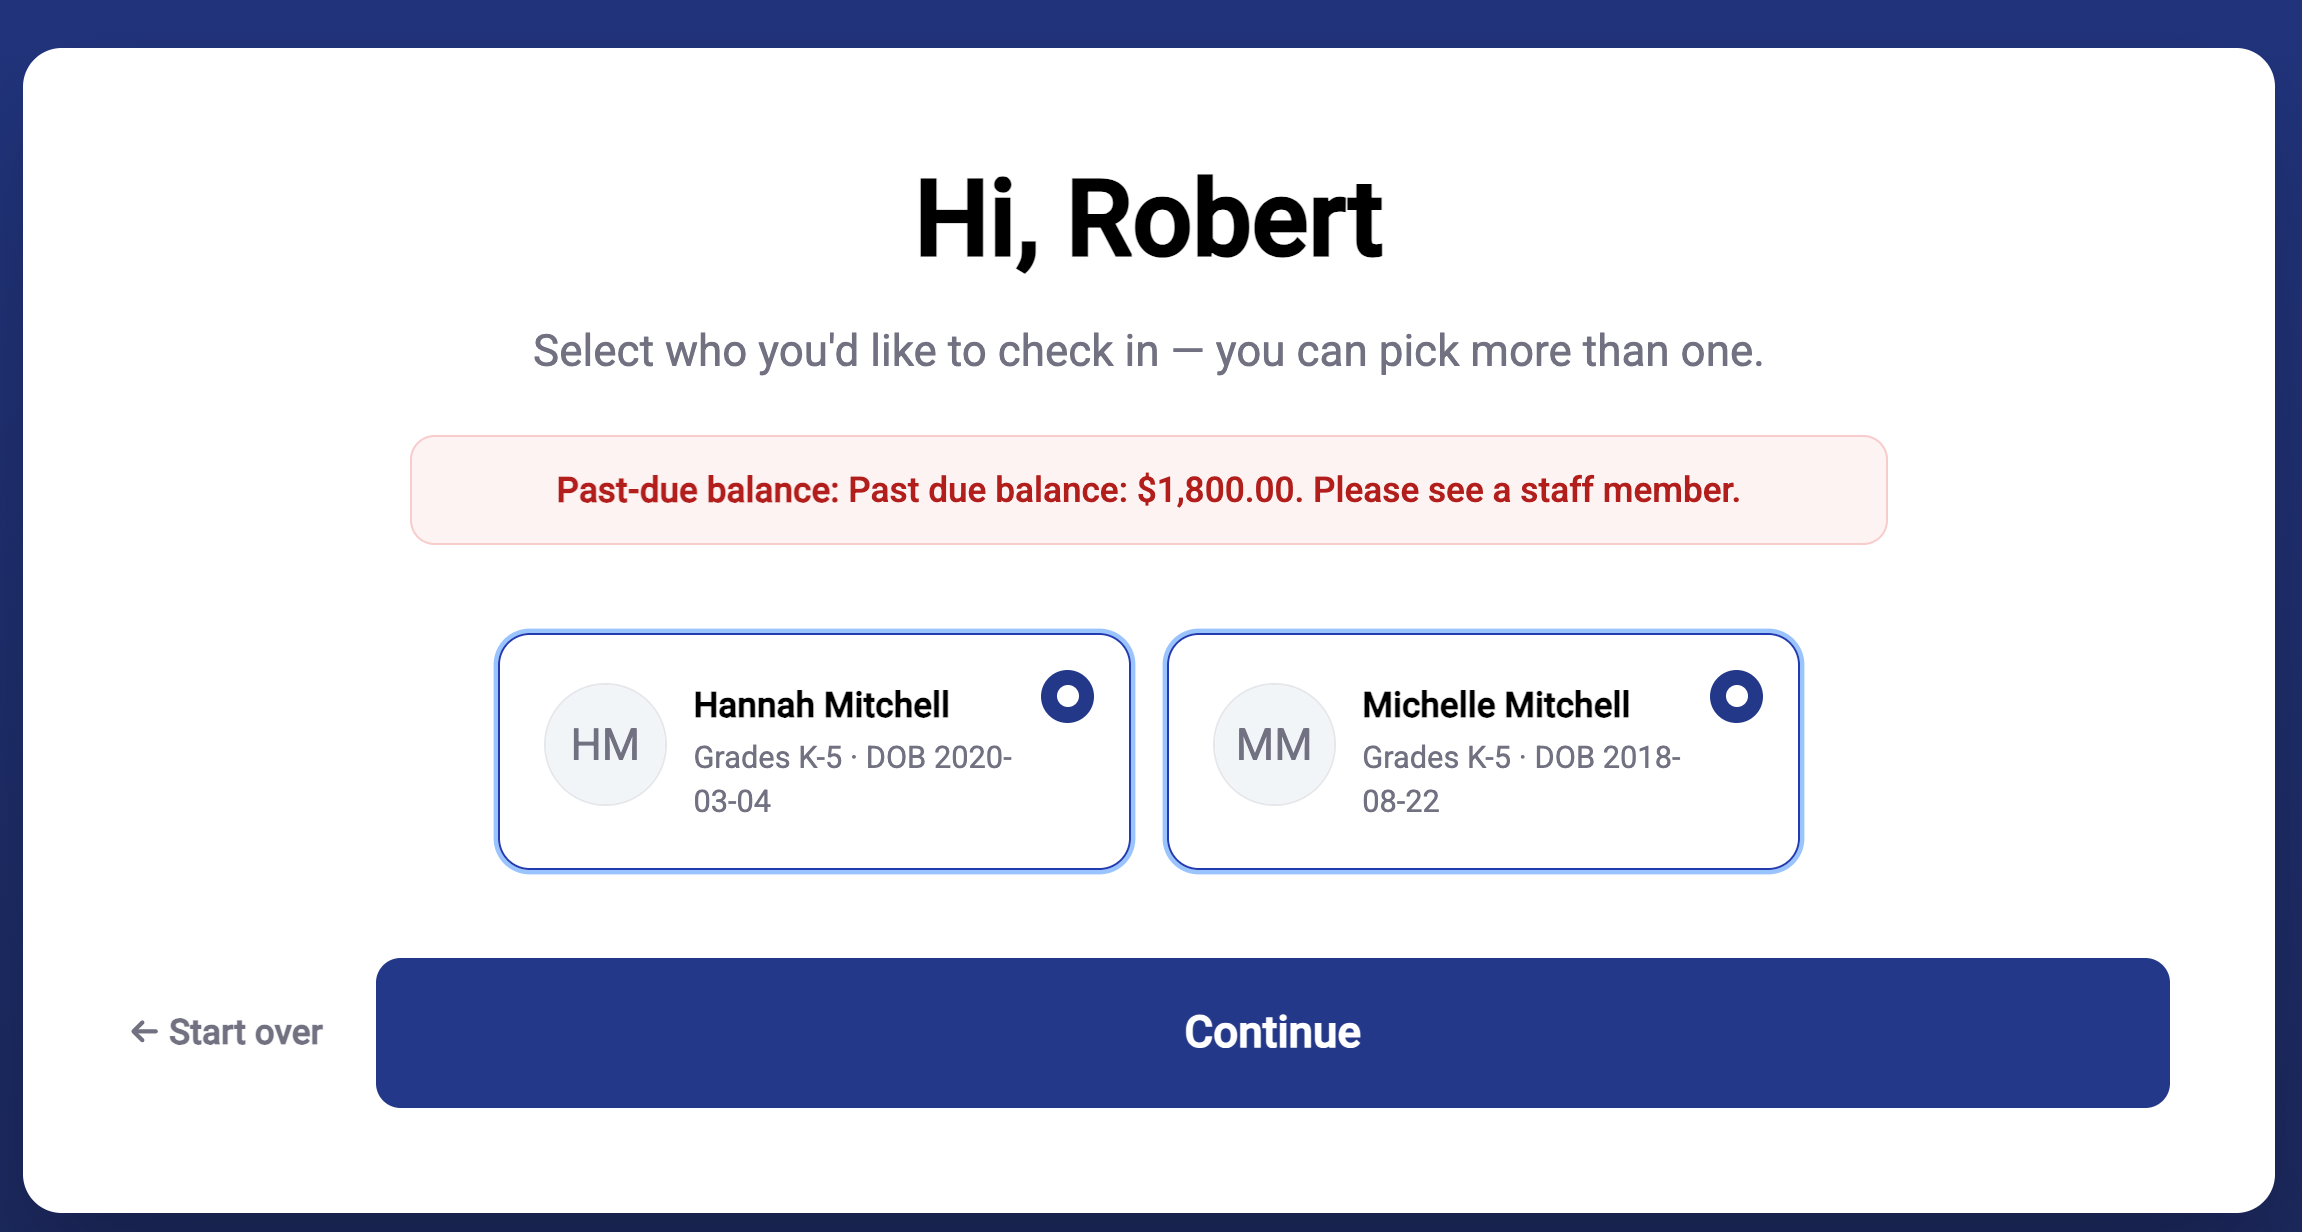
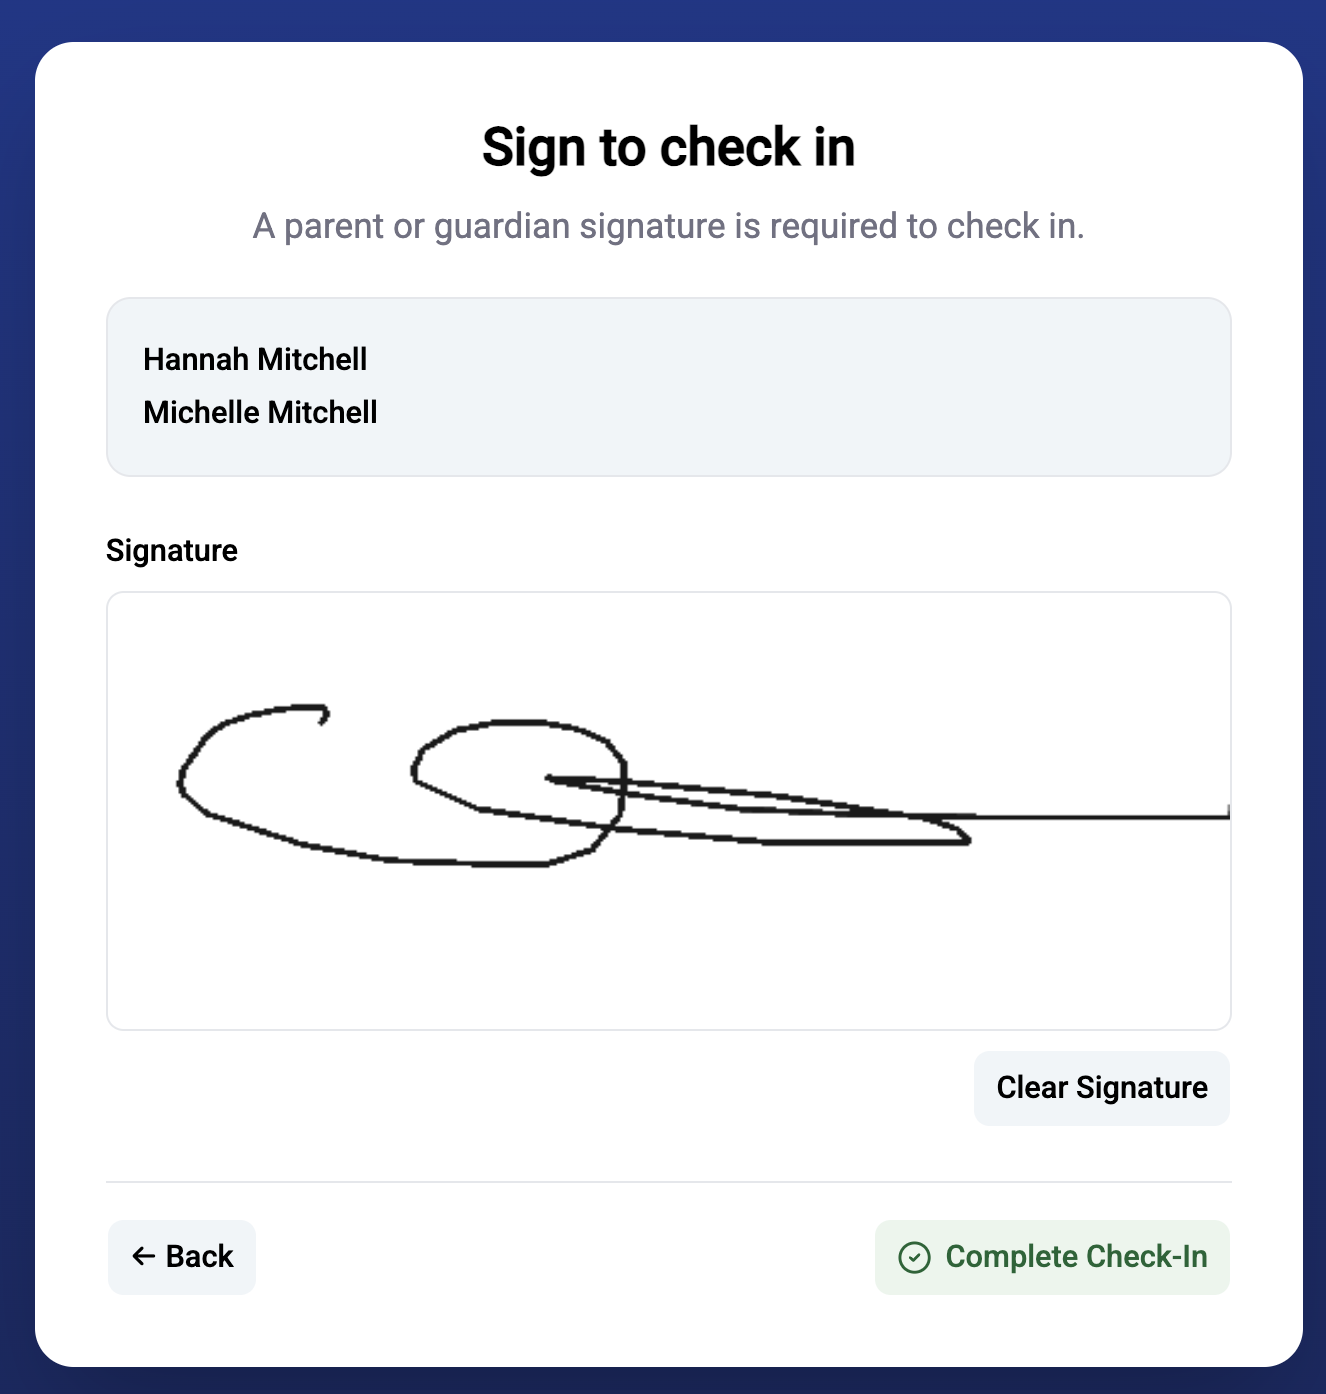
The kiosk greets them by name and lists their children. They can select more than one. They tap Continue, sign on the signature pad, and tap Complete Check-In.
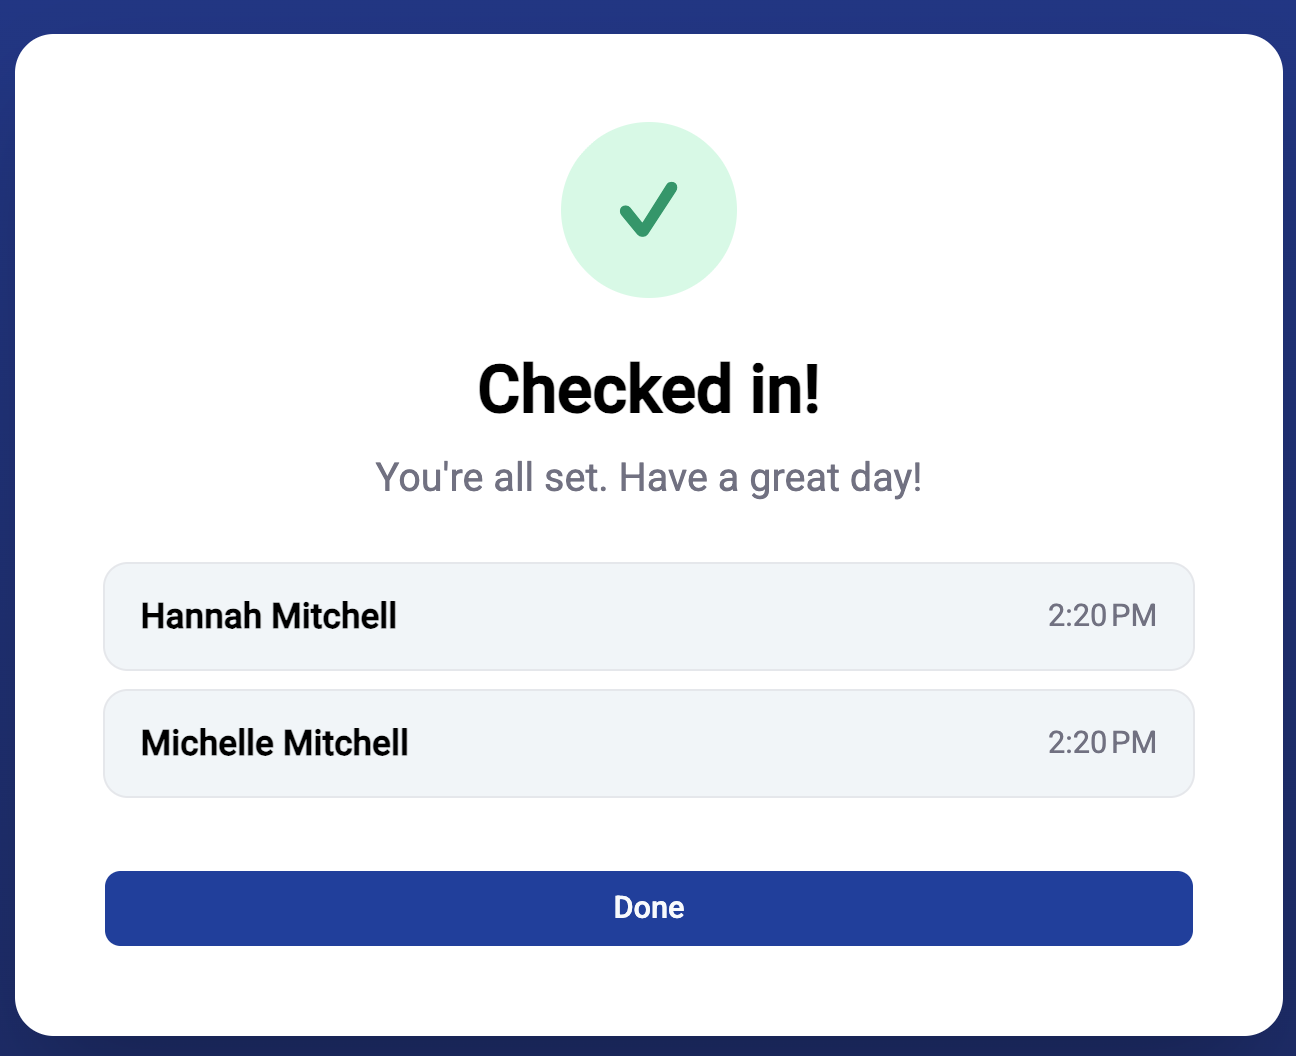
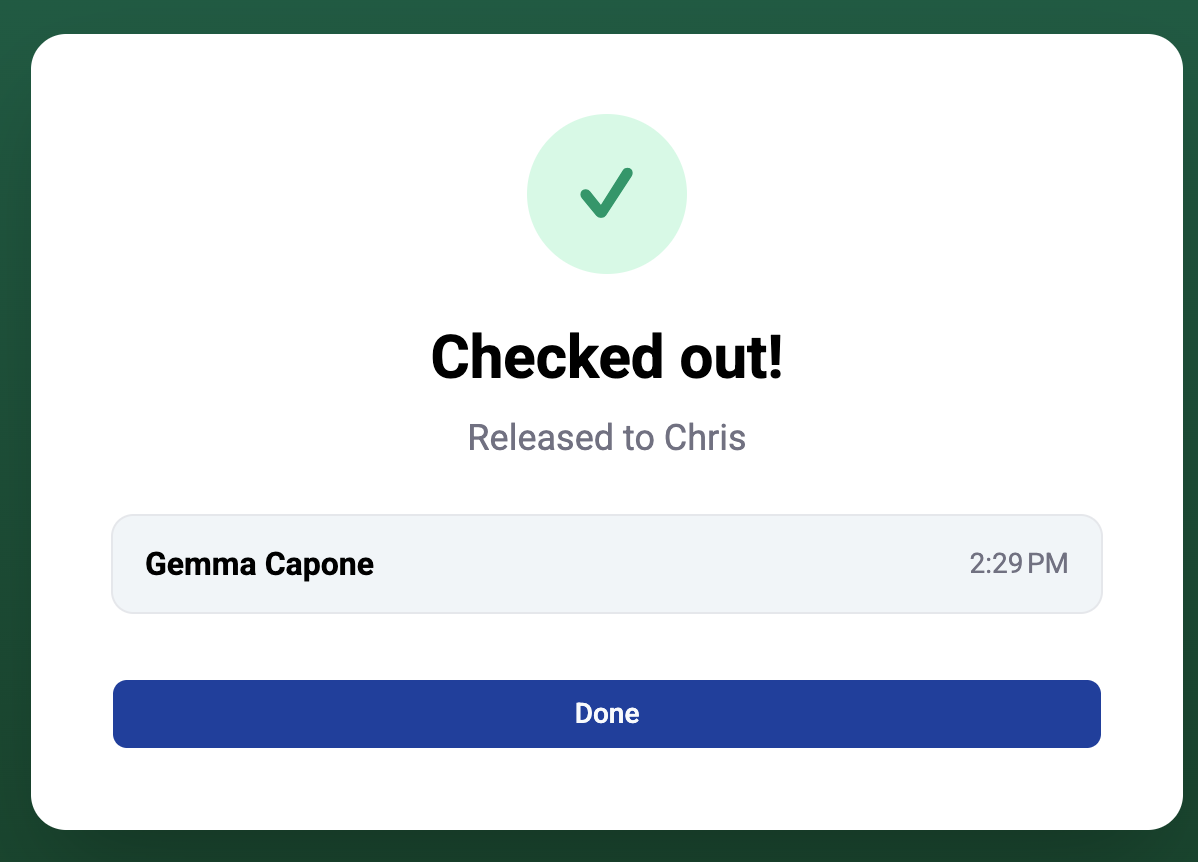
A confirmation screen lists each child with their check-in time.
If the family has a past-due balance, a message on the selection screen tells them to see a staff member.
Check-out at the kiosk
Check-out starts the same way, with phone or email and a search. What happens next depends on your check-out security settings:
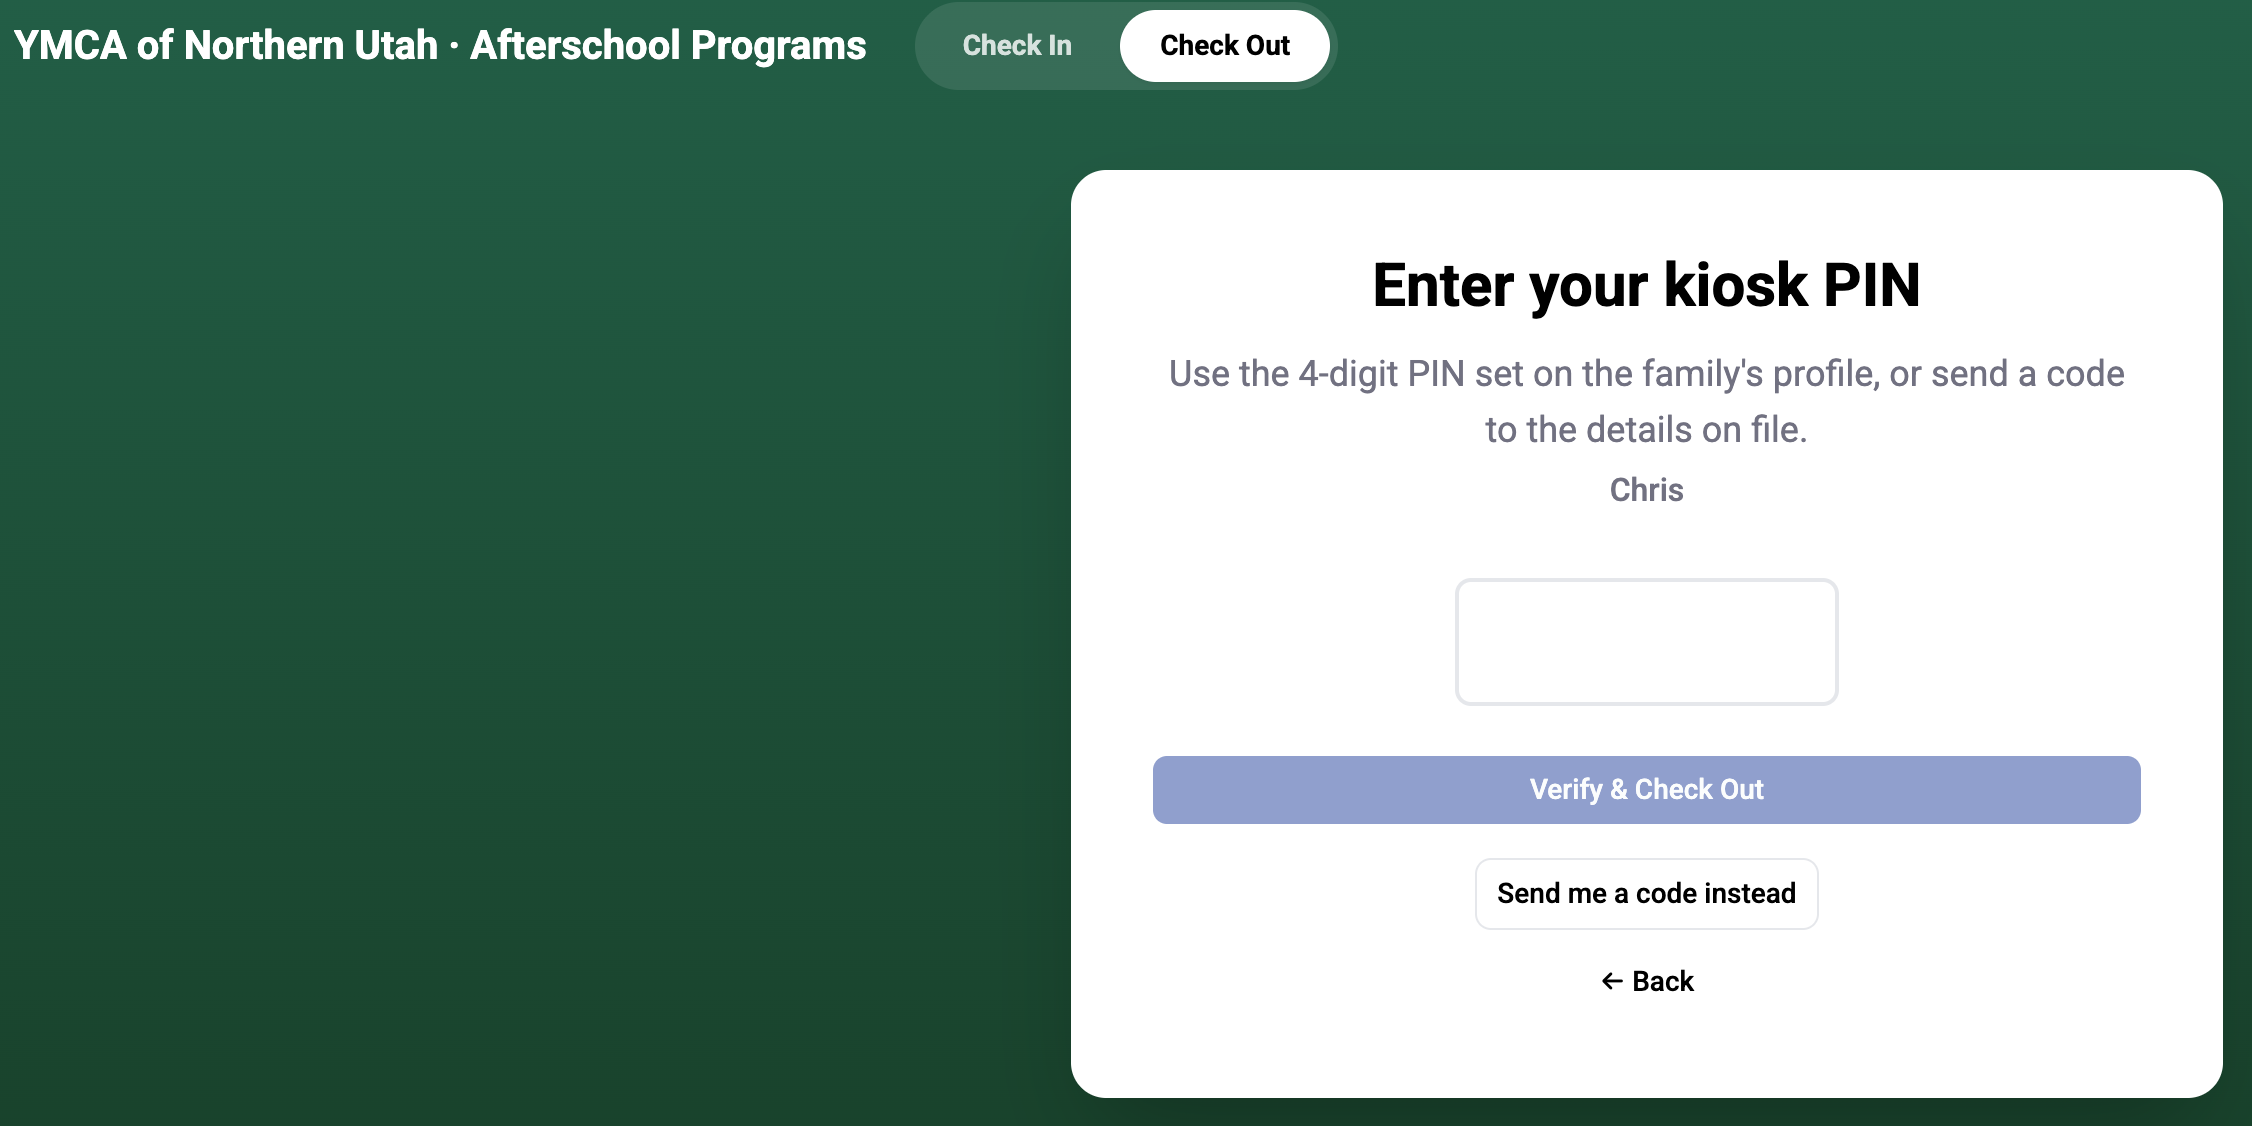
PIN: the parent enters the four-digit PIN set on the family's profile.
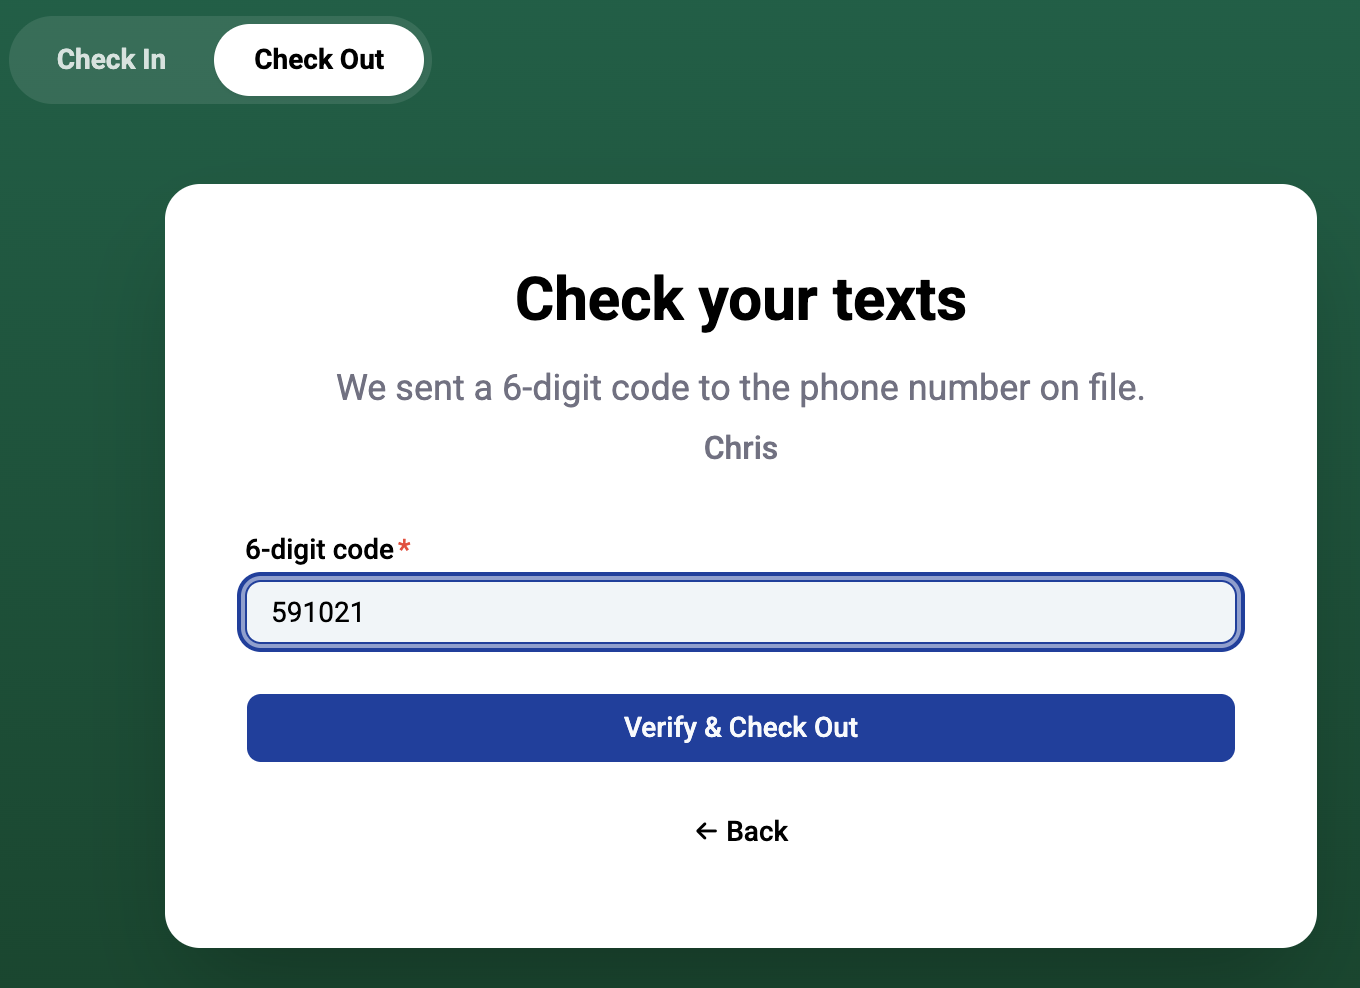
Texted code: a parent who does not know their four-digit PIN can select Send me a code instead, and the kiosk sends a six-digit code to the phone number on file, and they enter that.
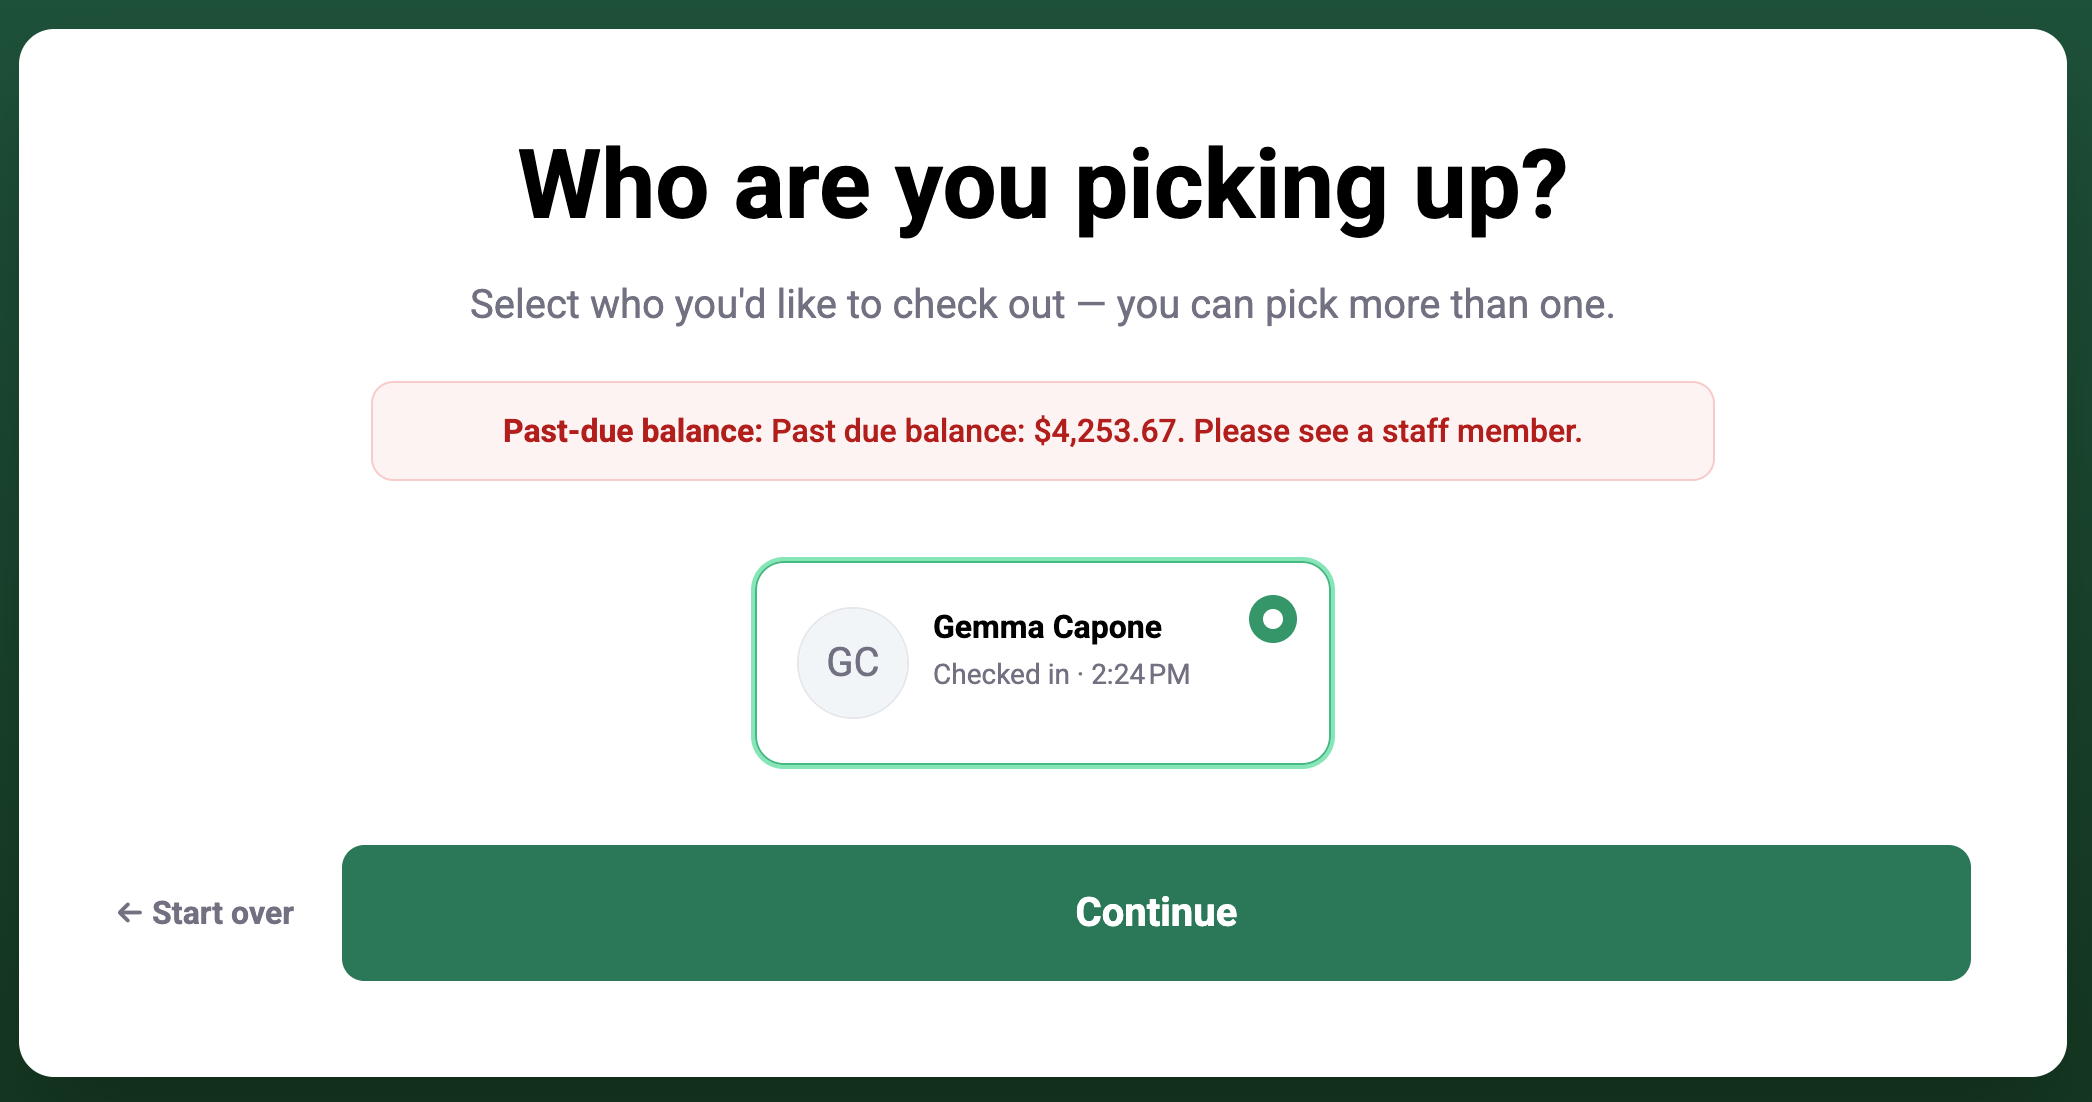
Once verified, they select the child, sign, and complete the check-out.
Other things on the Tracking tab
Offline Import brings in attendance recorded while you were offline, which matters at sites with unreliable wifi.
Mark Absent records a planned or unplanned absence rather than leaving a child showing as not arrived.
The date filter lets you go back and record or correct attendance for a previous day.
Tips for sites
When possible, decide as a site which scenario you're using and stick to it. Mixing bulk check-in with individual check-out leaves you with signatures on one end of the day and not the other.
The individual view surfaces allergies and medical alerts at the moment a child arrives. If your staff only ever use bulk check-in, they never see that, so build another point in your day where someone reviews it.
At the kiosk, check the mode and the screen color each time you reset the tablet. Remember that blue = check-in mode and green = check-out mode.