Managing Invoices and Past Payments
Last updated: September 14, 2026
When a member asks why they were charged, needs a receipt, or can't cover a program fee all at once, the answer lives in the same place. Every charge tied to a person, paid or upcoming, sits on their Invoices tab, and you can adjust an upcoming one without involving your billing team.
Find the invoices
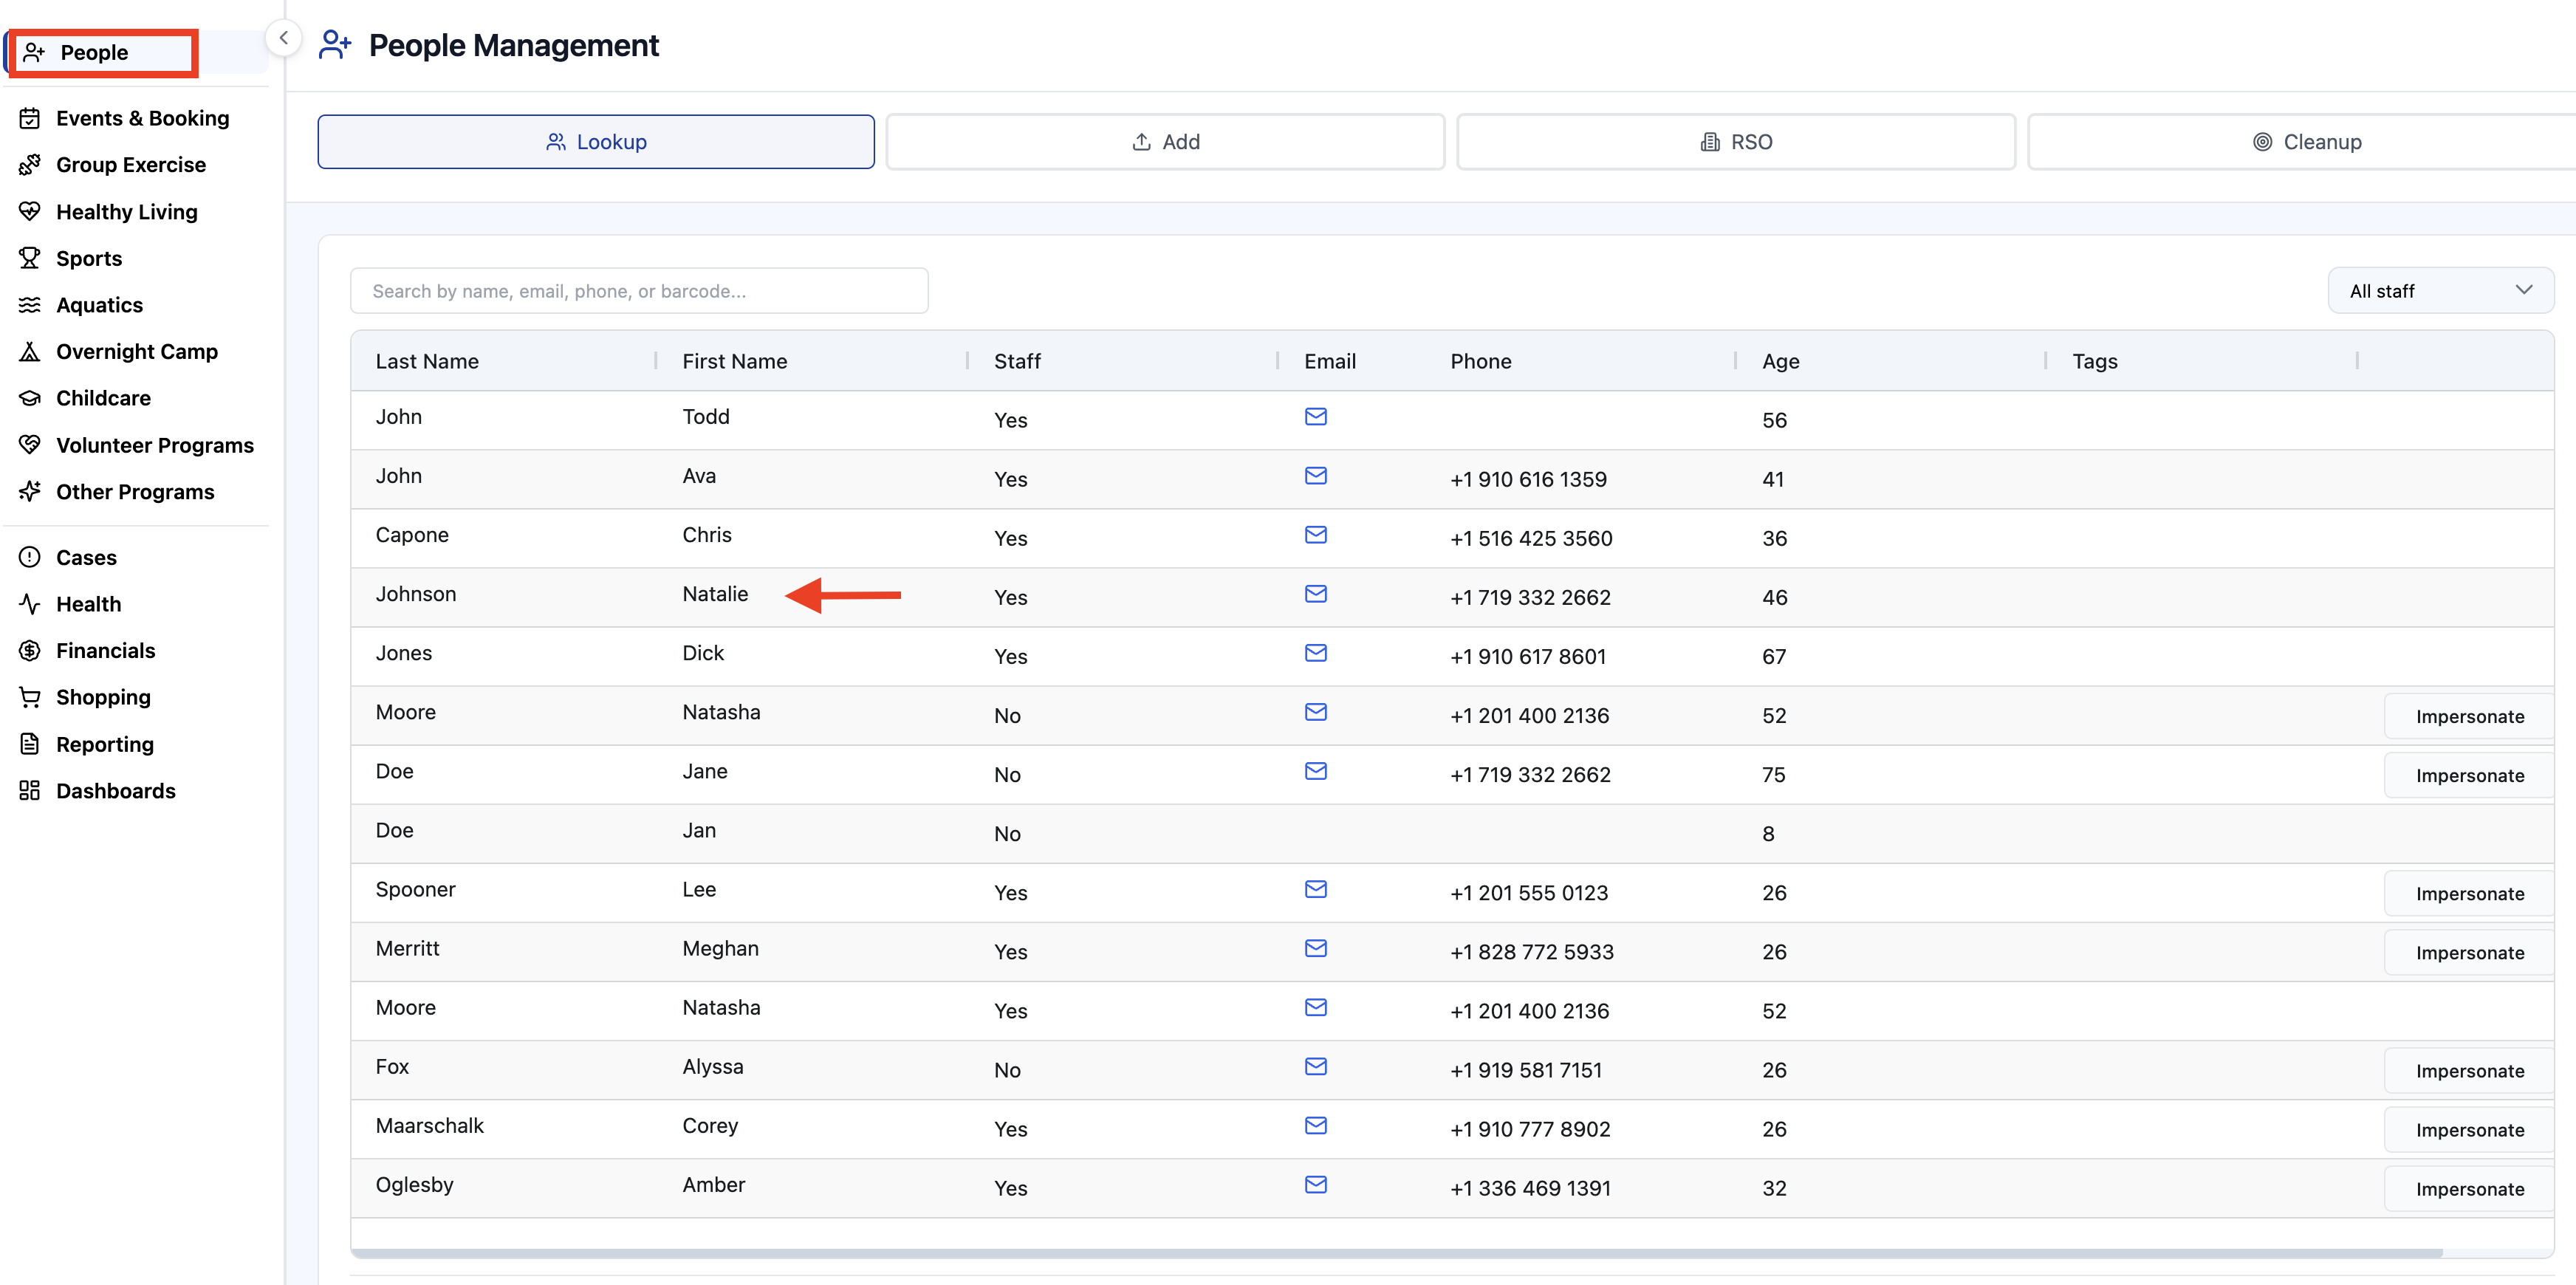
Click People in the left rail menu, search for the member, and open their record. Click the Financials tab, then the Invoices sub-tab.
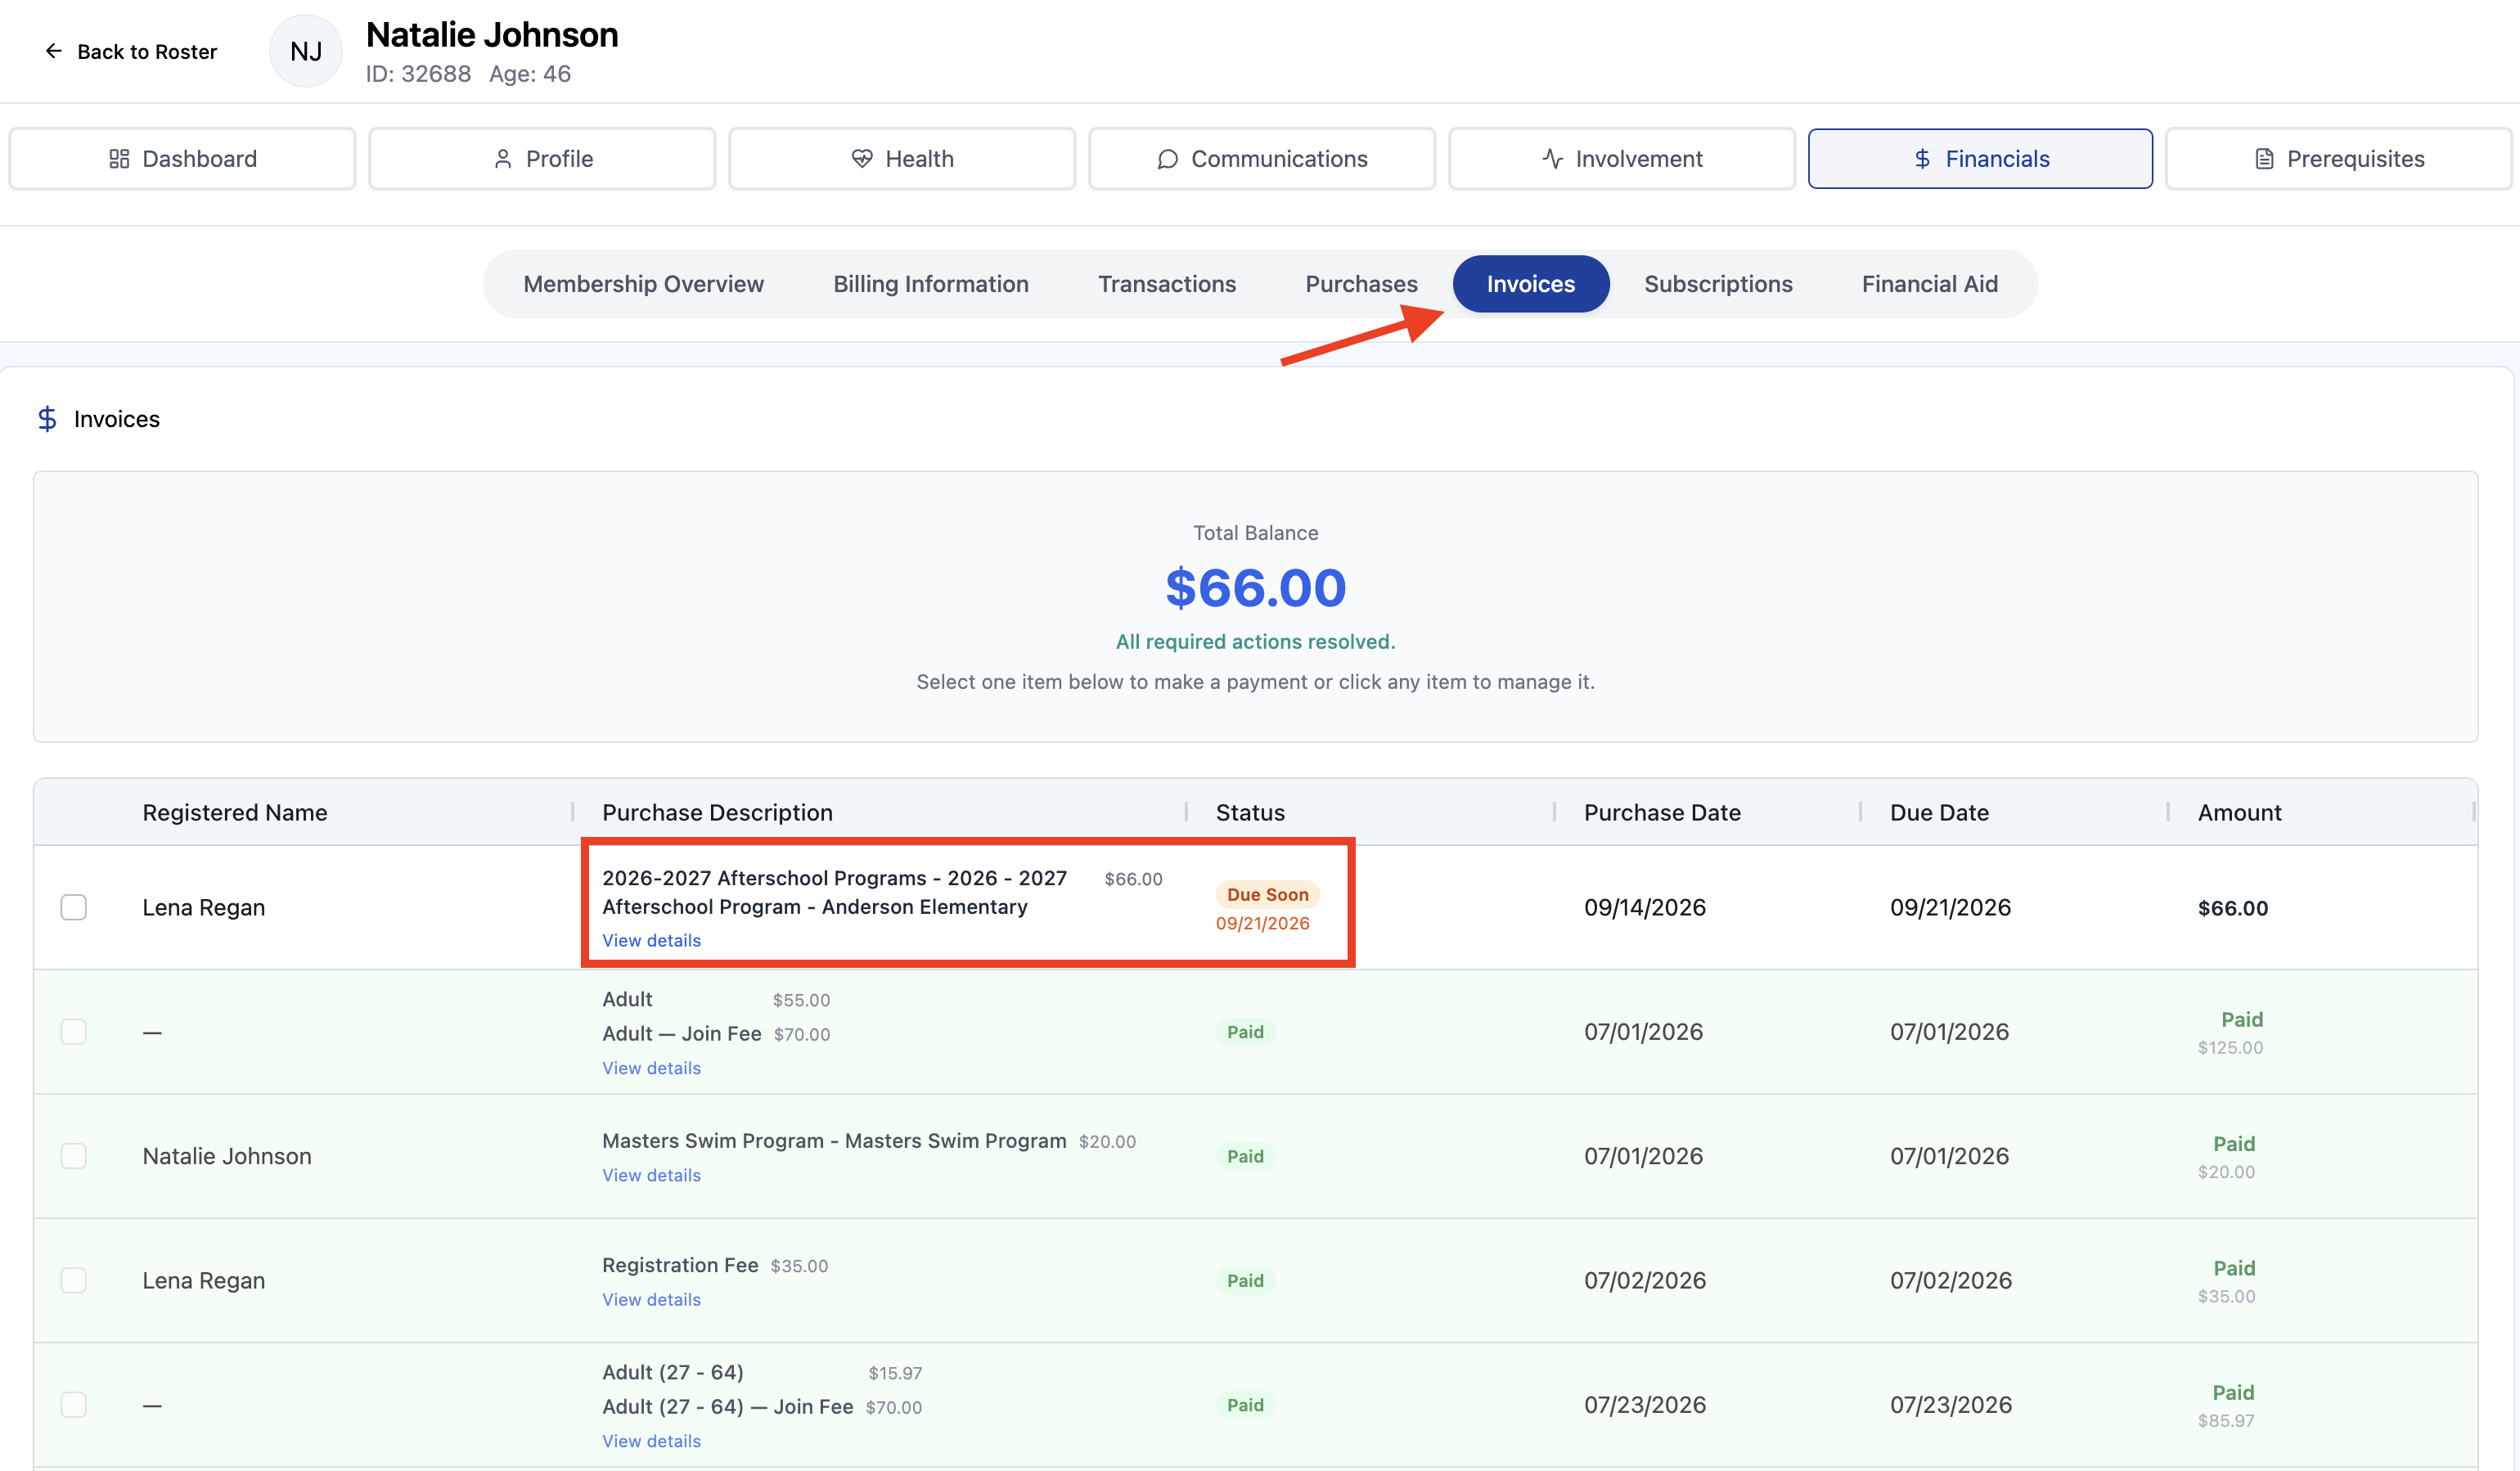
The top of the screen shows their Total Balance across everything outstanding, along with a note about whether anything needs action. Below that is the full list of invoices, both upcoming and already paid.
Each row shows who the charge is registered to, which matters on household accounts where a parent is billed for a child's program, along with a description of what was purchased, the status, purchase and due dates, and the amount. View details under any description expands the line items. A Paid status means it's settled; an upcoming charge shows how soon it's due.
Click any invoice to open it.
What's on an invoice
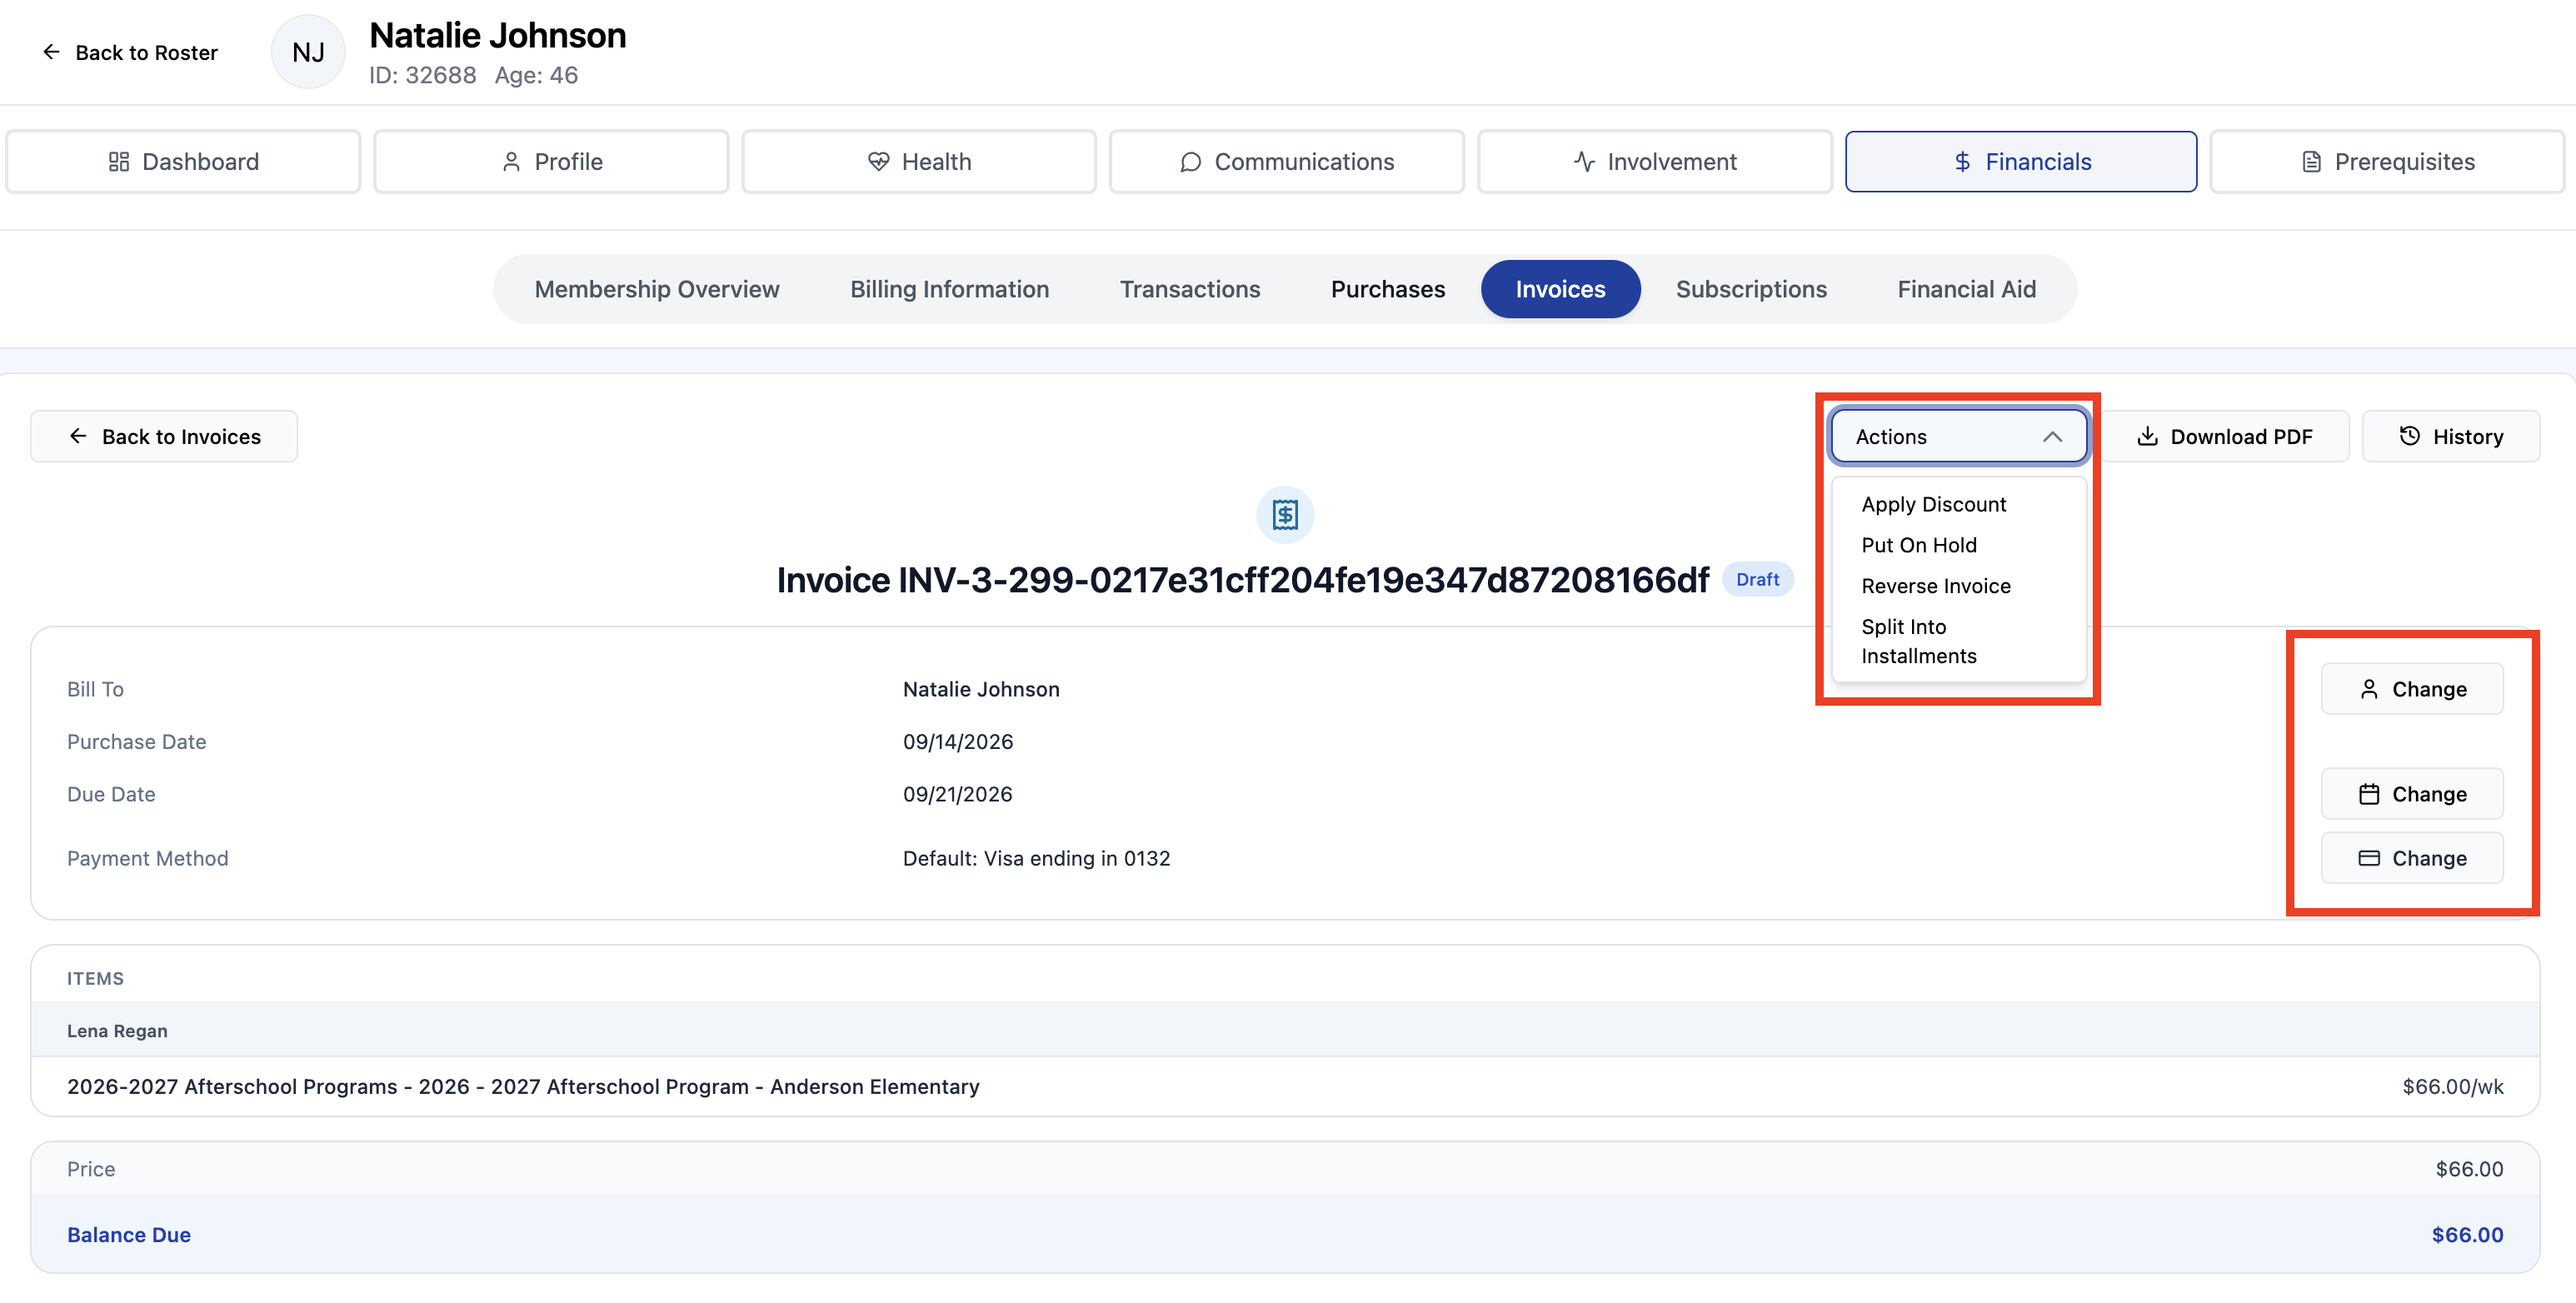
The invoice detail screen shows the invoice number and its status, who it's billed to, the purchase and due dates, the payment method on file, and the itemized charges grouped by the person they belong to. The price and balance due sit at the bottom.
Three buttons at the top right handle the routine requests:
Download PDF produces the invoice or receipt for a member who wants a copy.
History shows what's happened to this invoice over time, which is where to look when a charge doesn't match what a member remembers.
Actions opens the adjustment options covered below.
Adjust an upcoming invoice
Each of the three fields in the invoice header has a Change button next to it:
Bill To reassigns the invoice to a different person on the account. Use this when the wrong household member got billed.
Due Date moves the deadline. Useful when someone gets paid on the 15th and the charge lands on the 10th.
Payment Method switches which card or account gets charged.
For anything beyond those, click Actions:
Apply Discount reduces what's owed on this invoice.
Put On Hold pauses the invoice rather than cancelling it. This is the right choice when something is being sorted out and you don't want the charge to process in the meantime.
Reverse Invoice backs the charge out entirely.
Split Into Installments breaks the balance into smaller scheduled charges, covered in its own section below.
Because these actions change what a member owes, most associations limit who can use them. Know your own policy on which of these a front desk staffer can do versus what needs a supervisor.
Apply a discount
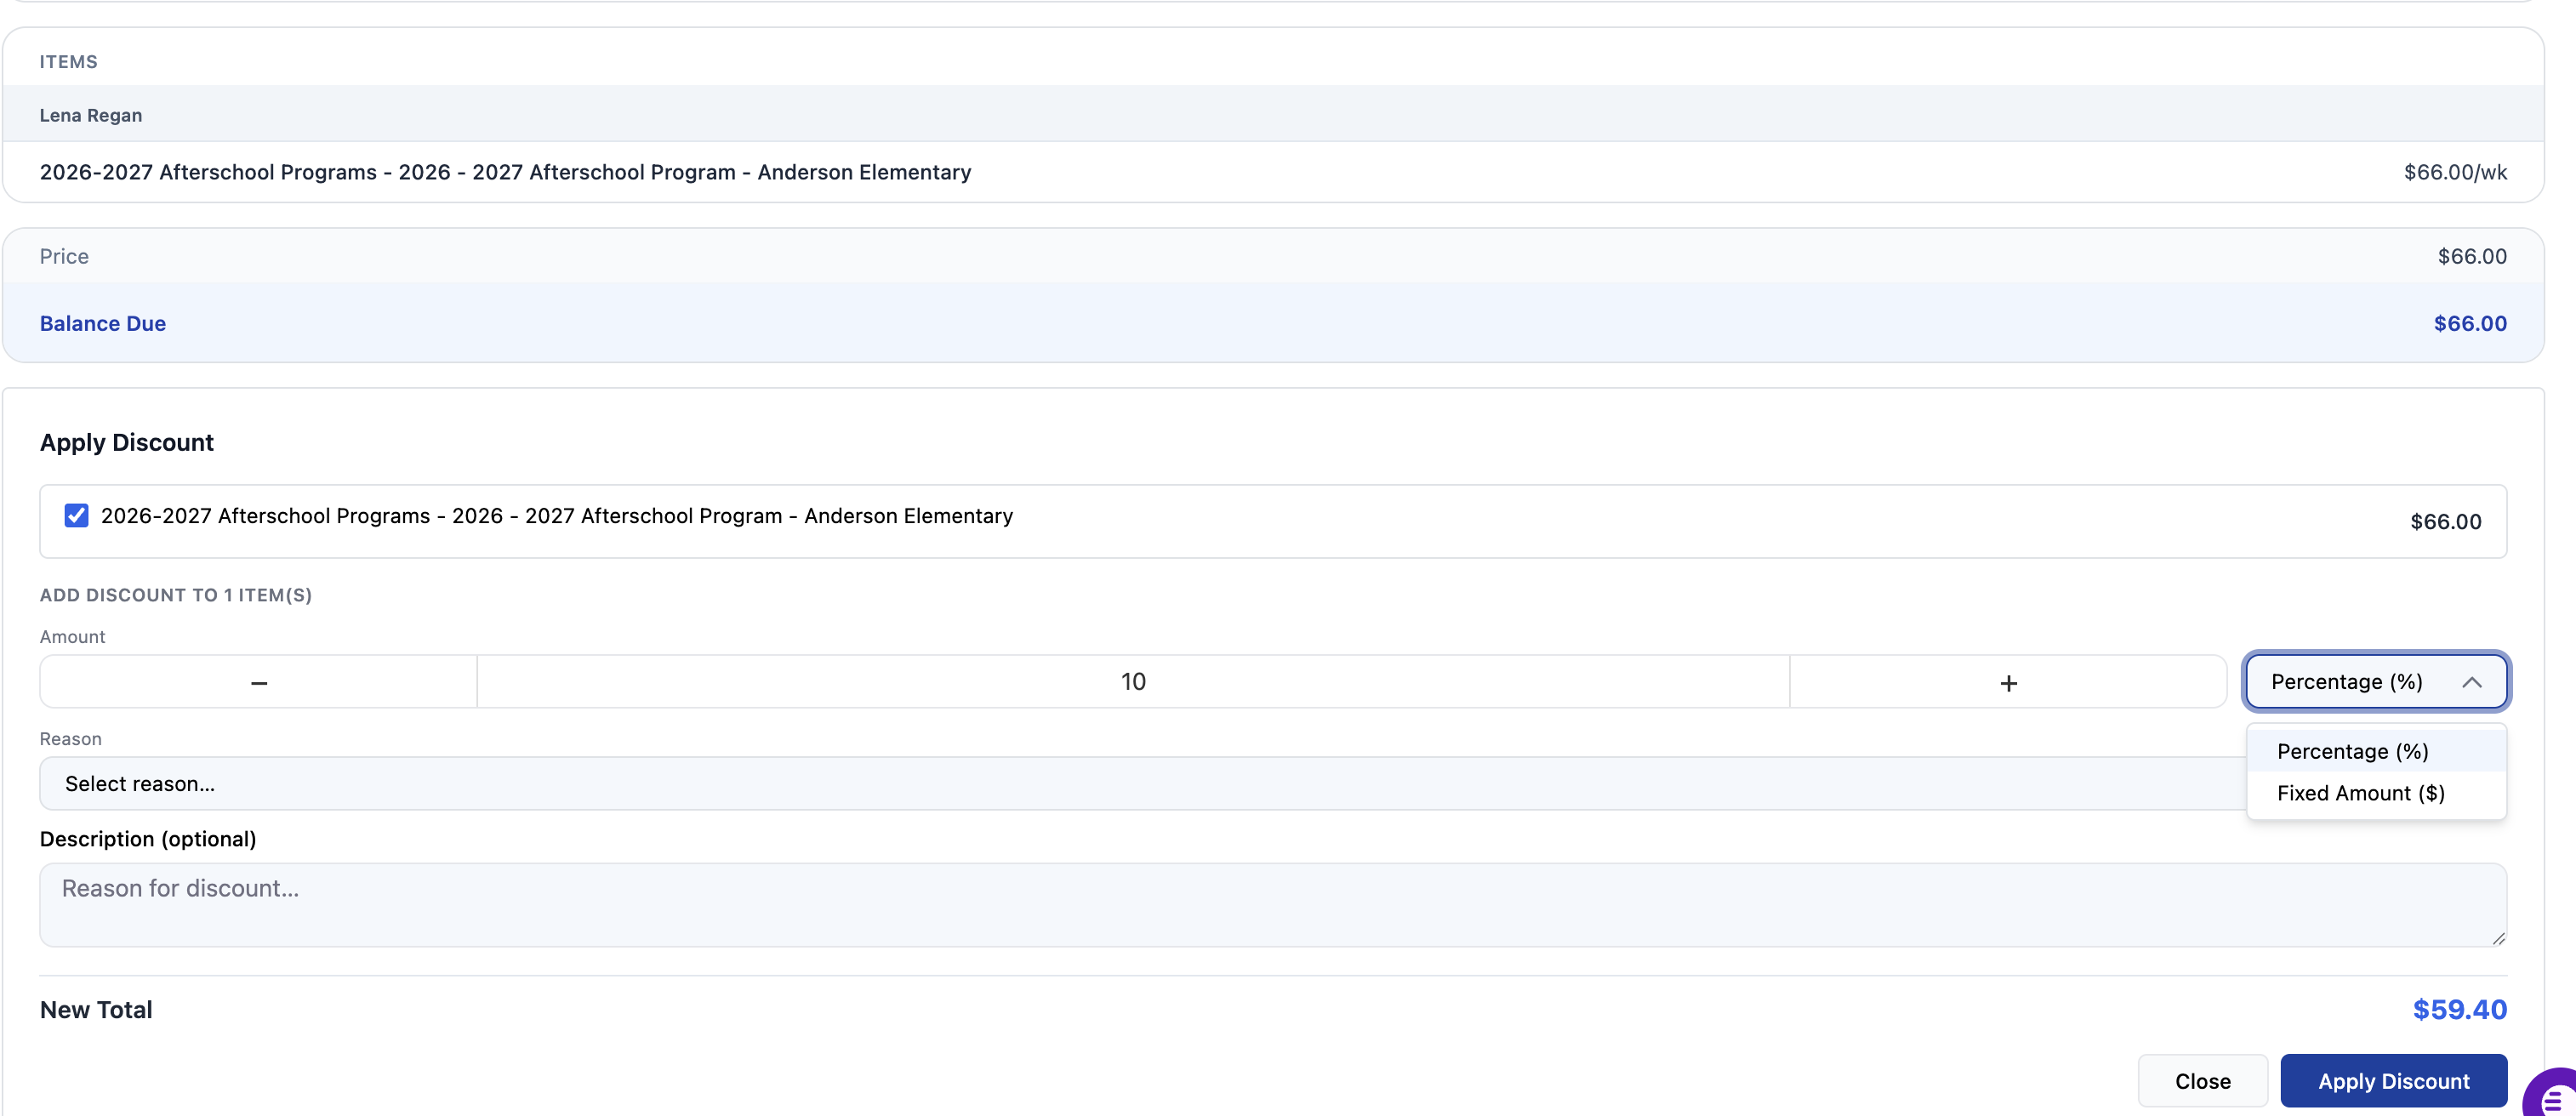
Click Actions, then Apply Discount.
Start by checking the line items the discount applies to. An invoice can carry several items, and the discount only touches the ones you select. The header above the amount field confirms how many items you're discounting.
Set the Amount using the field and stepper, then choose how it's calculated from the dropdown next to it:
Percentage (%) takes a percentage off the selected items.
Fixed Amount ($) takes a flat dollar amount off.
Pick a Reason from the dropdown. This is what shows up in reporting later, so the reason matters as much as the number. Add a Description if there's context worth recording, like who approved it or what the member was told.
The New Total at the bottom updates as you work, so you can confirm the member's new balance before committing. Read that number back to them.
Click Apply Discount to save, or Close to back out without changing anything.
Split an invoice into installments
This is the tool for a member who wants a program fee but can't pay it in one charge.
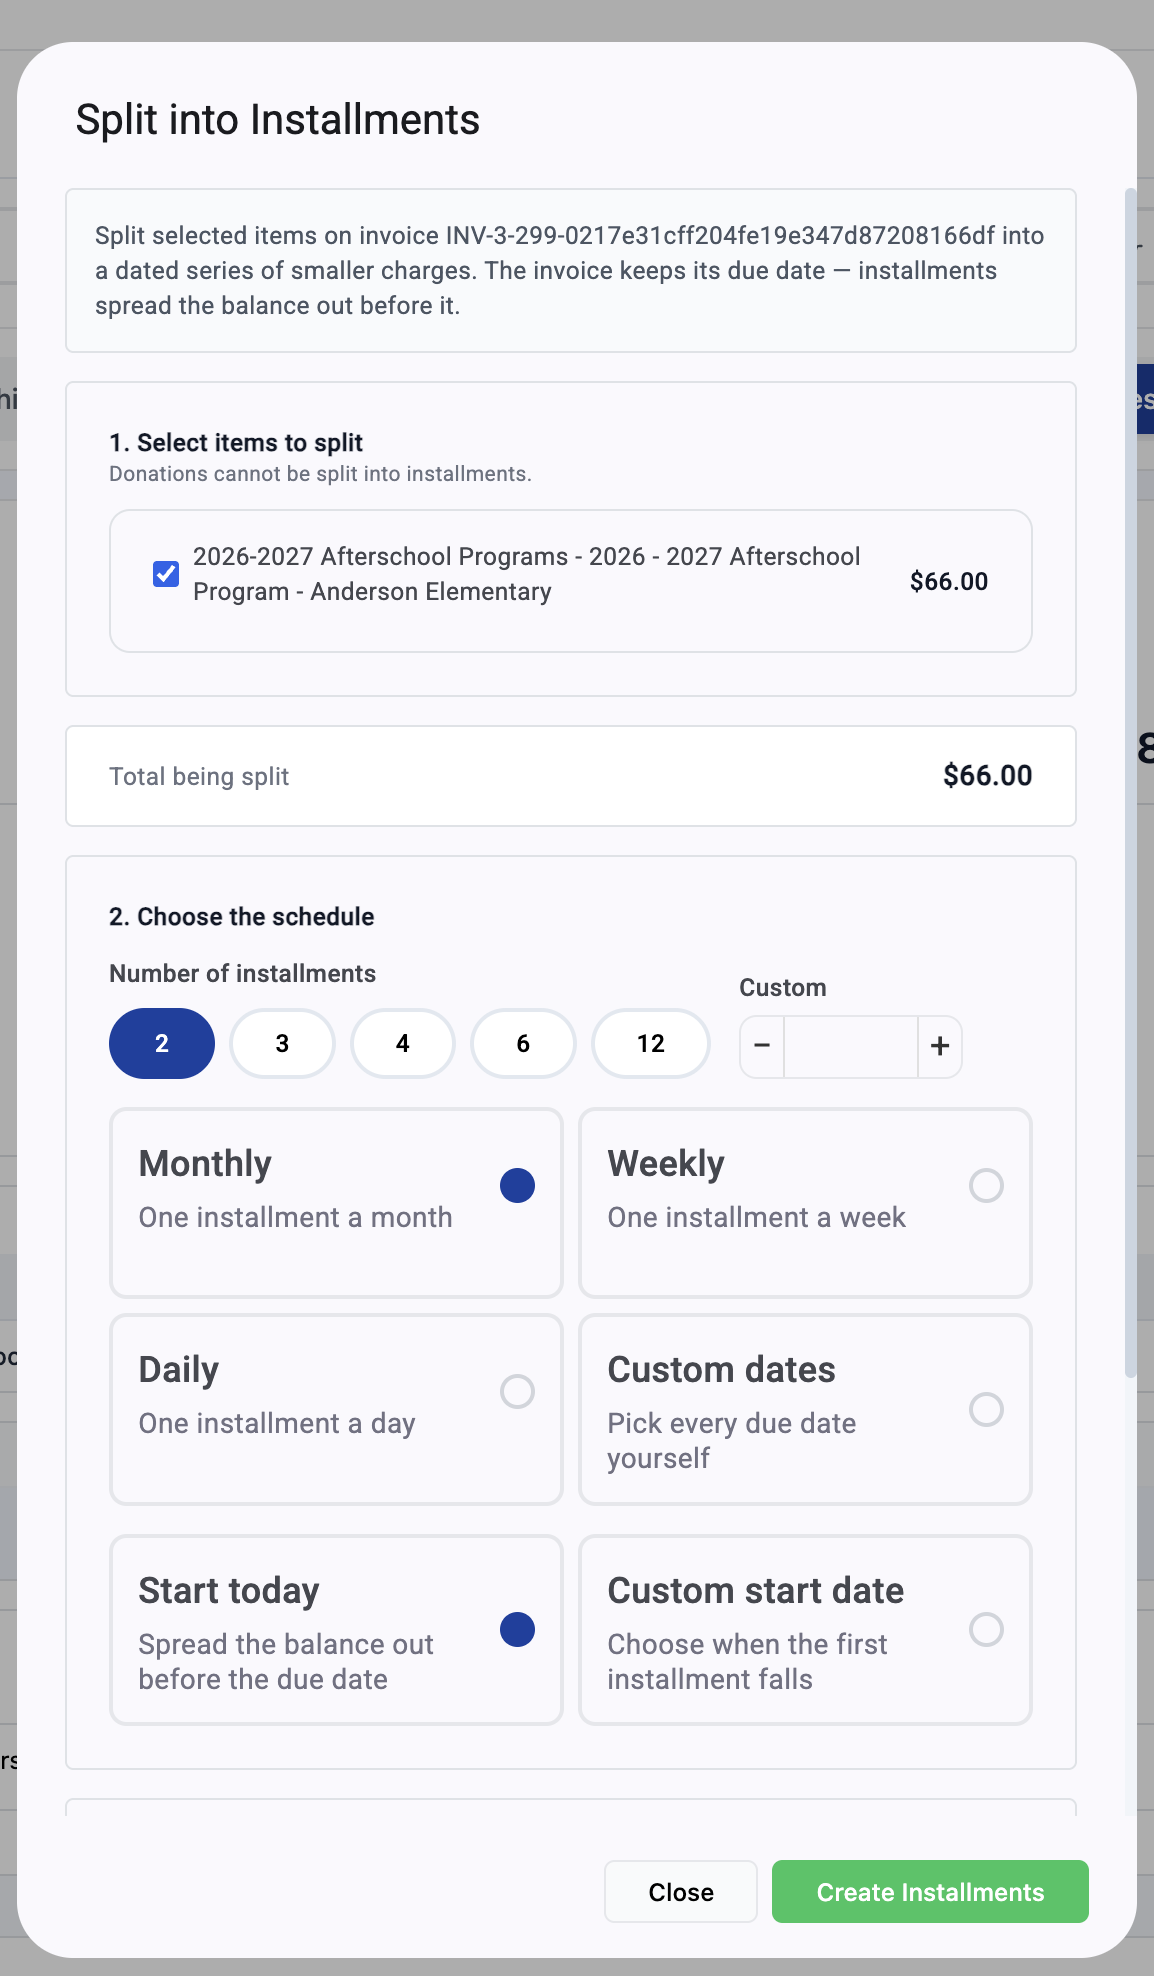
Click Actions, then Split Into Installments. The invoice keeps its original due date, and the installments spread the balance out before that date rather than extending it.
Step 1: pick what to split. Check the line items you're breaking up. An invoice can hold more than one item, and donations can't be split.
Step 2: choose the schedule. Pick how many installments, either from the preset counts or a custom number. Then pick the frequency: monthly, weekly, daily, or custom dates where you set every due date yourself. Finally choose whether the first installment starts today or on a date you pick.
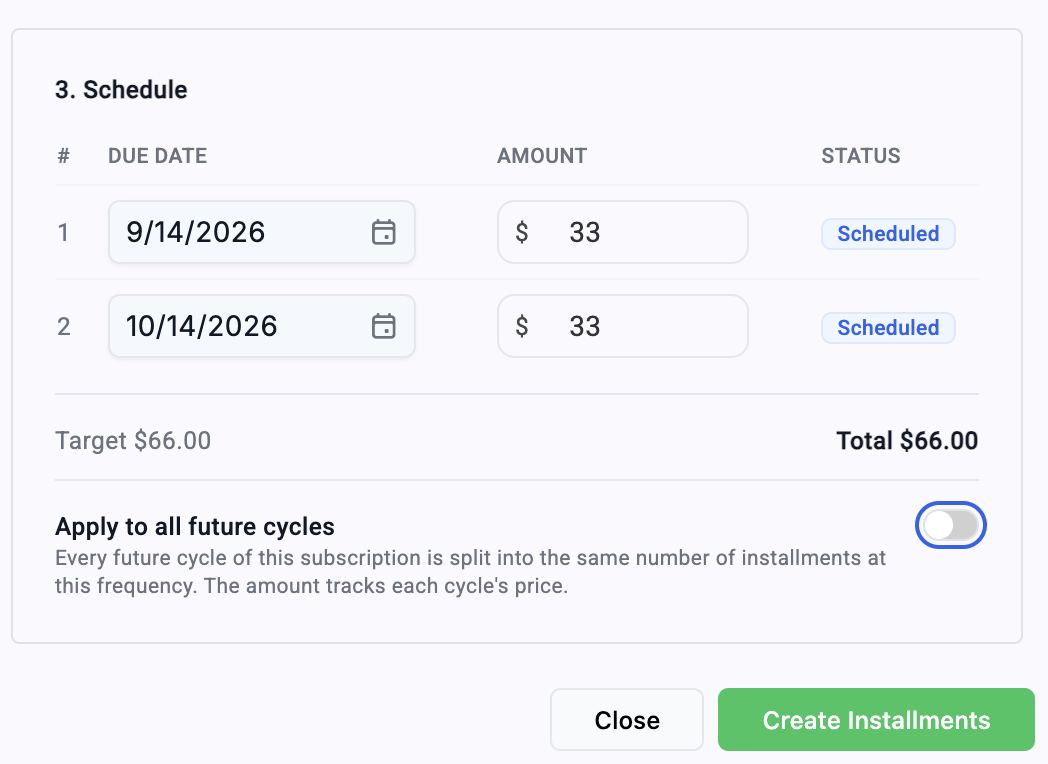
Step 3: review the schedule. The system lays out each installment with its due date and amount, and both are editable if you need to adjust one. Watch the target and total figures at the bottom, since they need to match for the split to cover the balance.
If the invoice belongs to a recurring subscription, an Apply to all future cycles toggle splits every future cycle the same way, with amounts tracking each cycle's price. Leave it off for a one time accommodation.
Click Create Installments to finish.
Handle a past payment
Open a paid invoice from the same list. From there you can produce a receipt with Download PDF and issue a refund when one is warranted.
Check History before refunding. It tells you what's already been done to the invoice, which prevents a second refund on a charge someone else already handled.
Tips for the desk
Start with the Total Balance at the top. It tells you in one glance whether the member owes anything before you go digging through rows.
Put On Hold and Reverse Invoice look similar but aren't. Hold pauses, reverse undoes. Pick hold when the outcome is still undecided.