Selling Items at the Front Desk
Last updated: September 14, 2026
Goggles, a bath towel, a replacement swipe card, a snack after swim lessons. The Shopping module handles all of it, and because the sale is tied to a member record rather than an anonymous register, the purchase shows up in their history and can be paid with the card they already have on file.
Start with the customer
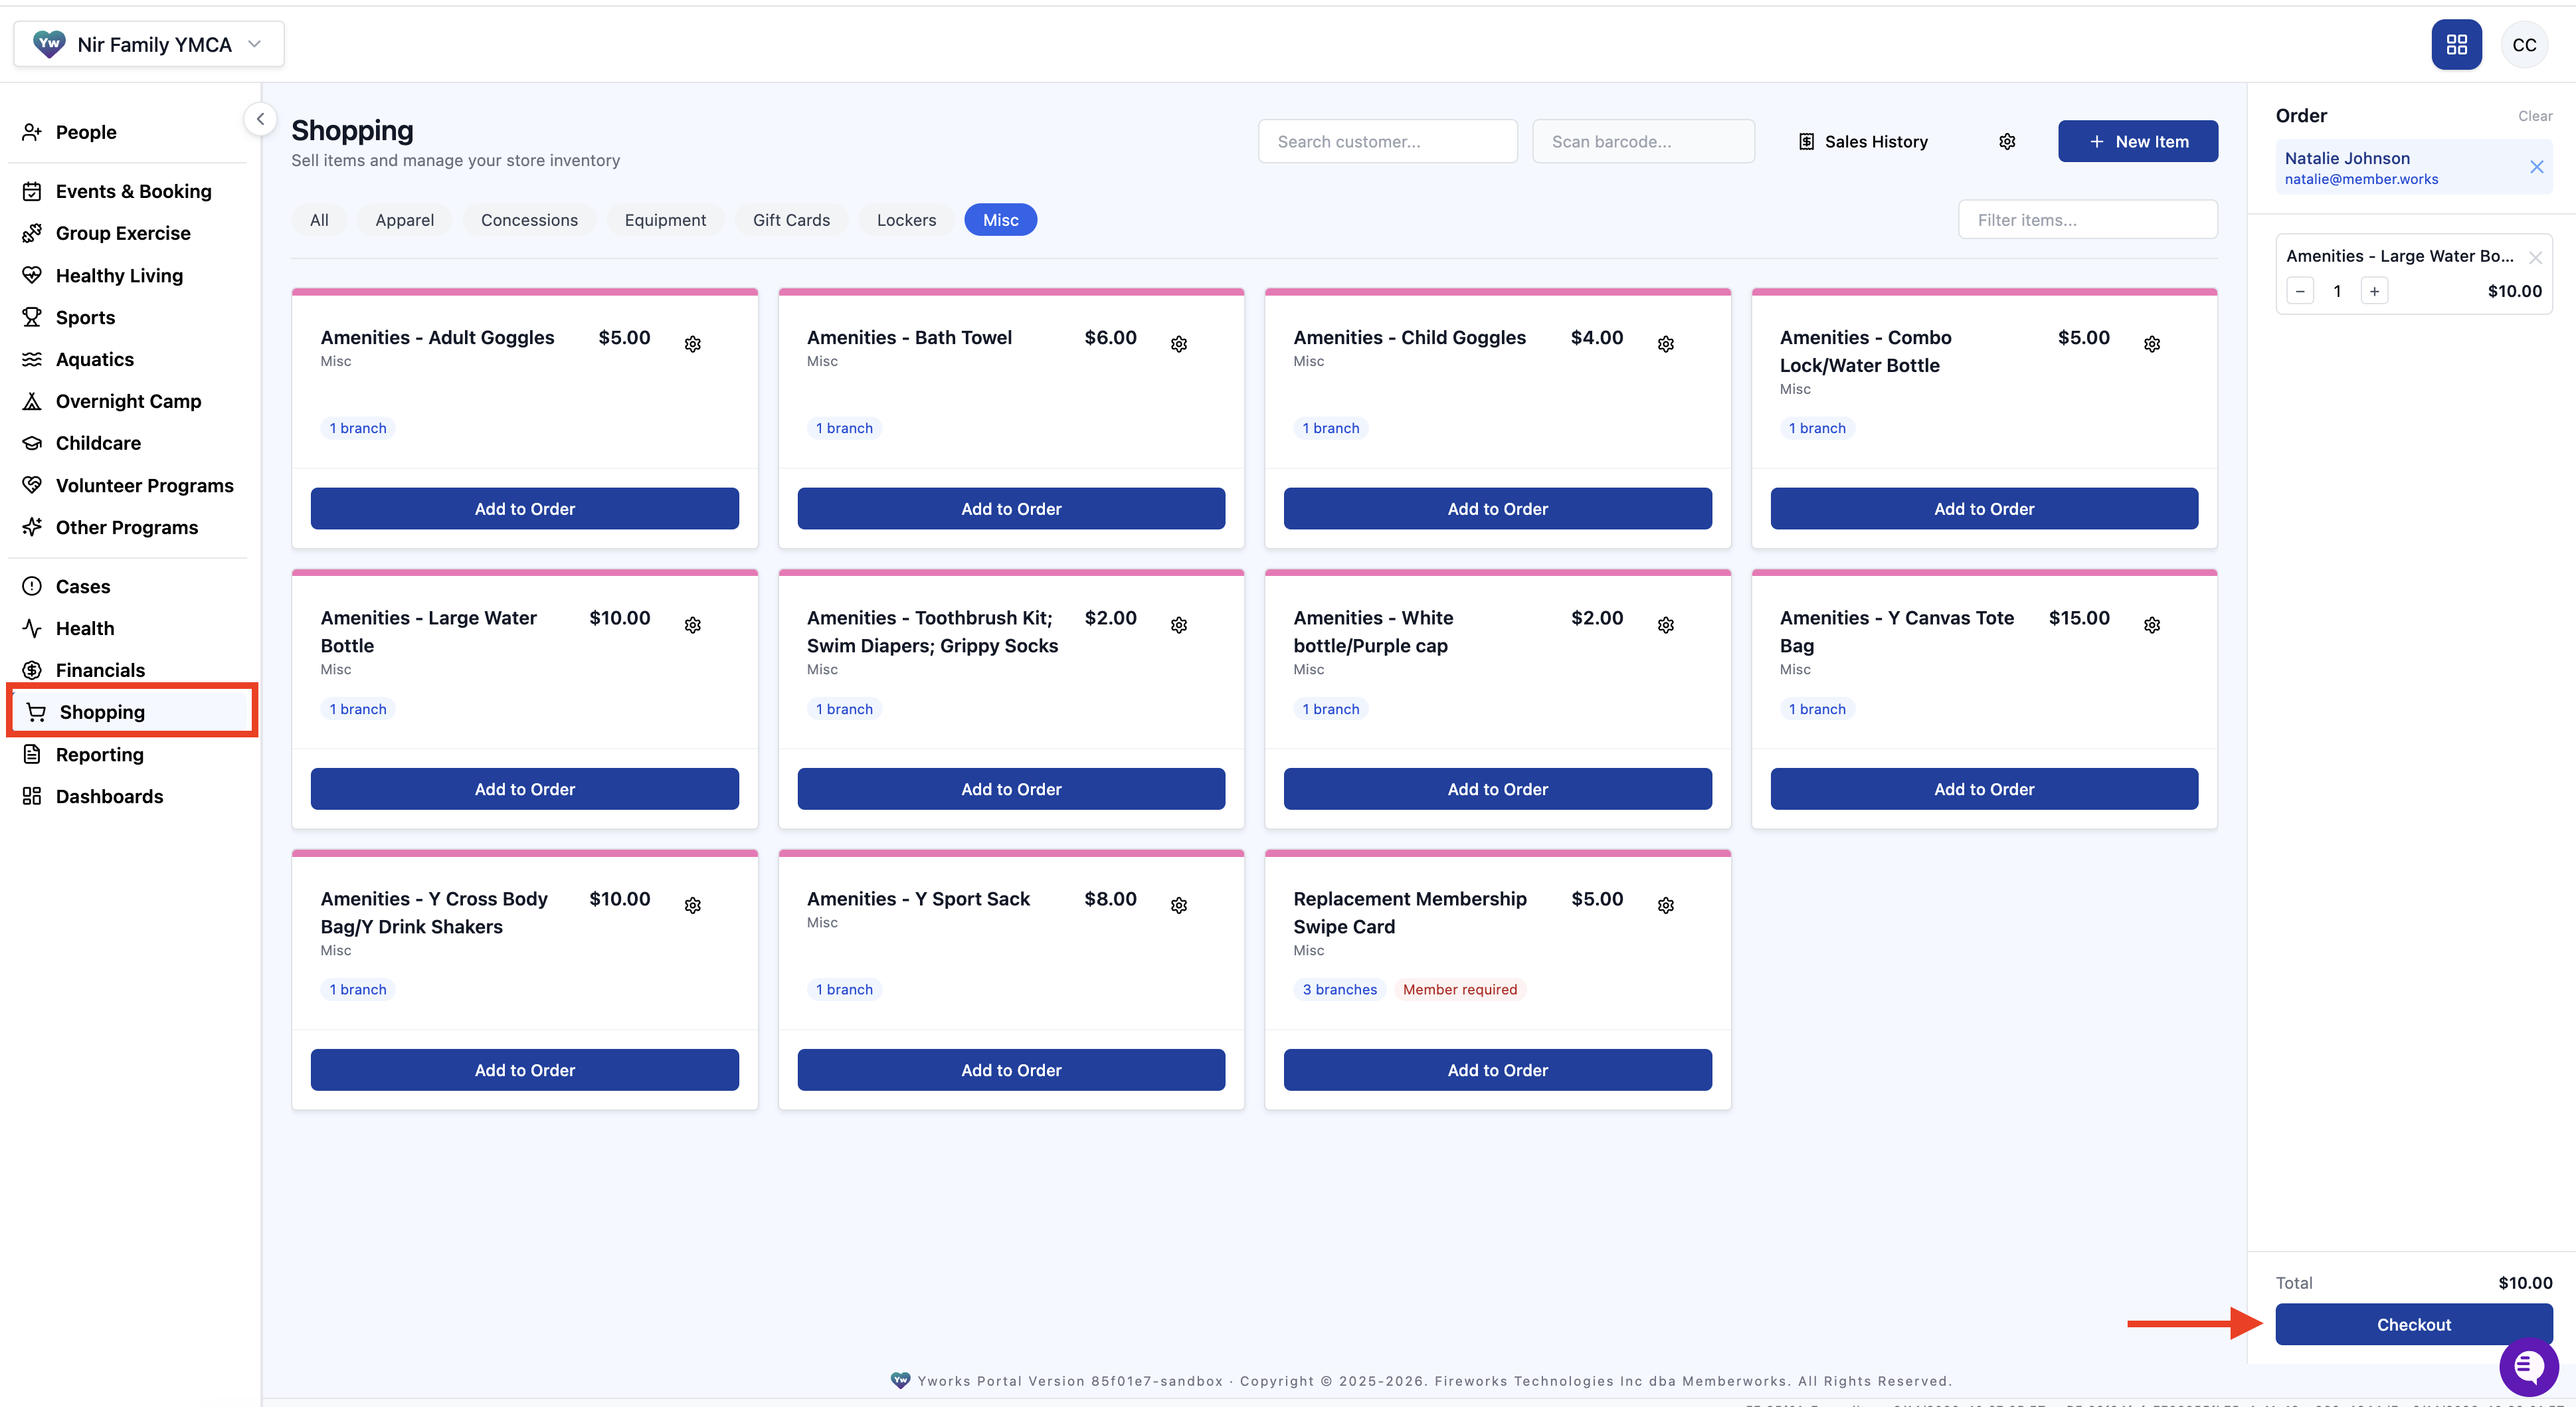
Click Shopping in the left rail menu.
Before you add anything to the order, attach the customer. There are two ways:
Type their name in the Search customer box at the top.
Scan their key card, or scan the QR code in their Memberworks mobile app, using the Scan barcode box.
Do this first. Adding items before you've pulled up the customer means backtracking, and some items can only be sold to a member at all. Any item marked Member required on its card, like a replacement membership swipe card, needs the customer attached before it will go through.
Once they're attached, their name and email appear at the top of the Order panel on the right side of the screen.
Add items to the order
Items are laid out as cards grouped by category tabs across the top: Apparel, Concessions, Equipment, Gift Cards, Lockers, and Misc, with All if you'd rather browse everything at once. Each card shows the item name, price, category, and which branches carry it. If you know what you're looking for, the Filter items box narrows the list faster than clicking through tabs.
Click Add to Order on each item the customer is buying. It lands in the Order panel on the right.
In that panel you can adjust anything before you take payment. Use the plus and minus buttons to change quantity, click the X on a line to drop that item, or click Clear at the top to empty the whole order and start over. The Total updates as you go and sits at the bottom of the panel.
Check out
Click Checkout at the bottom right. Checkout runs in two steps.
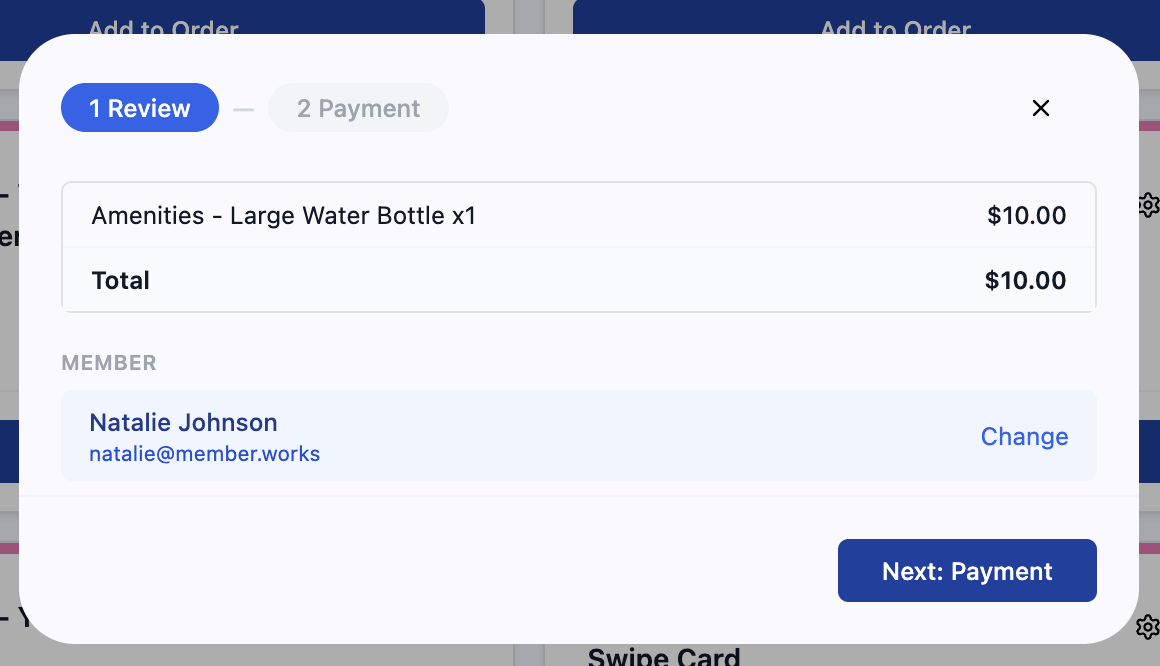
Step 1, Review. You get the itemized order, the total, and the member the sale is attached to. If you grabbed the wrong person, or a parent is paying for a child's item, click Change next to the member name to swap them rather than closing out and starting again. Click Next: Payment.
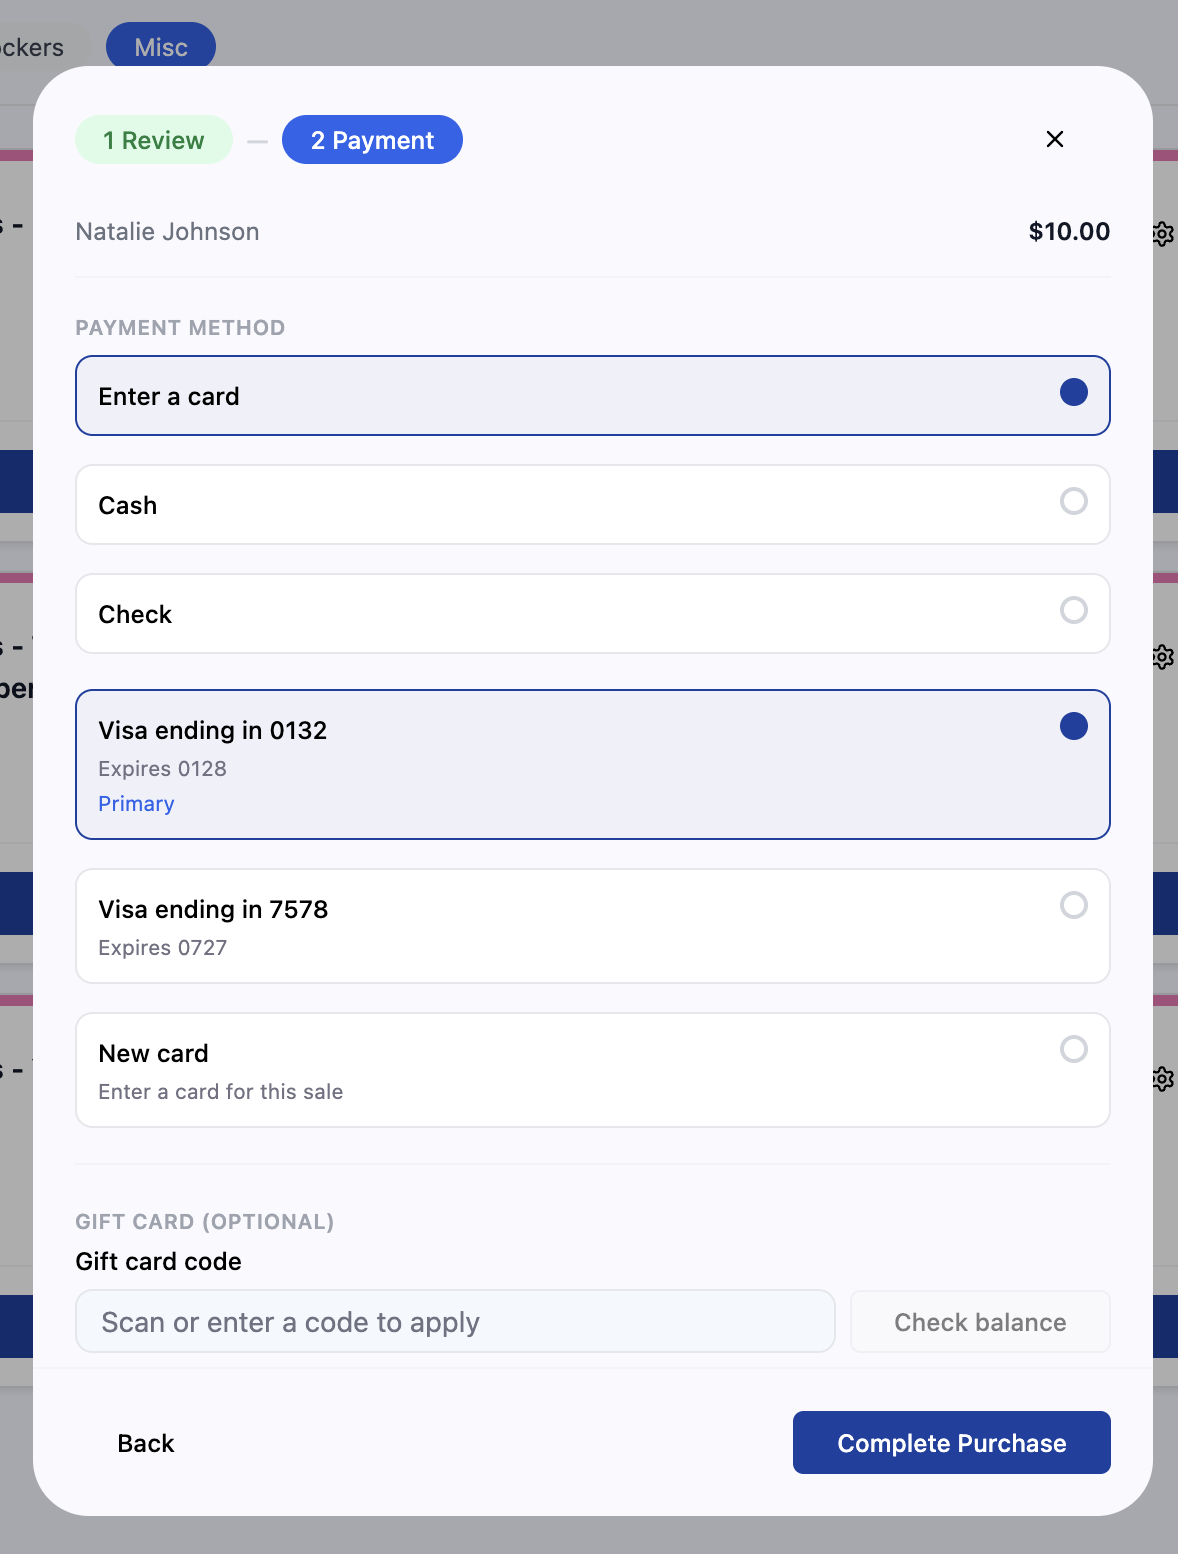
Step 2, Payment. Pick how the customer is paying:
Cash or Check for over the counter payments.
Any card already saved on their account, shown by the last four digits and expiration date, with the primary card marked.
New card to enter a card for this sale only.
If they have a gift card, enter or scan the code in the Gift card field. Check balance tells you what's left on it before you apply it, which saves the awkward moment of a card that doesn't cover the total.
Click Complete Purchase to finish.
Other things on this screen
Sales History at the top opens past transactions. Go here when a member asks about a charge or you need to look up what someone bought.
Tips for the desk
Attach the customer first, every time. It's the one step that can't be done out of order.
If an item card shows Member required and the person isn't a member, that's a membership conversation, not a workaround.
Check the gift card balance before applying it so you know whether you'll need a second payment method.