Renting a Locker at the Front Desk
Last updated: September 14, 2026
Locker rentals run through the same Shopping module as towels and goggles, with one difference that matters: lockers are tracked by individual unit. You're not just selling "a locker," you're assigning locker number 3 to a specific member, and the system keeps track of which units are taken.
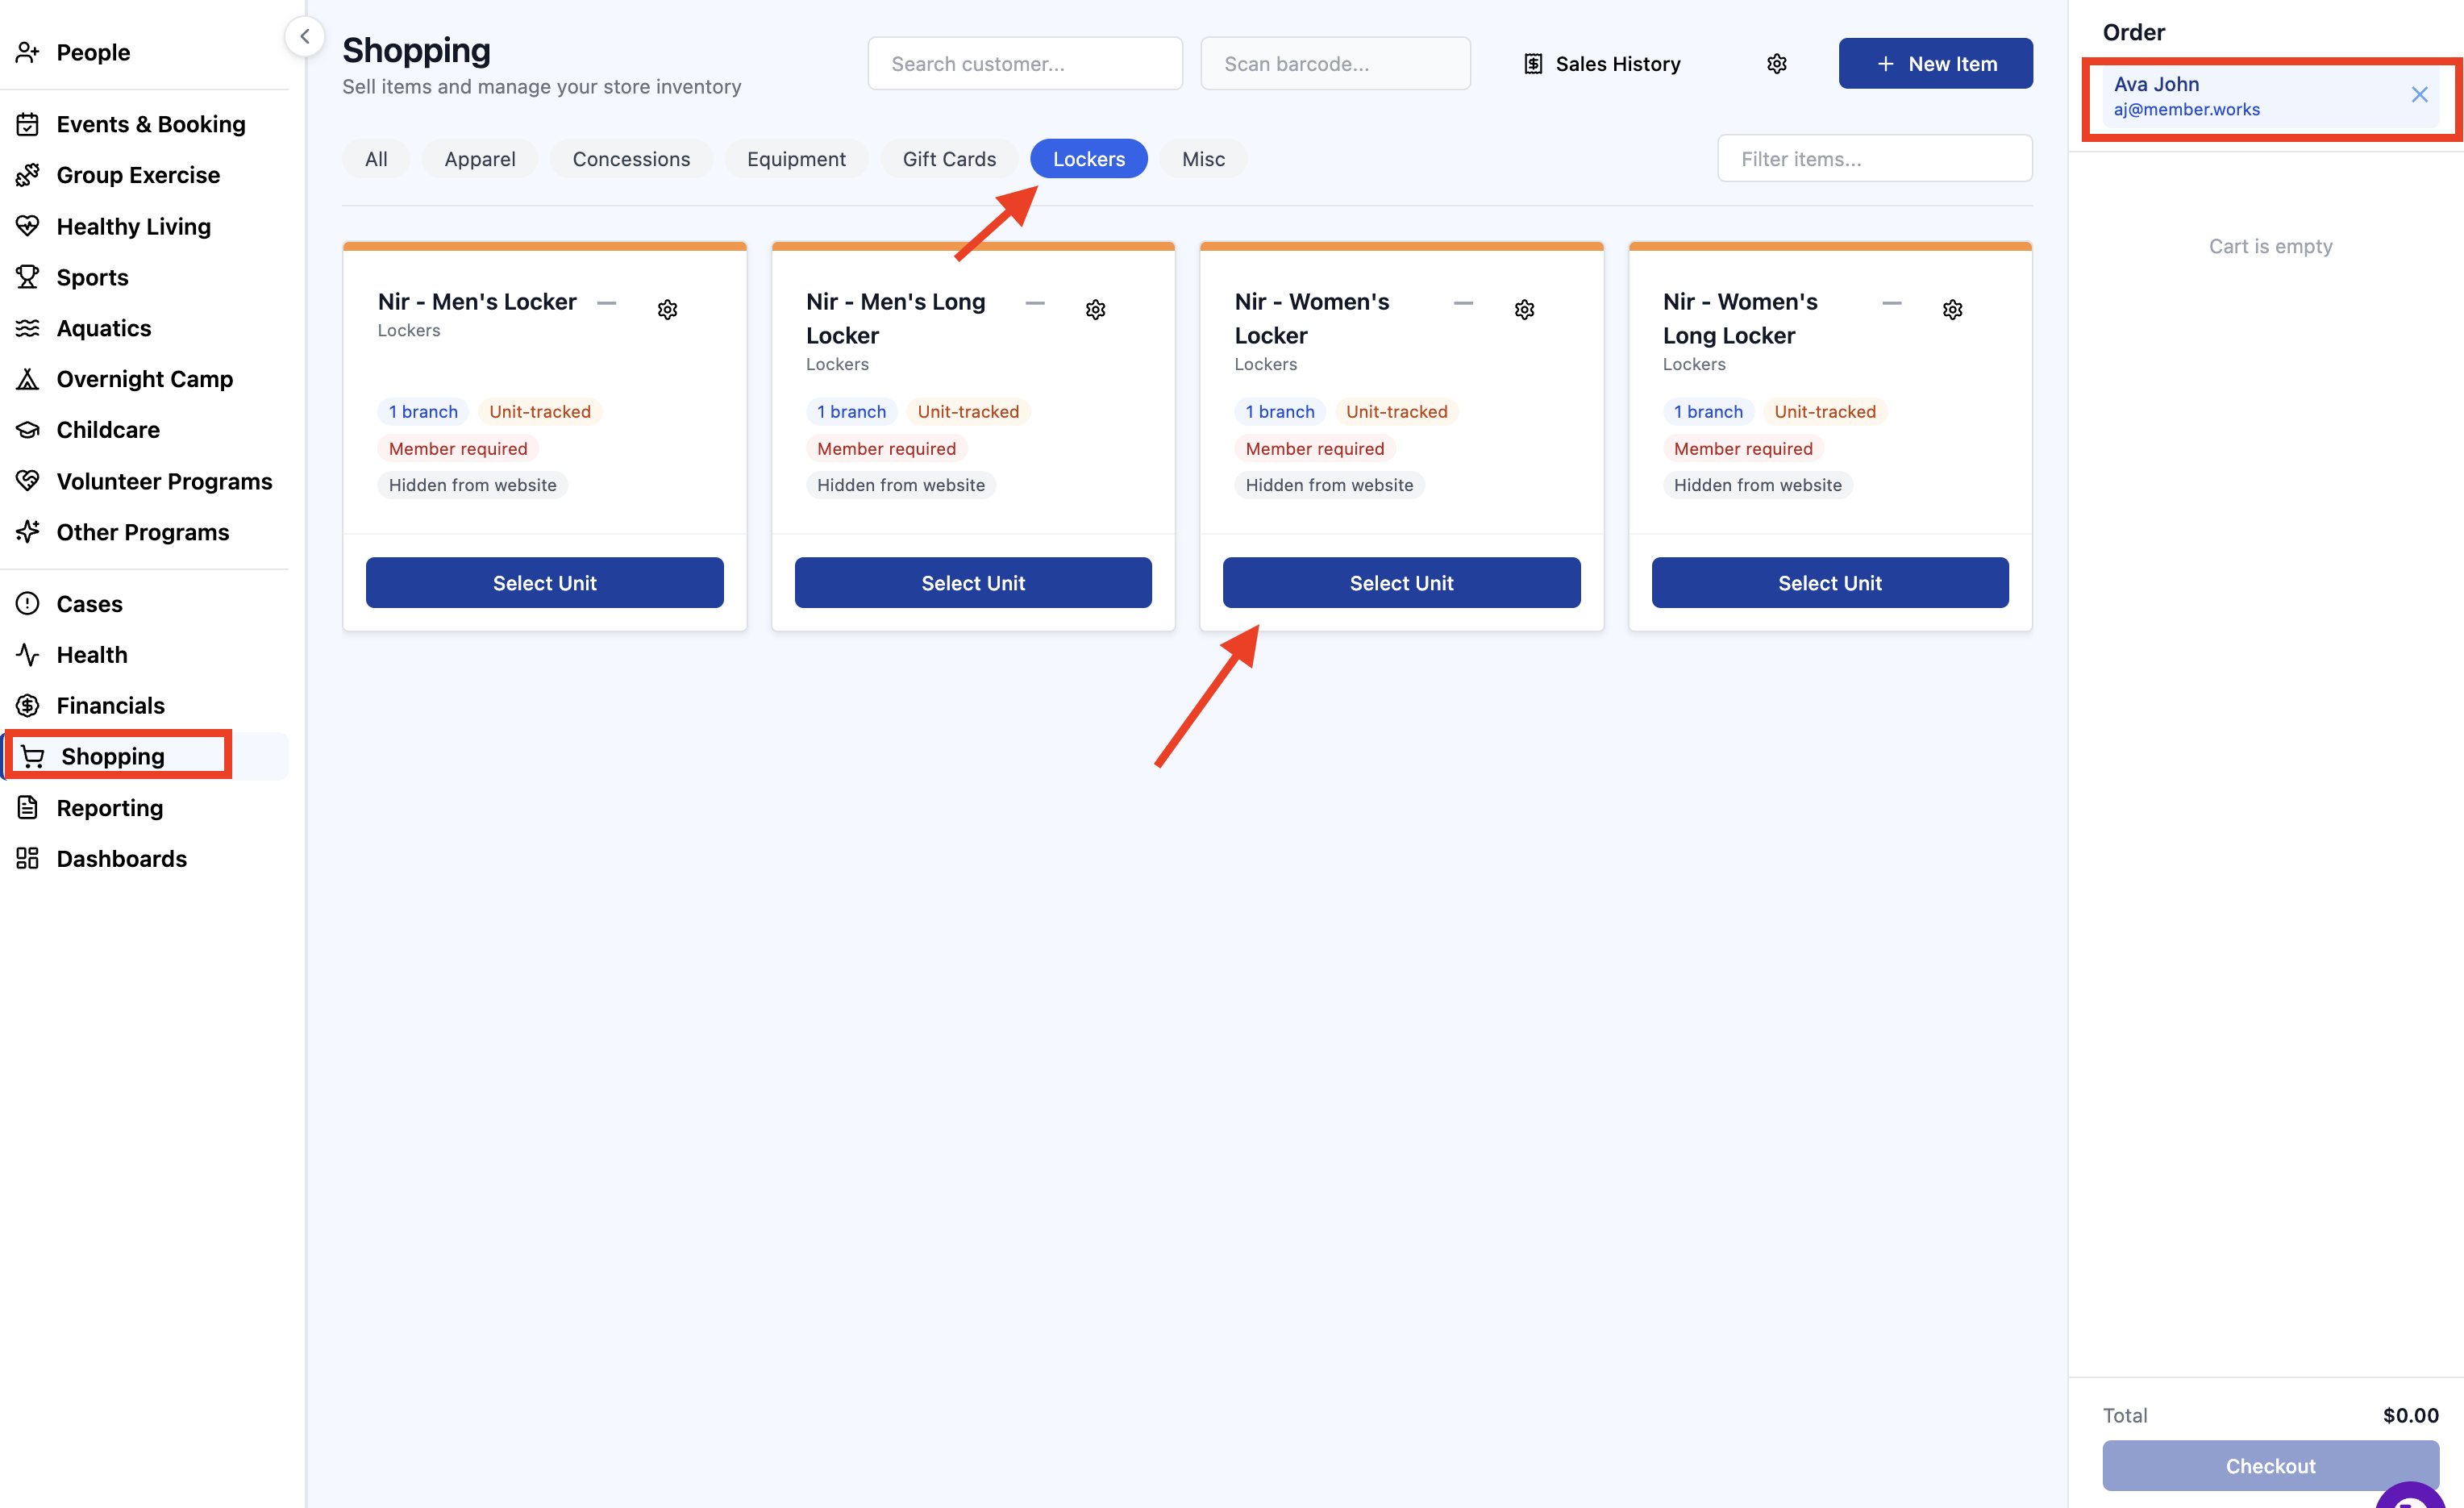
Pull up the member first
Click Shopping in the left rail menu, then attach the member before anything else. Either type their name in the Search customer box or scan their key card or the QR code in their Memberworks mobile app using the Scan barcode box.
Lockers are marked Member required, so this isn't optional. Their name appears at the top of the Order panel on the right once they're attached.
Choose the locker type
Click the Lockers tab in the category row.
You'll see a card for each locker type your branch offers, such as men's and women's standard and long lockers. The badges on each card tell you what you're working with: Unit-tracked means individual units are assigned and tracked, Member required means a member has to be attached, and Hidden from website means members can't rent this themselves online.
Click Select Unit on the type the member wants. Note that locker cards say Select Unit rather than Add to Order, because you have a choice to make before it goes in the cart.
Pick the plan and the unit
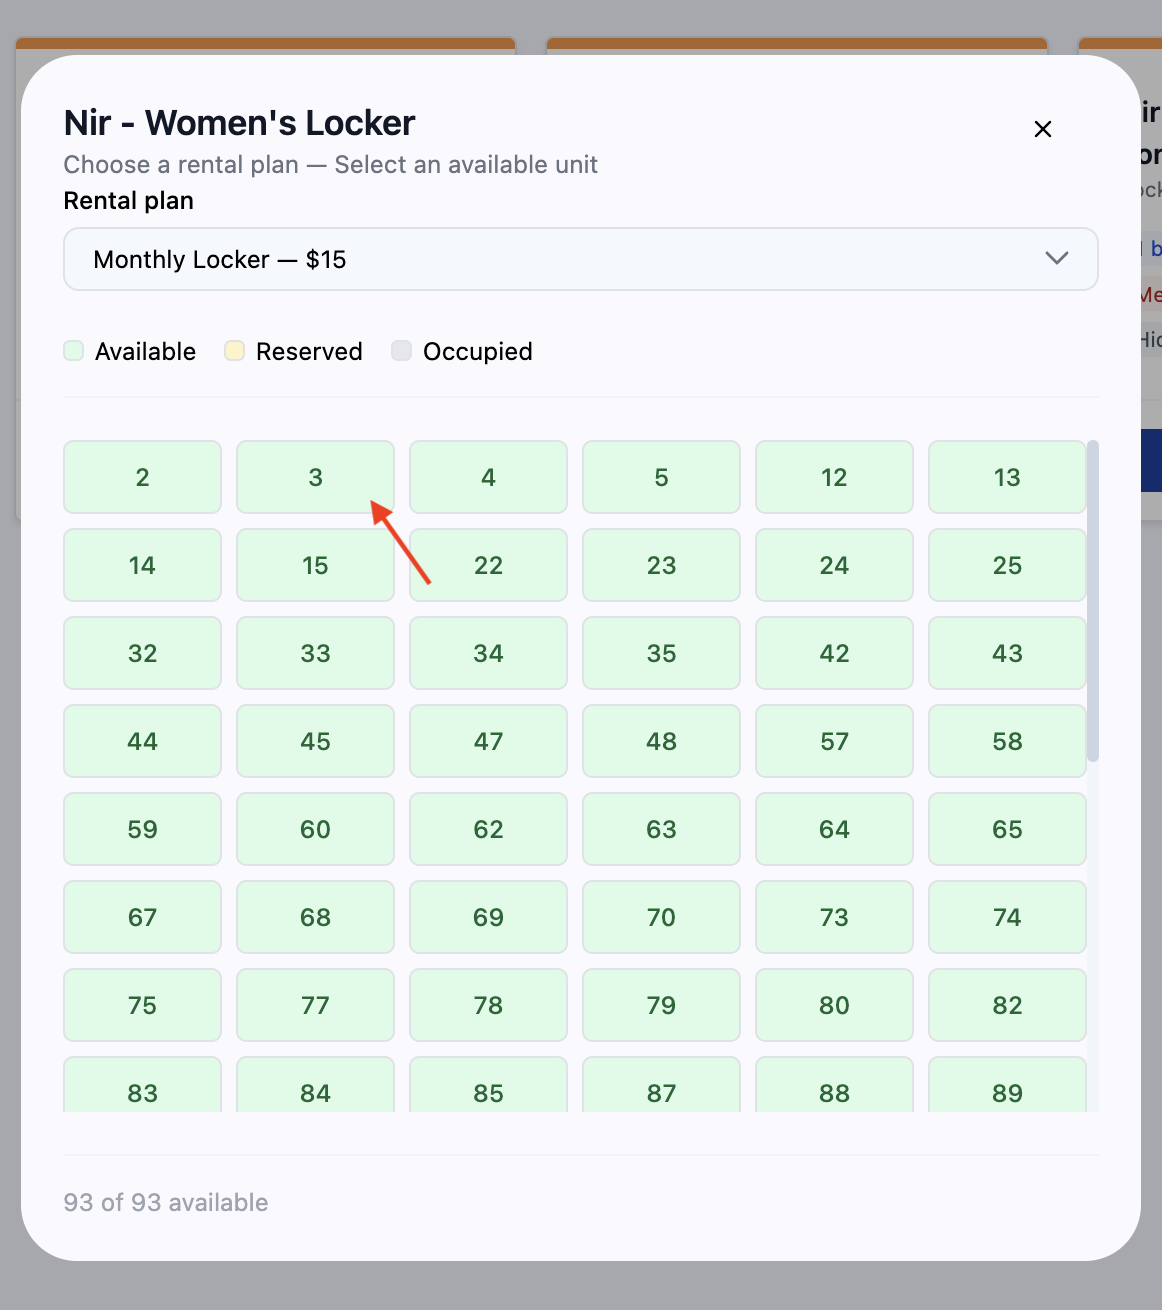
A window opens showing the locker type and two things to set.
First, choose the rental plan from the dropdown. This is the term and price, such as a monthly locker at a set rate.
Then pick the actual unit from the grid. The color legend at the top tells you the state of each one:
Available units are open and selectable.
Reserved units are spoken for.
Occupied units are currently rented.
The count at the bottom of the window shows how many units are available out of the total, which is useful when a member asks whether you have anything left before they commit.
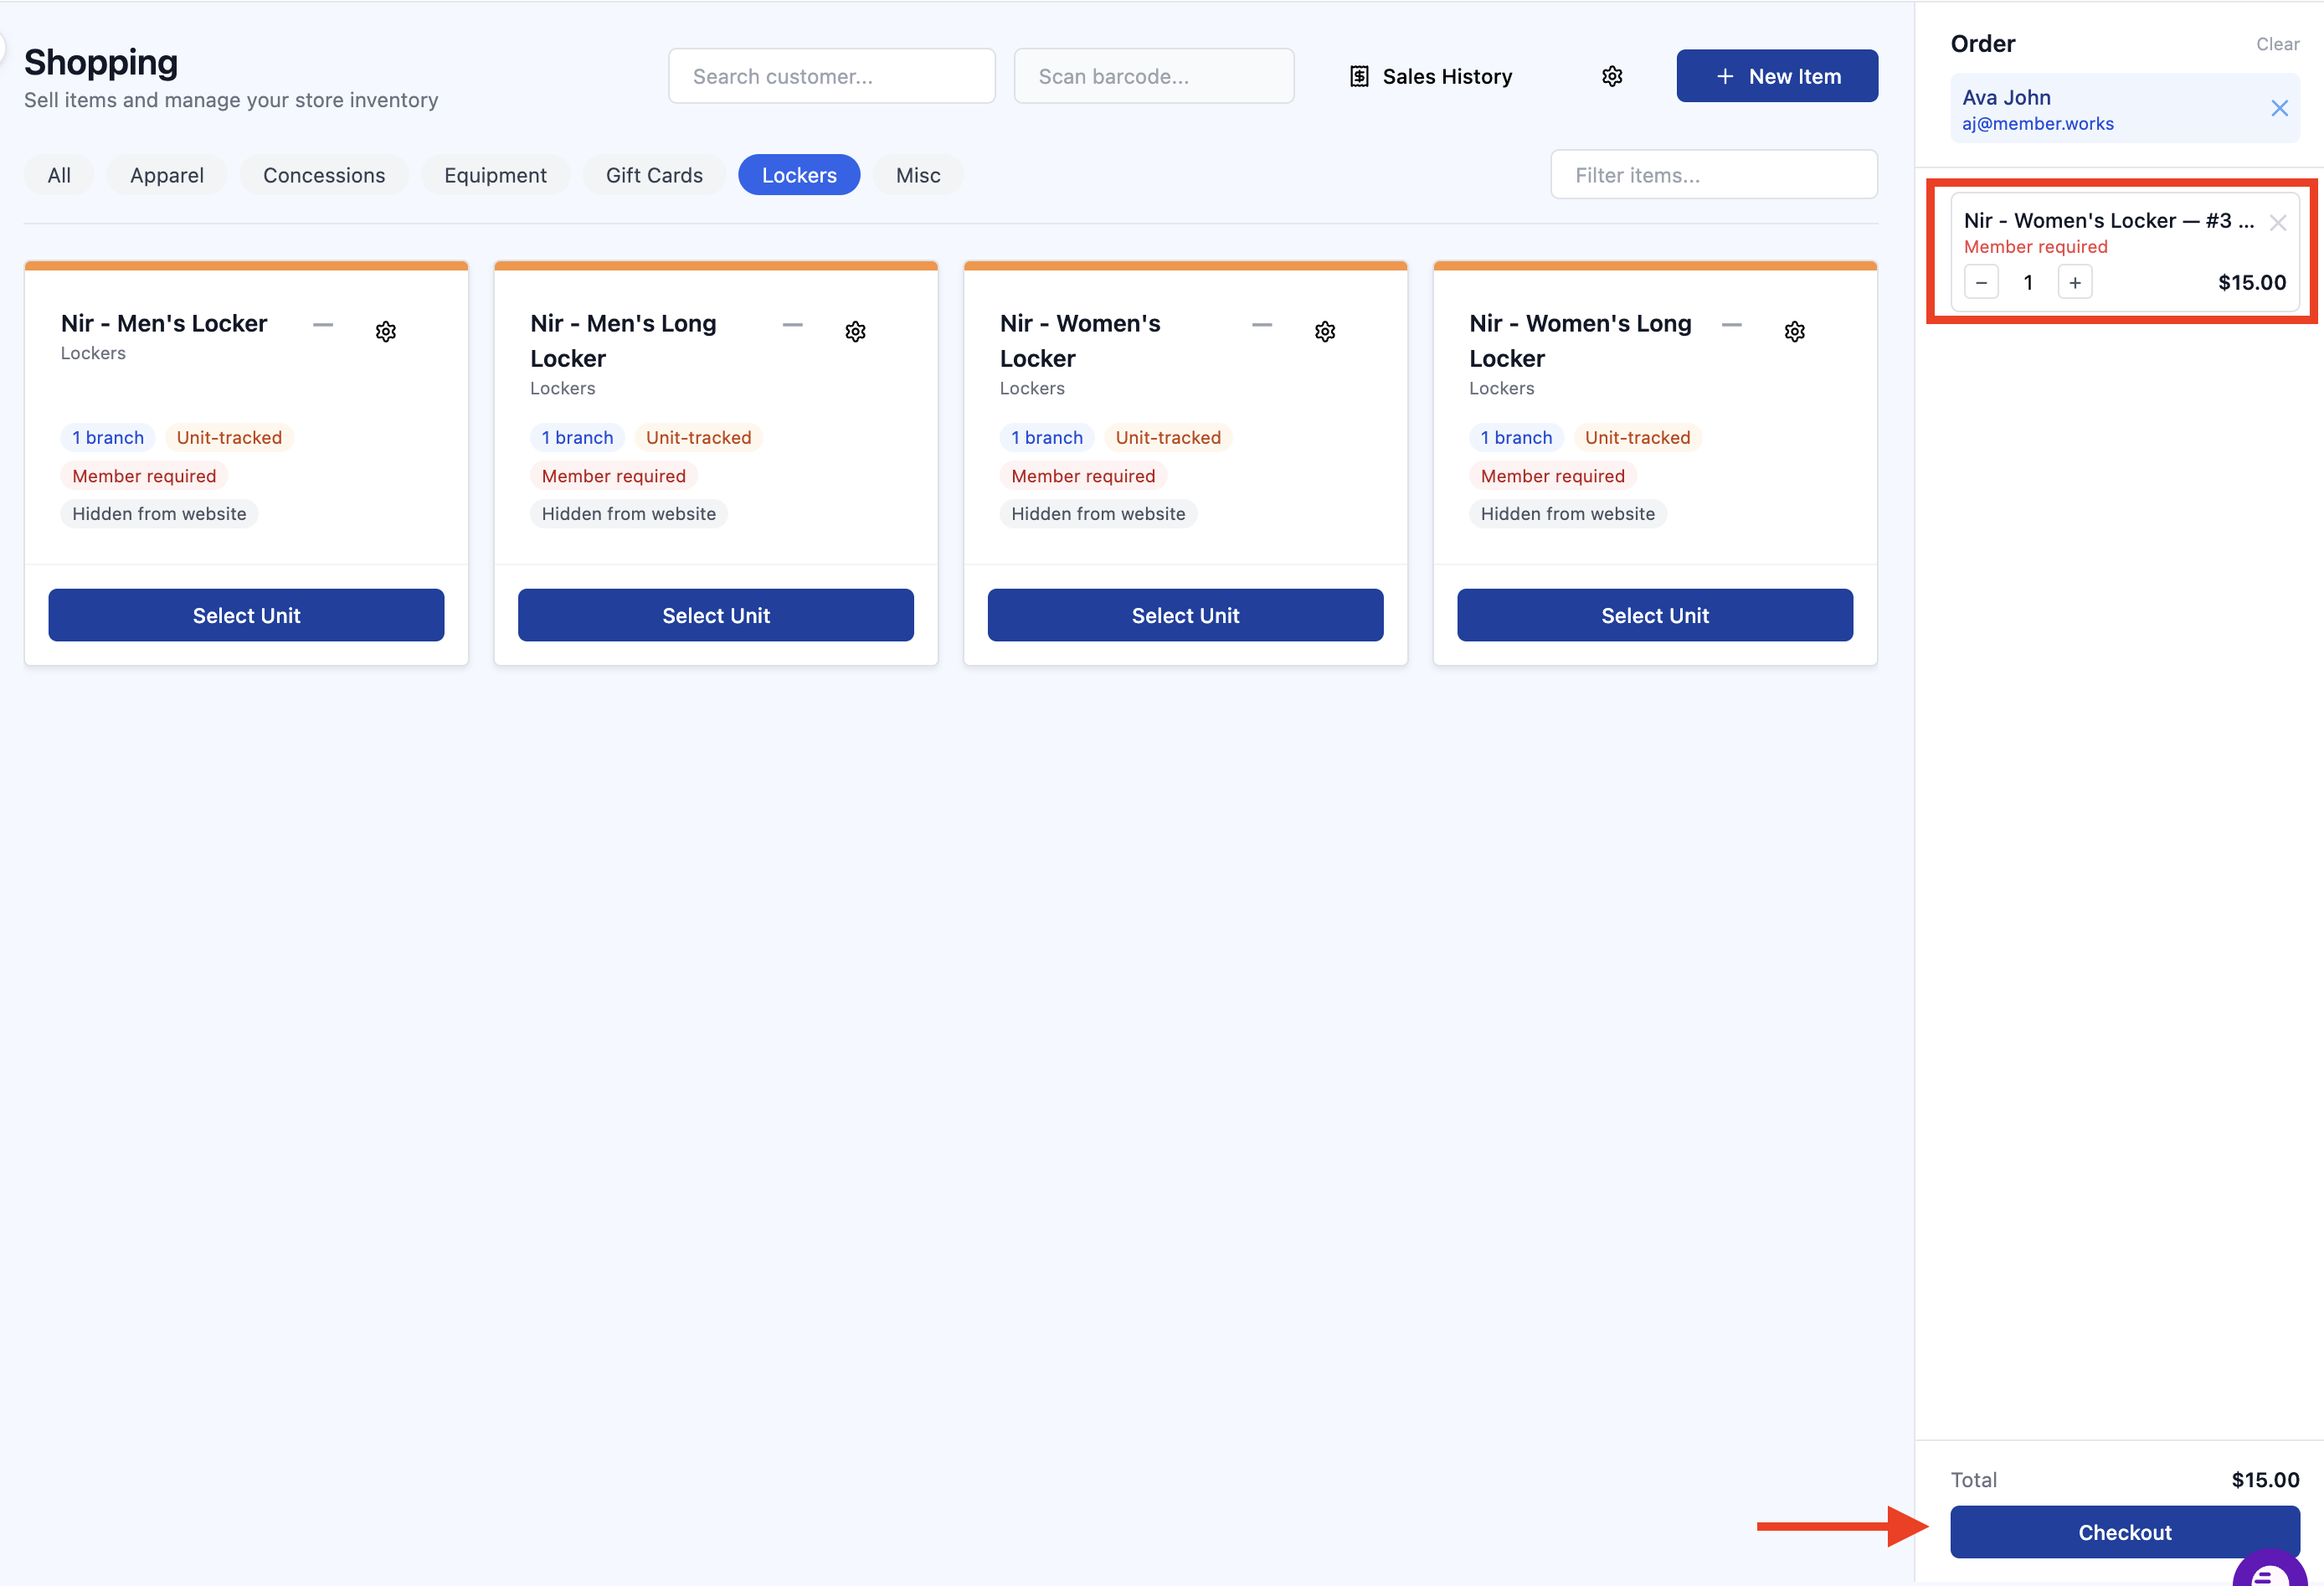
Click an available unit number. It gets added to the Order panel with the locker type, the unit number, the plan, and the price.
Check out
The Order panel works the same as any other sale. Adjust or remove the line if you picked wrong, then click Checkout at the bottom right.
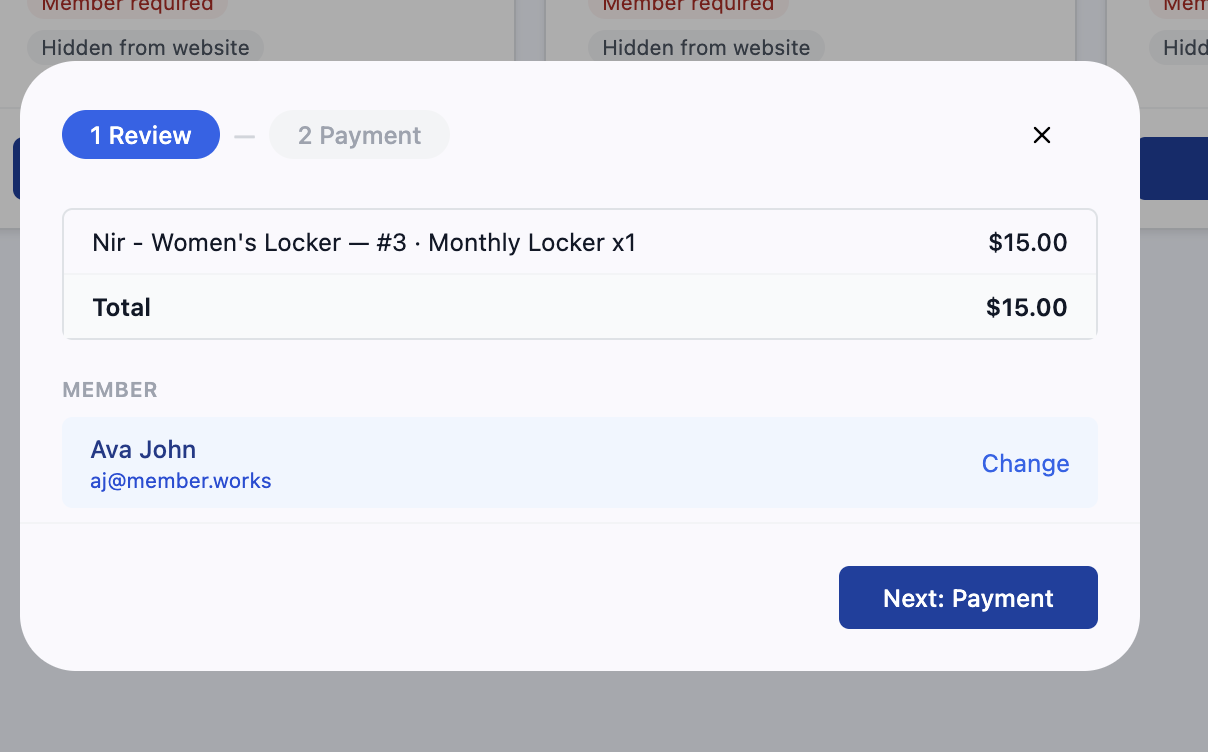
Step 1, Review. Confirm the line item, which now reads with the specific unit number and rental plan, the total, and the member. Use Change if you need a different person on the sale. Click Next: Payment.
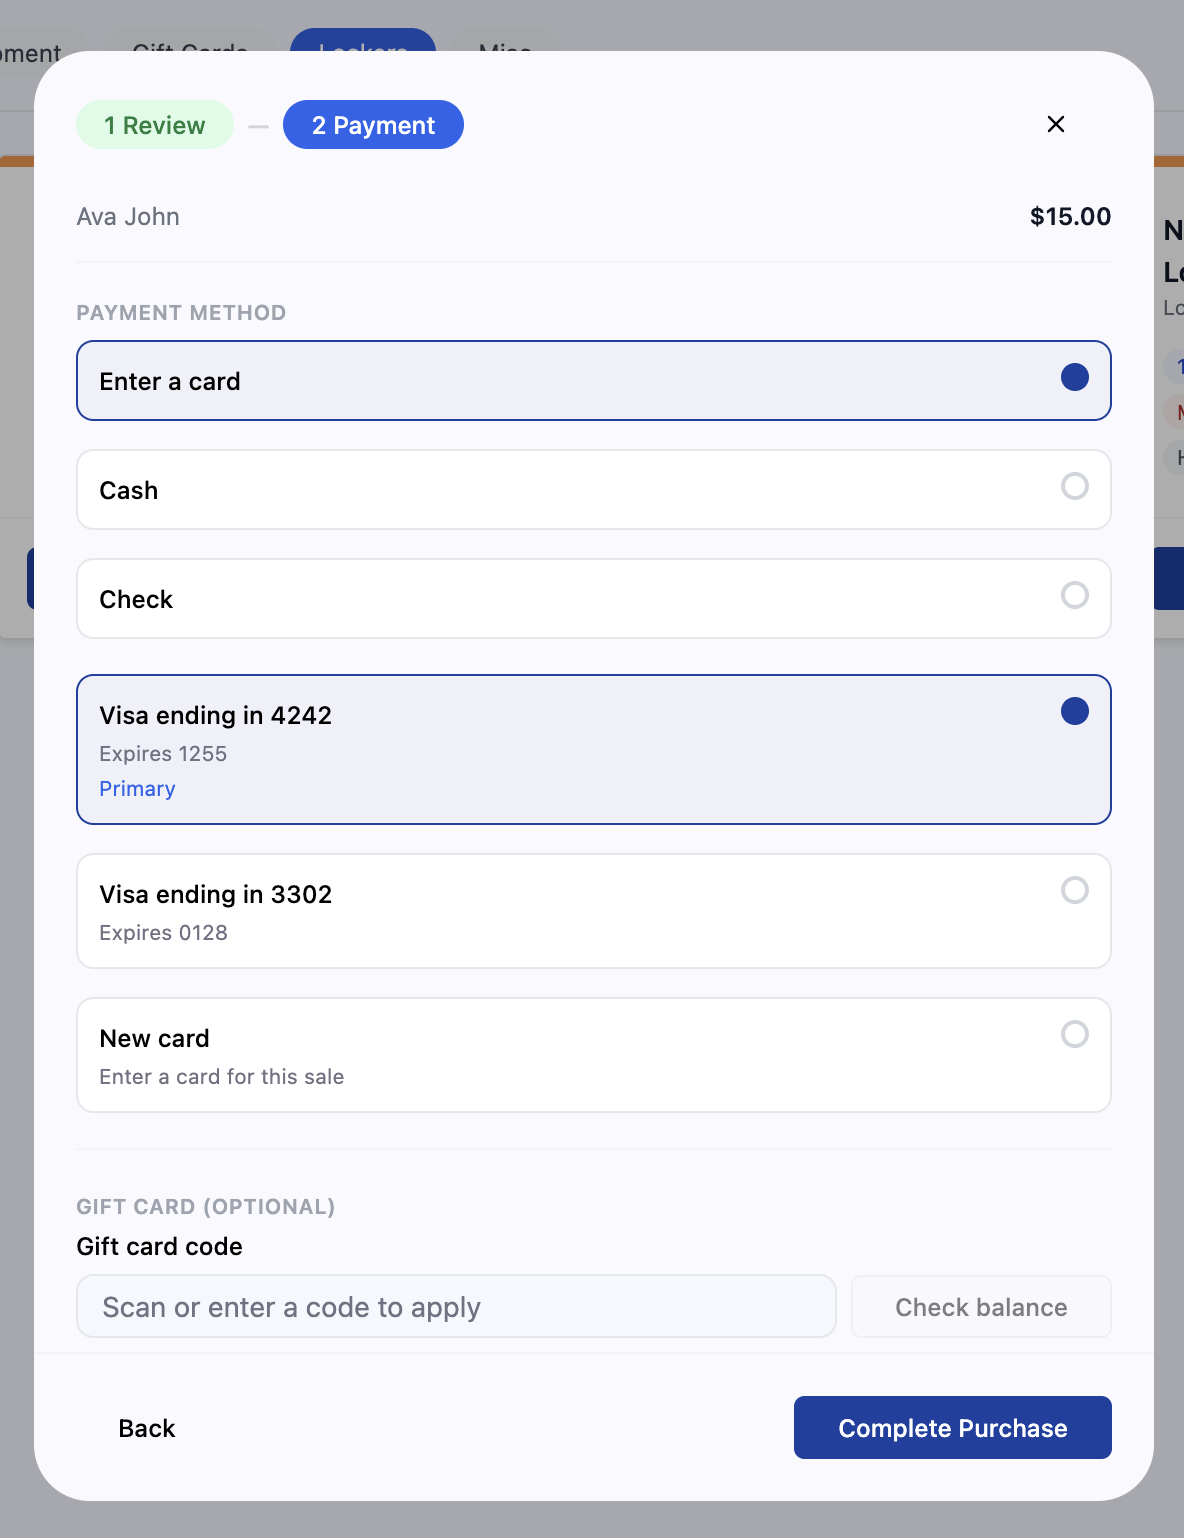
Step 2, Payment. Choose how they're paying: cash, check, a card already saved on their account, or a new card for this sale. Apply a gift card code here if they have one, using Check balance to see what's on it first. Click Complete Purchase.
Confirm the rental and print a receipt
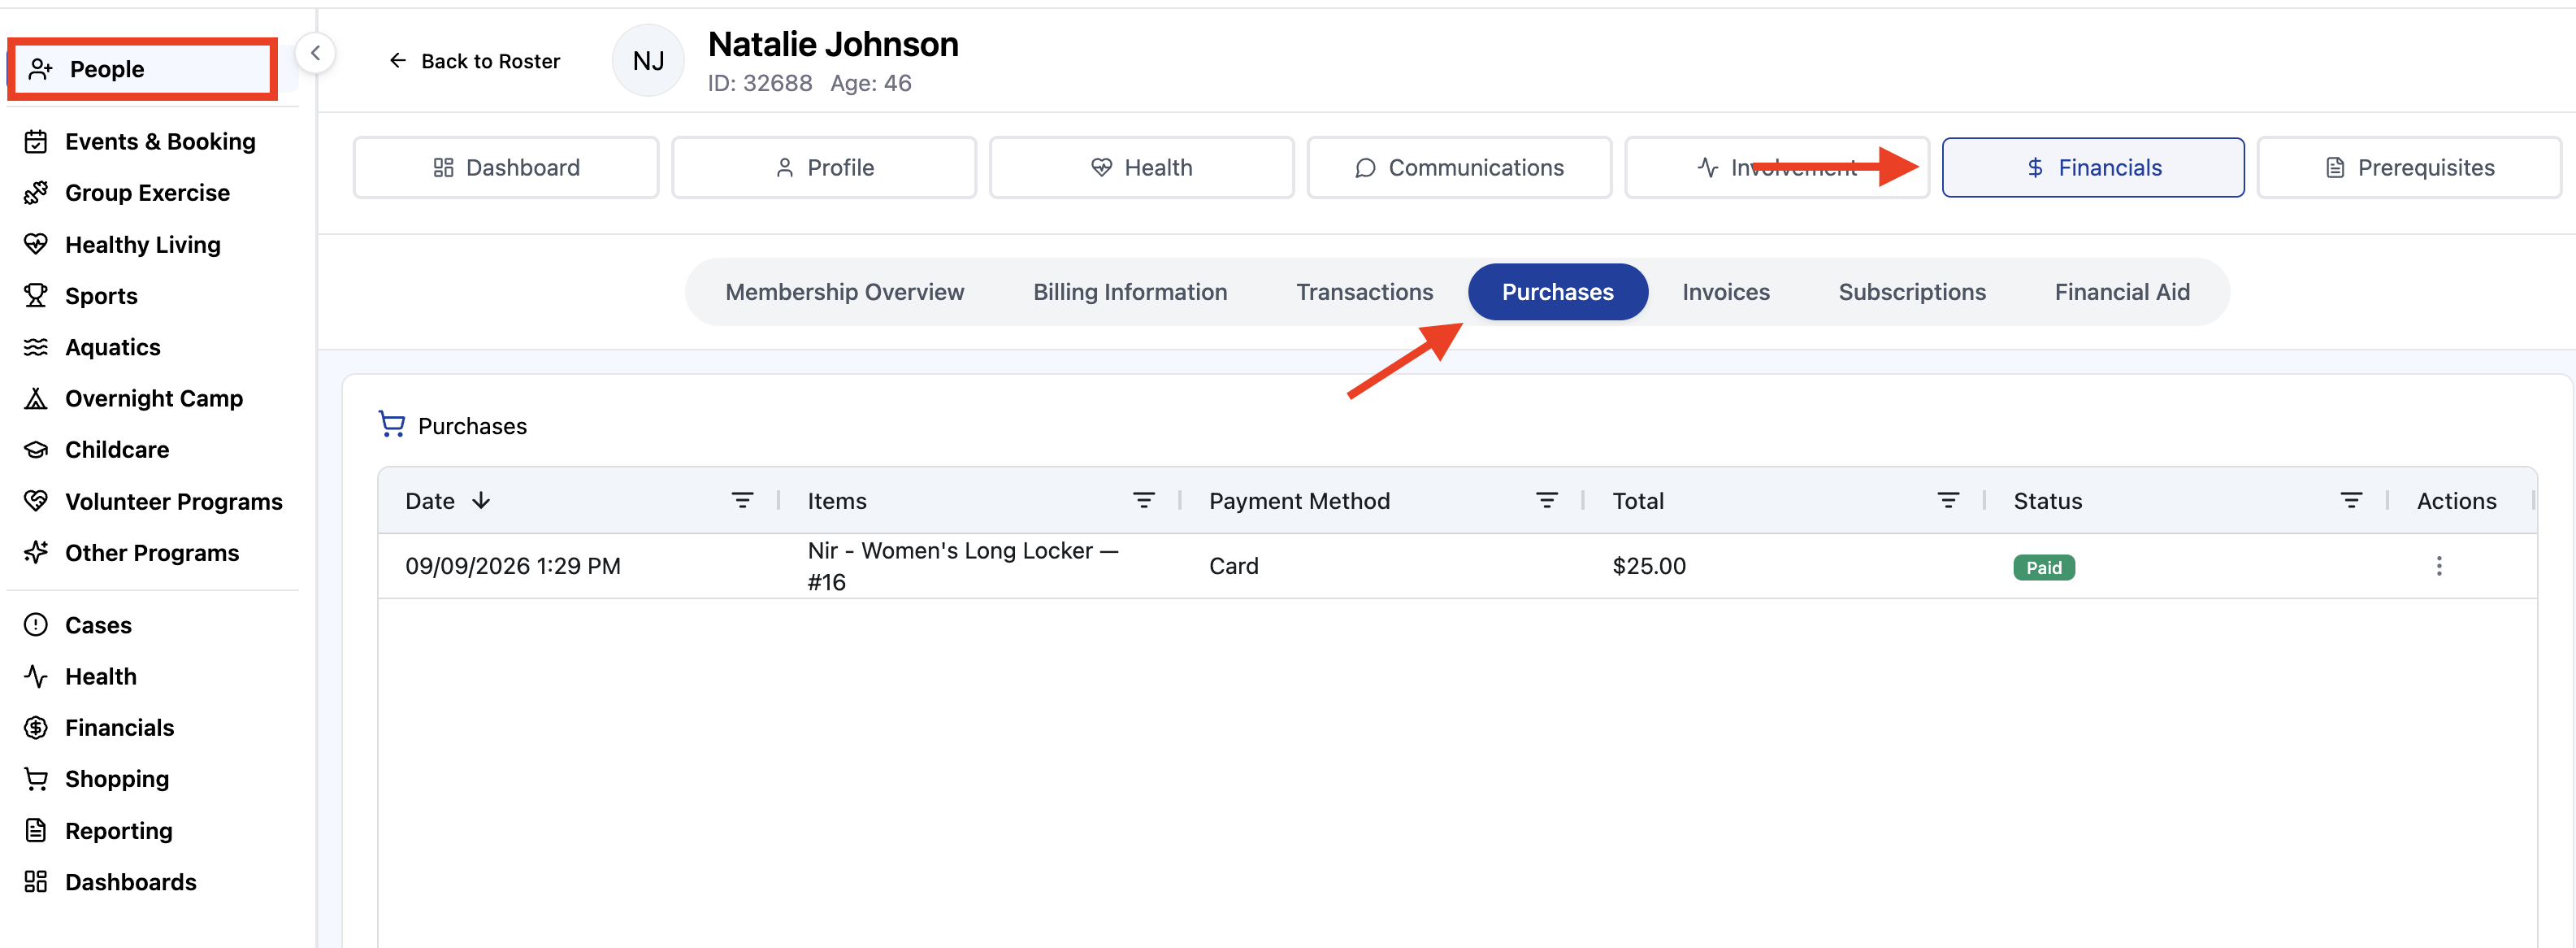
The rental now lives on the member's record. To find it, go to People, open the member, click the Financials tab, then the Purchases sub-tab.
The Purchases table lists the date, the item including the locker number, the payment method, the total, and the status. A paid rental shows a Paid badge.
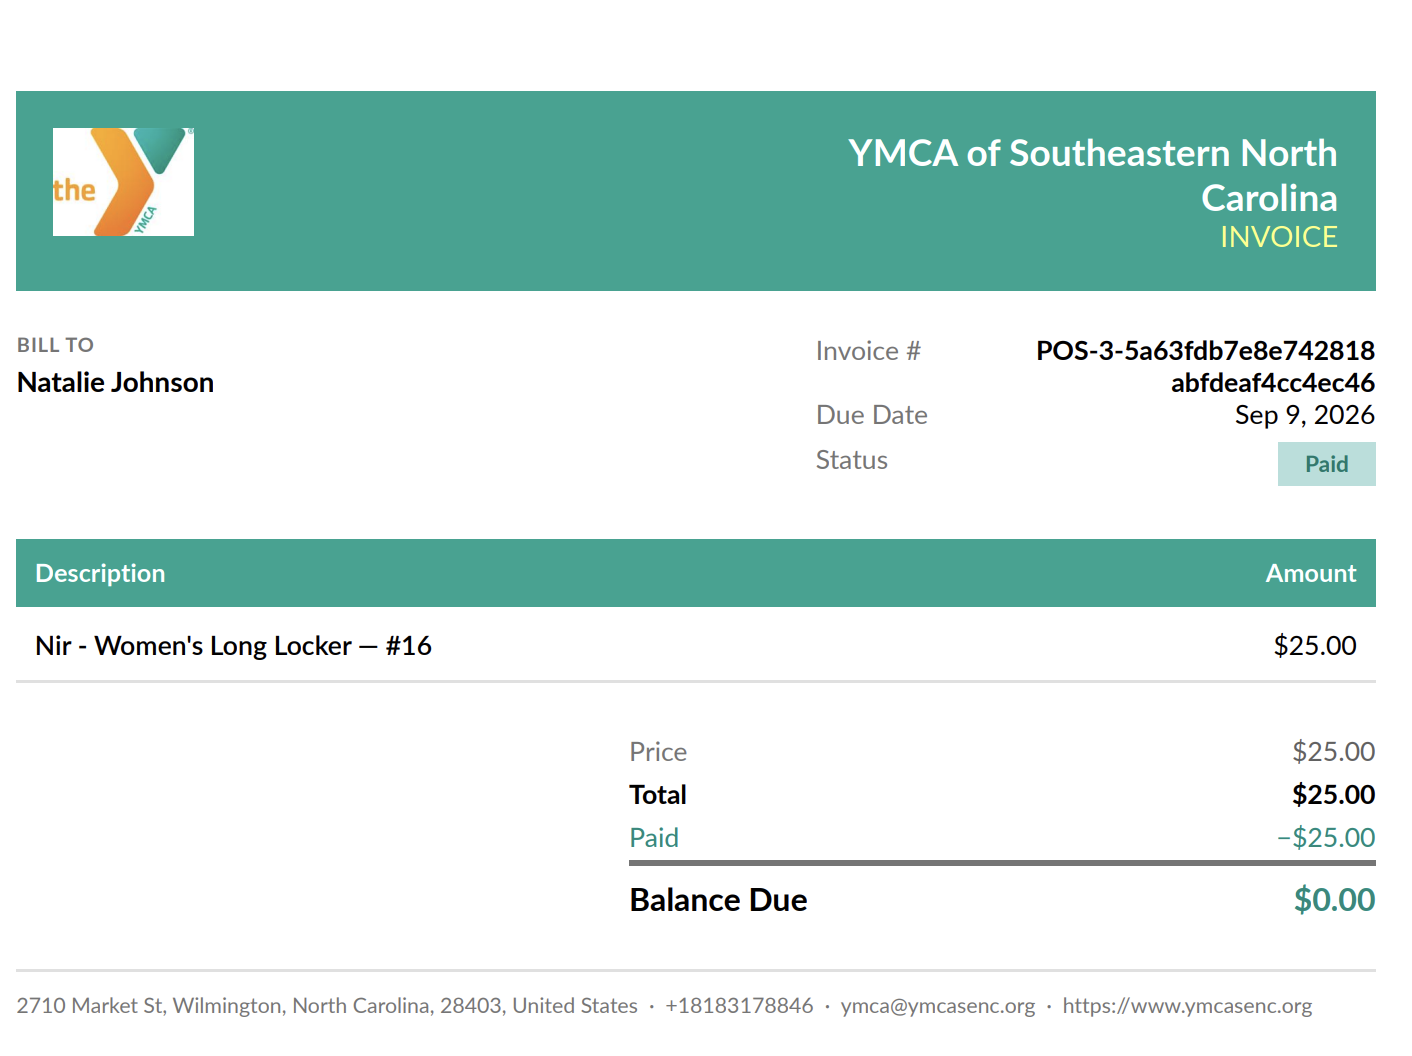
Click the three dots in the Actions column to print the receipt. The receipt comes out as a branded invoice with your association's logo and contact information, the member's name, an invoice number, the line item with the locker number, and the amount paid with the remaining balance.
This is also where to go later when a member asks which locker they have or wants proof of what they paid.
Tips for the desk
Write the unit number down or say it back to the member before you take payment. The number is on the receipt, but they'll usually ask at the counter.
The Purchases tab is the fastest way to answer "which locker am I in again?" without hunting through transactions.